Home › Forums › General › Help and information › Villiers F15 stationary engine
- This topic has 45 replies, 6 voices, and was last updated 3 years, 1 month ago by
 vhgmcbuddy.
-
AuthorPosts
-
November 20, 2020 at 4:31 pm #35933
 vhgmcbuddyMember
And now the needle and float. I don’t think it was damaged…. Will be away for 2 weeks so next update after 04 December.
Attachments:
December 22, 2020 at 6:34 pm #36226vhgmcbuddyMemberDears
Let me give yo a little update.
Engine was working fine. I had it to run on an external small tank, in order to adjust the carb and check leaks etc. It did work well until…it stopped. When I tried to start it again, it had lost compression. Got scared one valve was gone. After checking, it was not any valve but…the head gasket.Attachments:
December 22, 2020 at 6:42 pm #36228vhgmcbuddyMemberWhen I did re-assemble the engine, I did not have the F15 manual, that you shared with me Angus. I used my little knowledge to tighten the head bolts with a torque wrench and in a cross pattern. However, I only had put back the 5 main bolts, which are also shown on the F15 manual.
I had not put back the 3 other bolts, which I thought were only there to hold the tin cover (cooling cover. Is it called fairing?).
Picture to illustrate:Attachments:
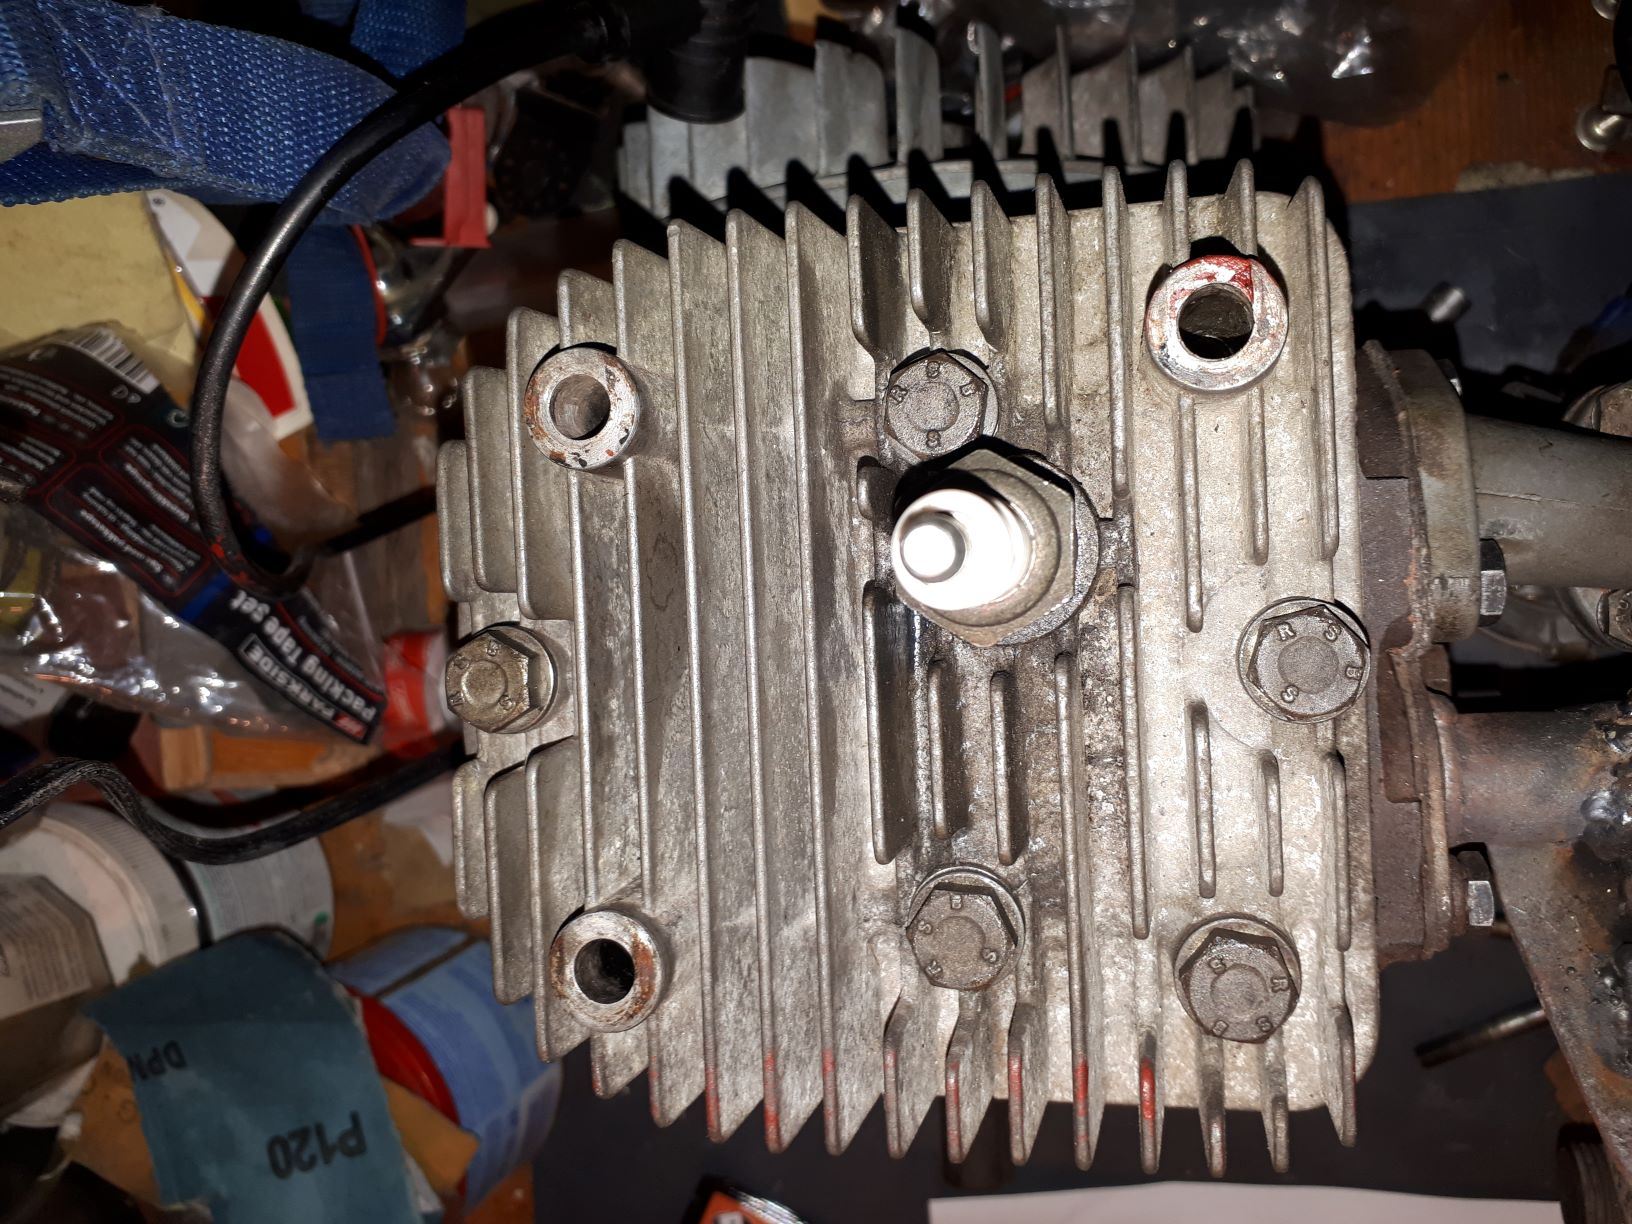
December 22, 2020 at 6:56 pm #36231vhgmcbuddyMemberNow, with a picture with all the bolts. The red ones are the ones that were not on the engine.
So right now, I need to replace my head gasket and here is what I’m thinking doing: make my own head gasket using a 0.5 mm copper plate, that I will anneal prior to applying to the engine.
What do you think?
I am currently working on the tin wear and the tank: removing old paint so as to be able to apply new primer + paint. I will only re-assemble the engine with it’s 8 bolts, so when the tin wear is ready.
I fixed the leaking tap by making my own cork replacement (after watching a number of videos on the topic. Even have a spare replacement cork if needed).
Will let you know how things are evolving.Attachments:
December 22, 2020 at 7:16 pm #36236andyfrost
ParticipantMaking your own head gasket is not something I would reccomend , I know we have to at times like on obsolete/unavailable machines . Over here head gaskets are widely available for under £10 , so I would try and source a genuine asbestos one.
Andy.
December 22, 2020 at 8:42 pm #36239vhgmcbuddyMemberThanks Andy, for your quick reply. I am scared that with Brexit and now COVID, it will take for ever to get spares from the UK.
December 23, 2020 at 8:25 am #36240 charlieKeymaster
Brexit and Covid should not impact on small parcels such as a head gasket which will probably go in the post. A good source of Villiers spares is Meetens.
December 23, 2020 at 1:21 pm #36244vhgmcbuddyMemberThanks Charlie. Did not know this supplier as I used L&S. Head gaskets are cheap indeed and it is easy to get them.
One of my reasoning is that I will export this engine to Africa, where I’d like to use it to power a pump or a generator. Getting spares will become much more difficult, so rather learn (before I go there) how to keep this engine running with a minimum dependence on imported spares.
Also like the challenge that comes with it. From my reading/viewings, if the copper gasket is made properly, it could easily replace a factory one, espcially for side valve engines But may be there are risks, specific to this engine or you would have a different experience to share?
Cheers
JeffDecember 23, 2020 at 2:52 pm #36245charlieKeymasterCorrection to my earlier comment regarding post. I found out today that only mail to Republic of Ireland is been sent at present, all other destinations are blocked due to Covid.
December 23, 2020 at 3:29 pm #36246vhgmcbuddyMemberCrazy situation but nothing we can do…
January 17, 2021 at 3:21 pm #36434vhgmcbuddyMemberDear Charlie, Andy and Angus.
Went ahead with fabricating my own head gasket.
Did take me several hours (evening hours, after work) spread over a week to cut, adjust, make the holes, quench and finally put it back onto the engine.
I started and tested the engine yesterday. I had it run for 10 minutes in at least 2 stints.
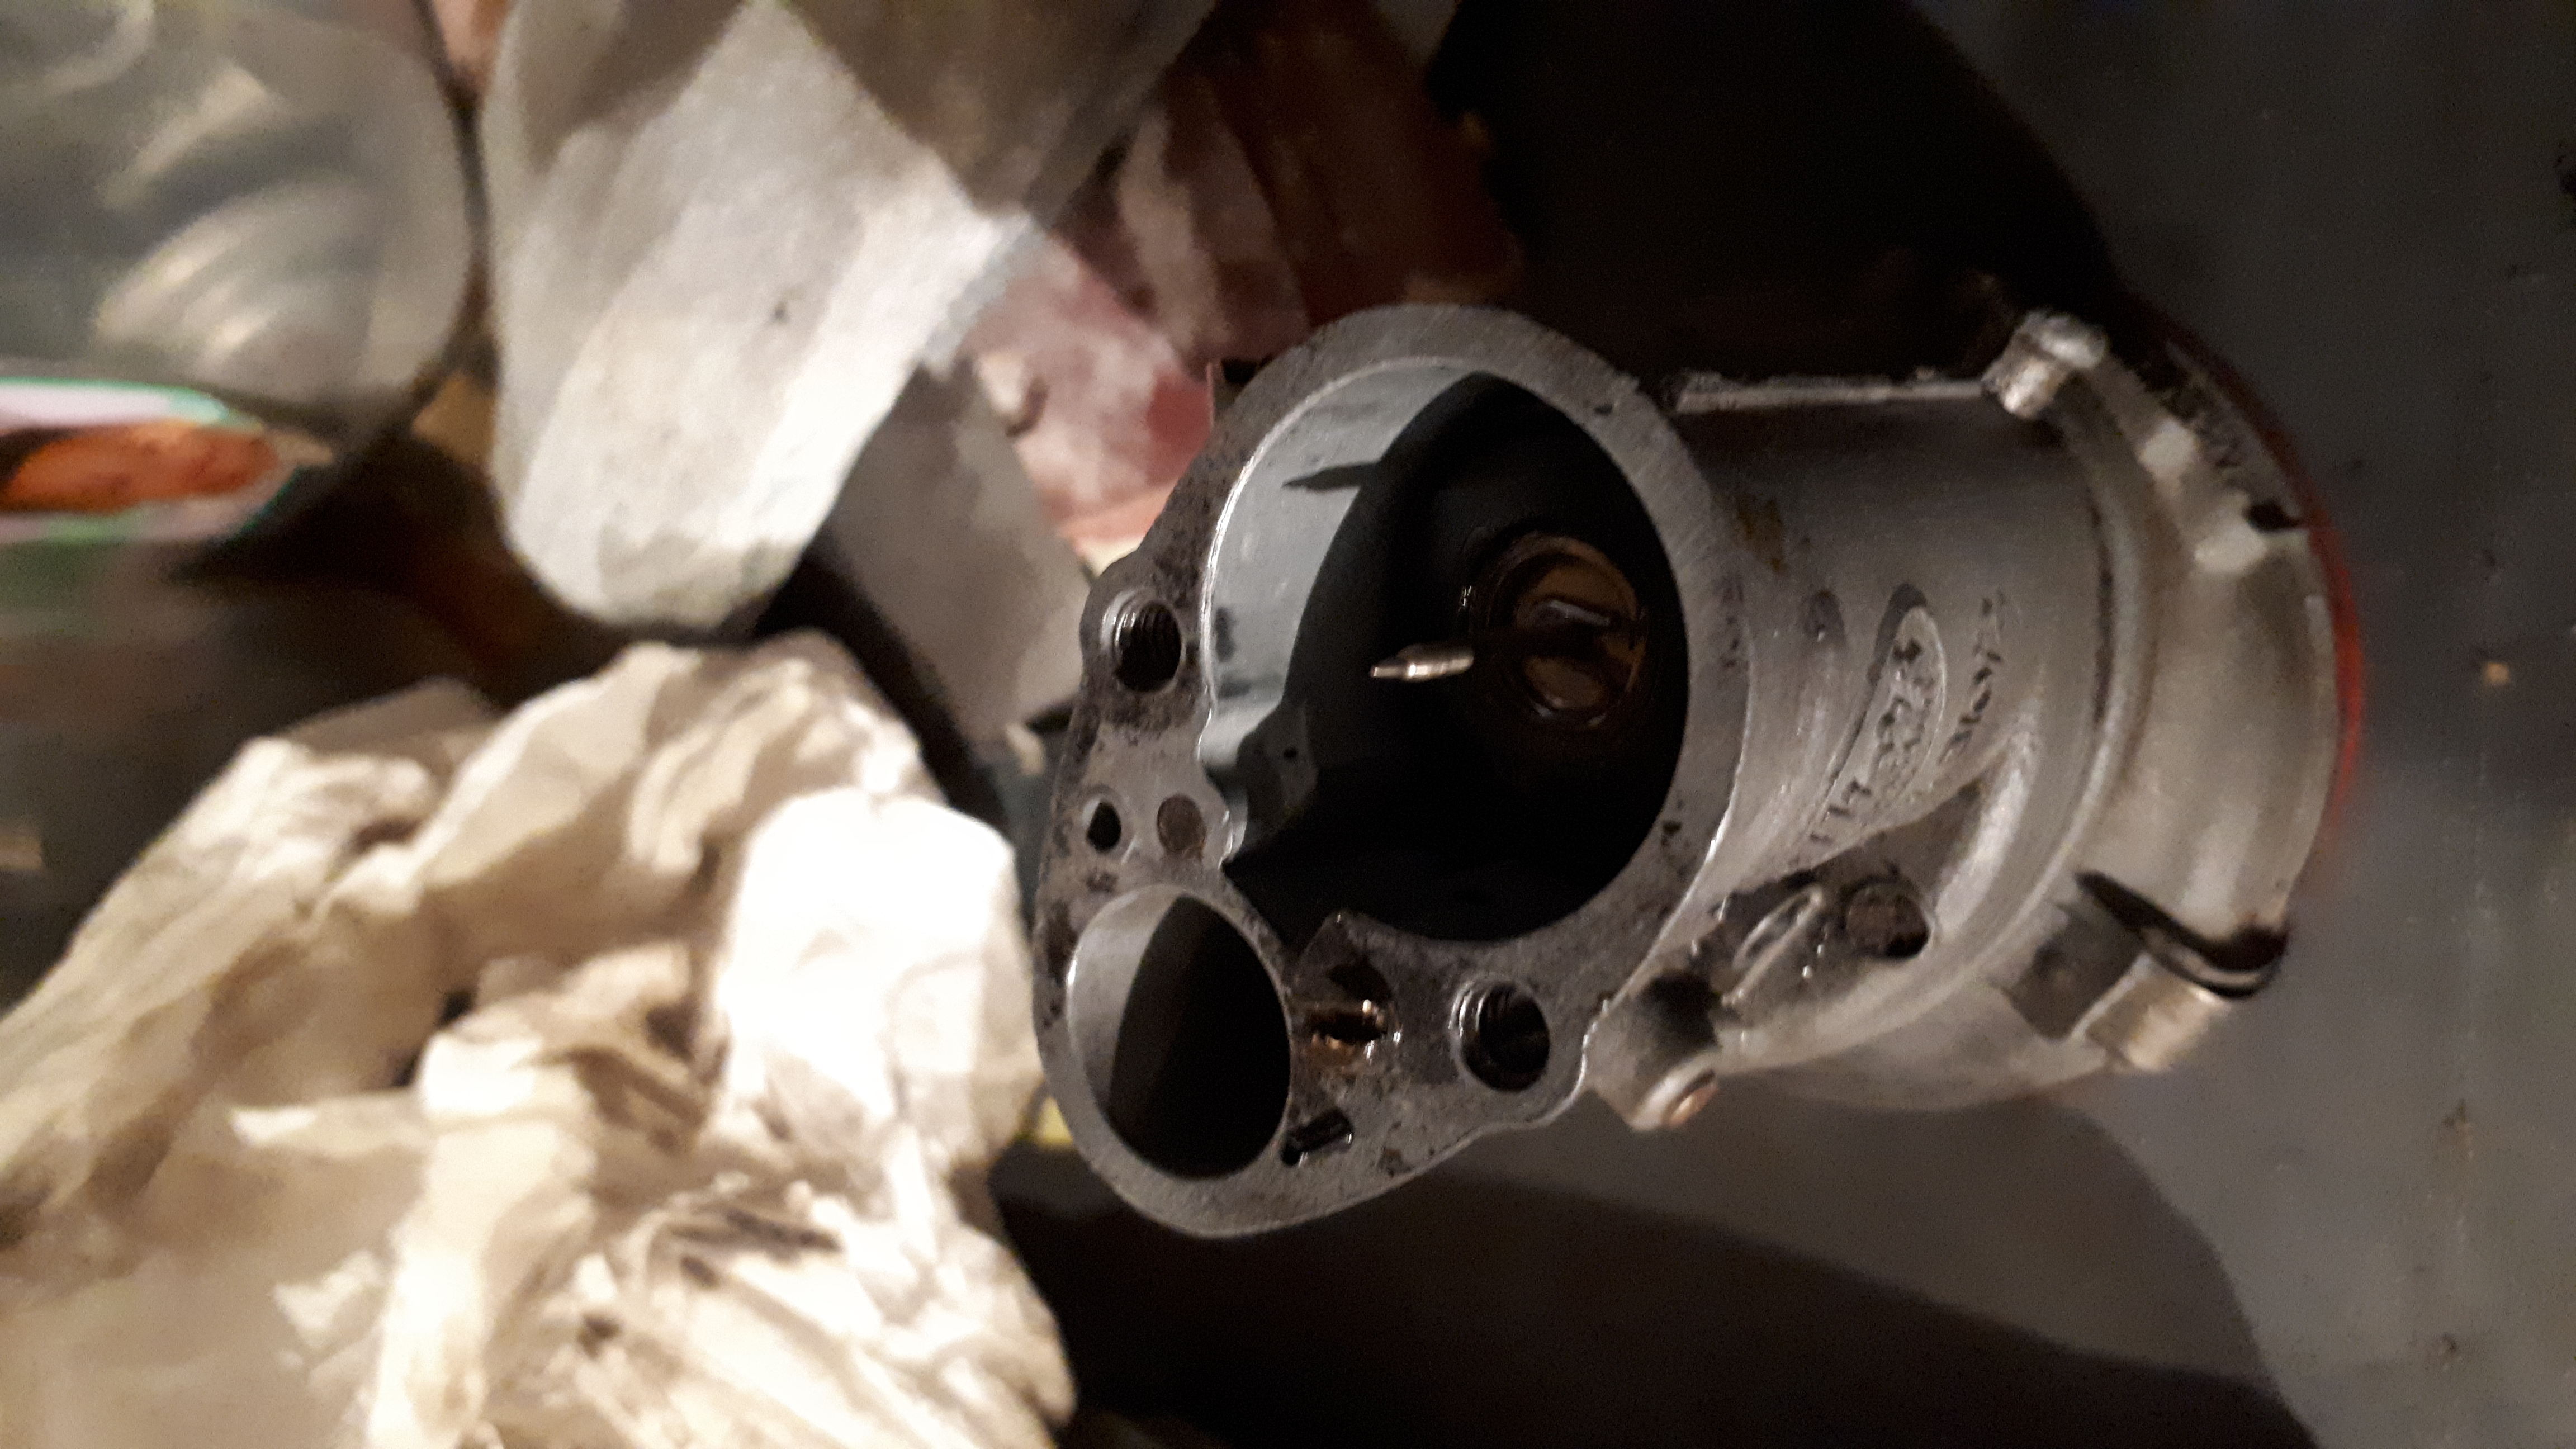
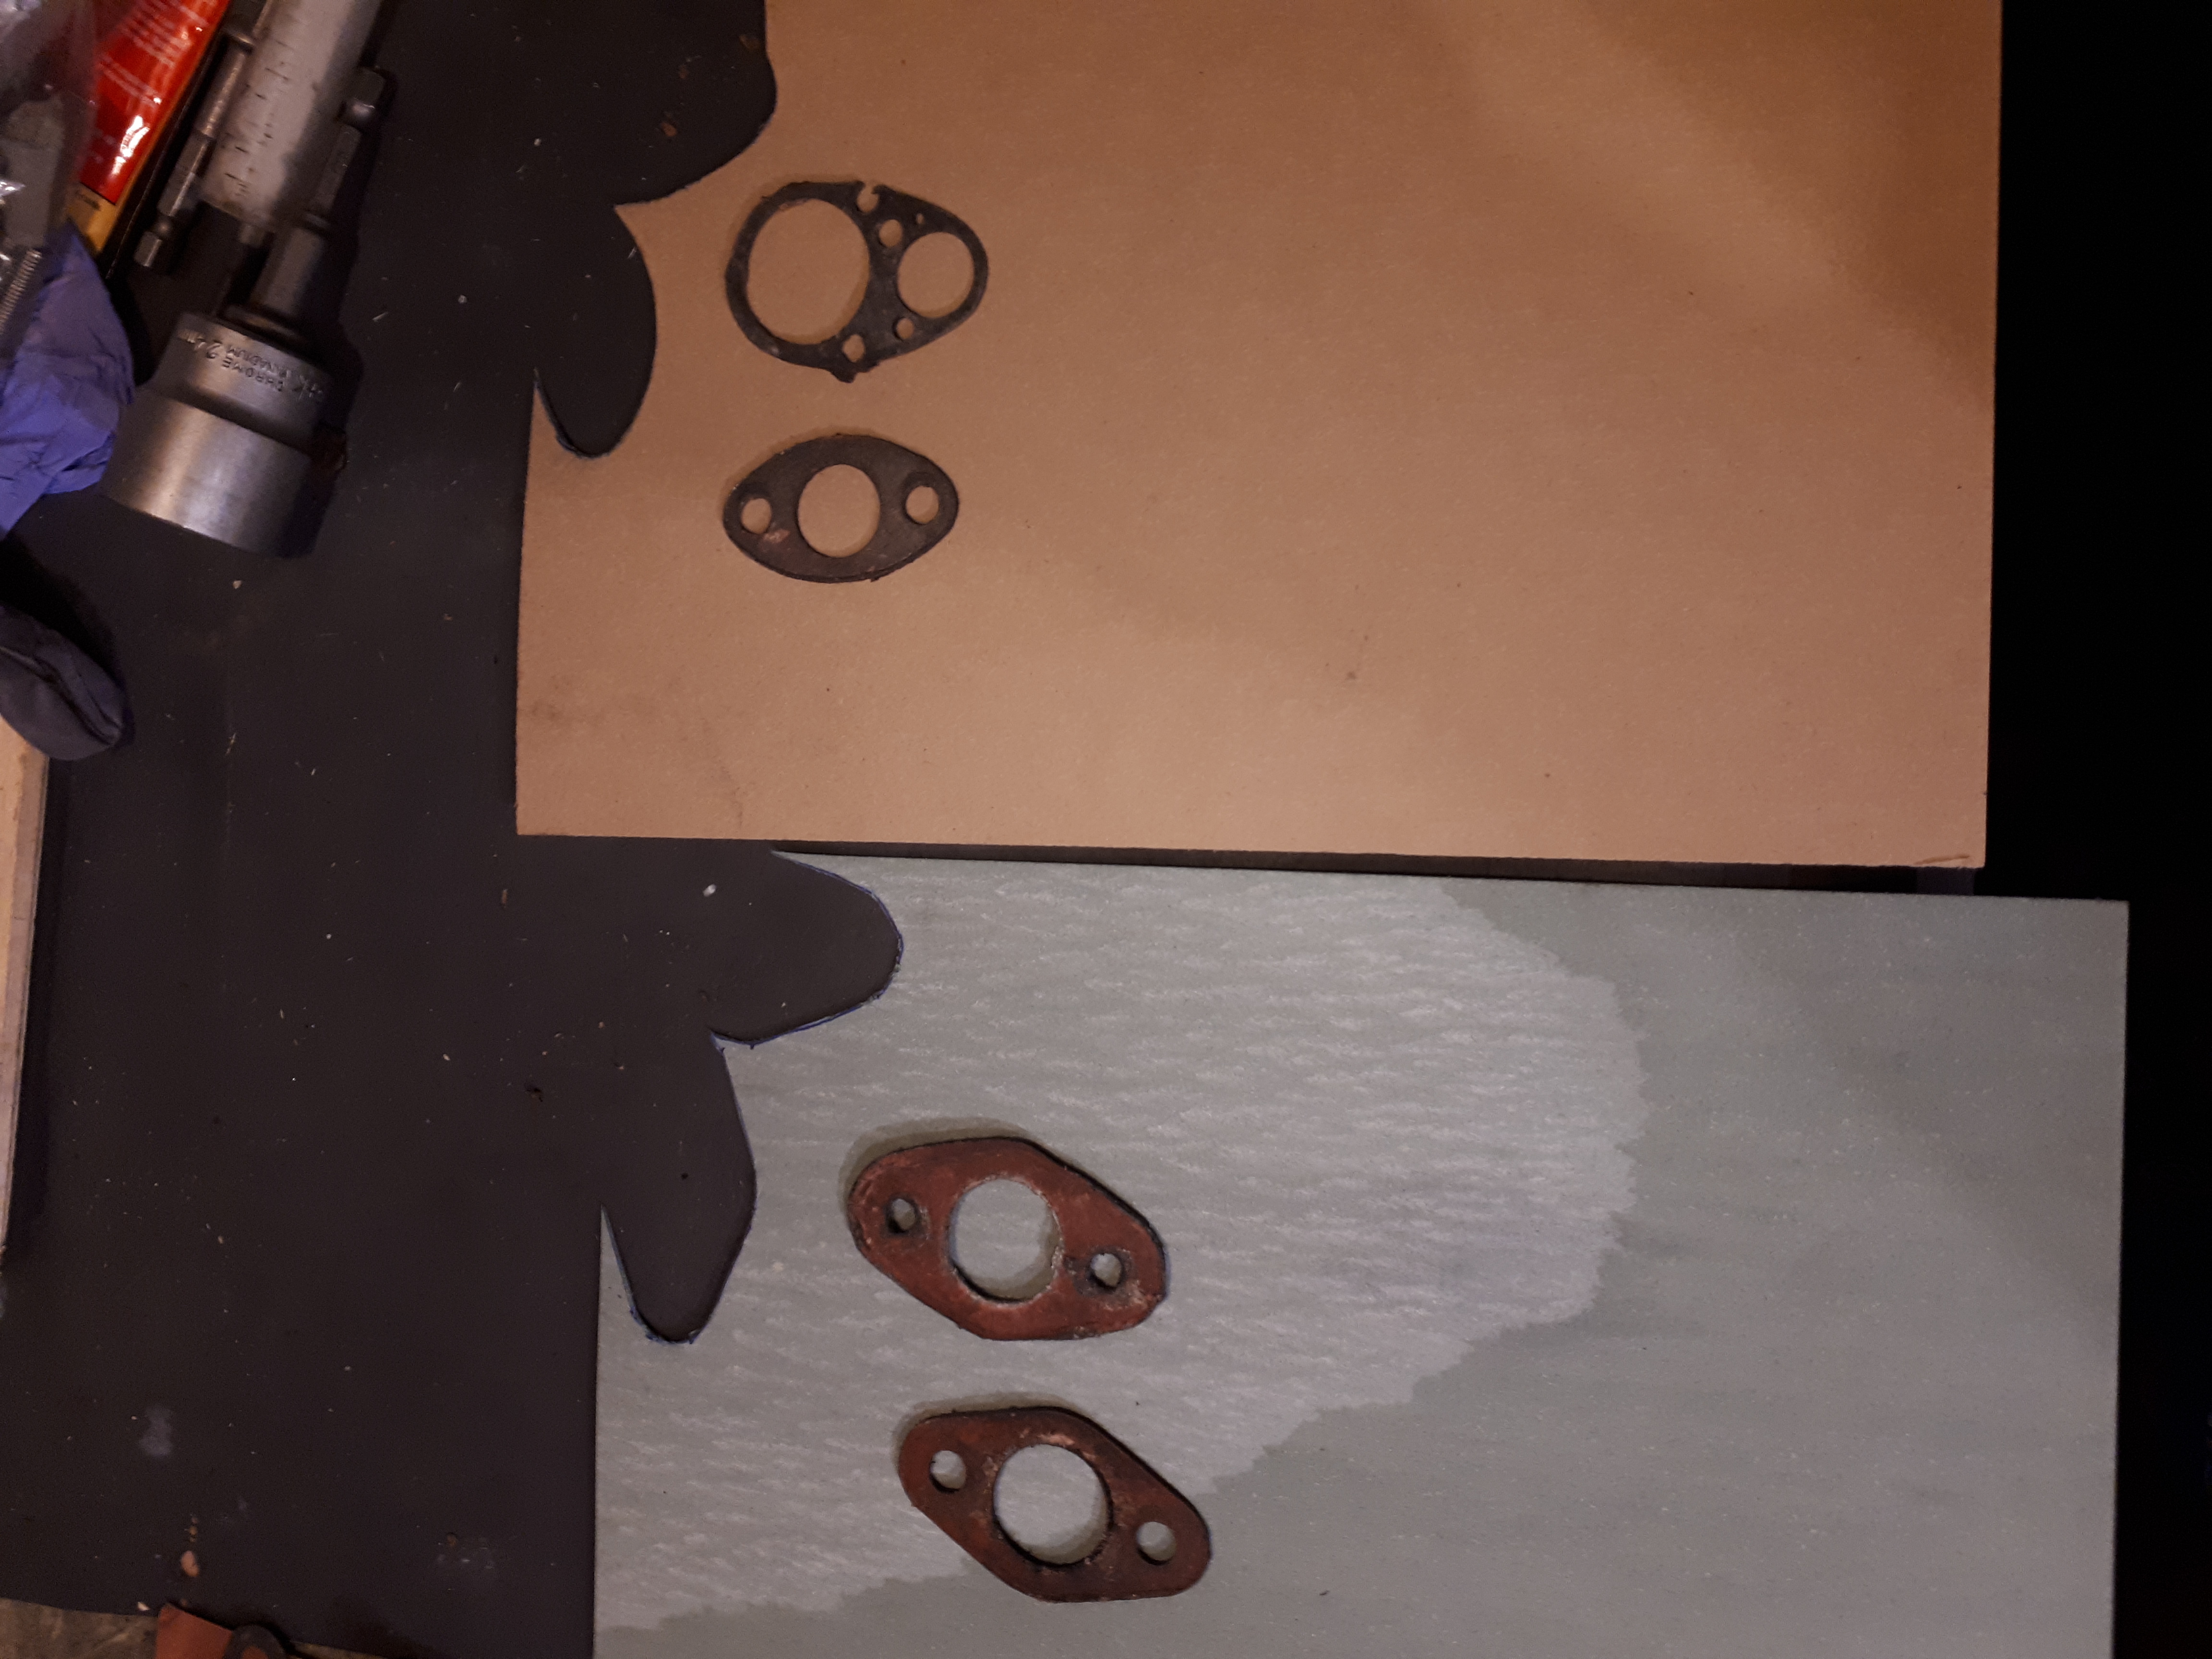
As I re-installed the governor linkage to the carb, it now stabilizes nicely (had to adjust the carb). As I had ordered a gasket kit, I had several types + thicknesses of gaskets so used the opportunity to fabricate all the gaskets for the carb + intake and for the exhaust.
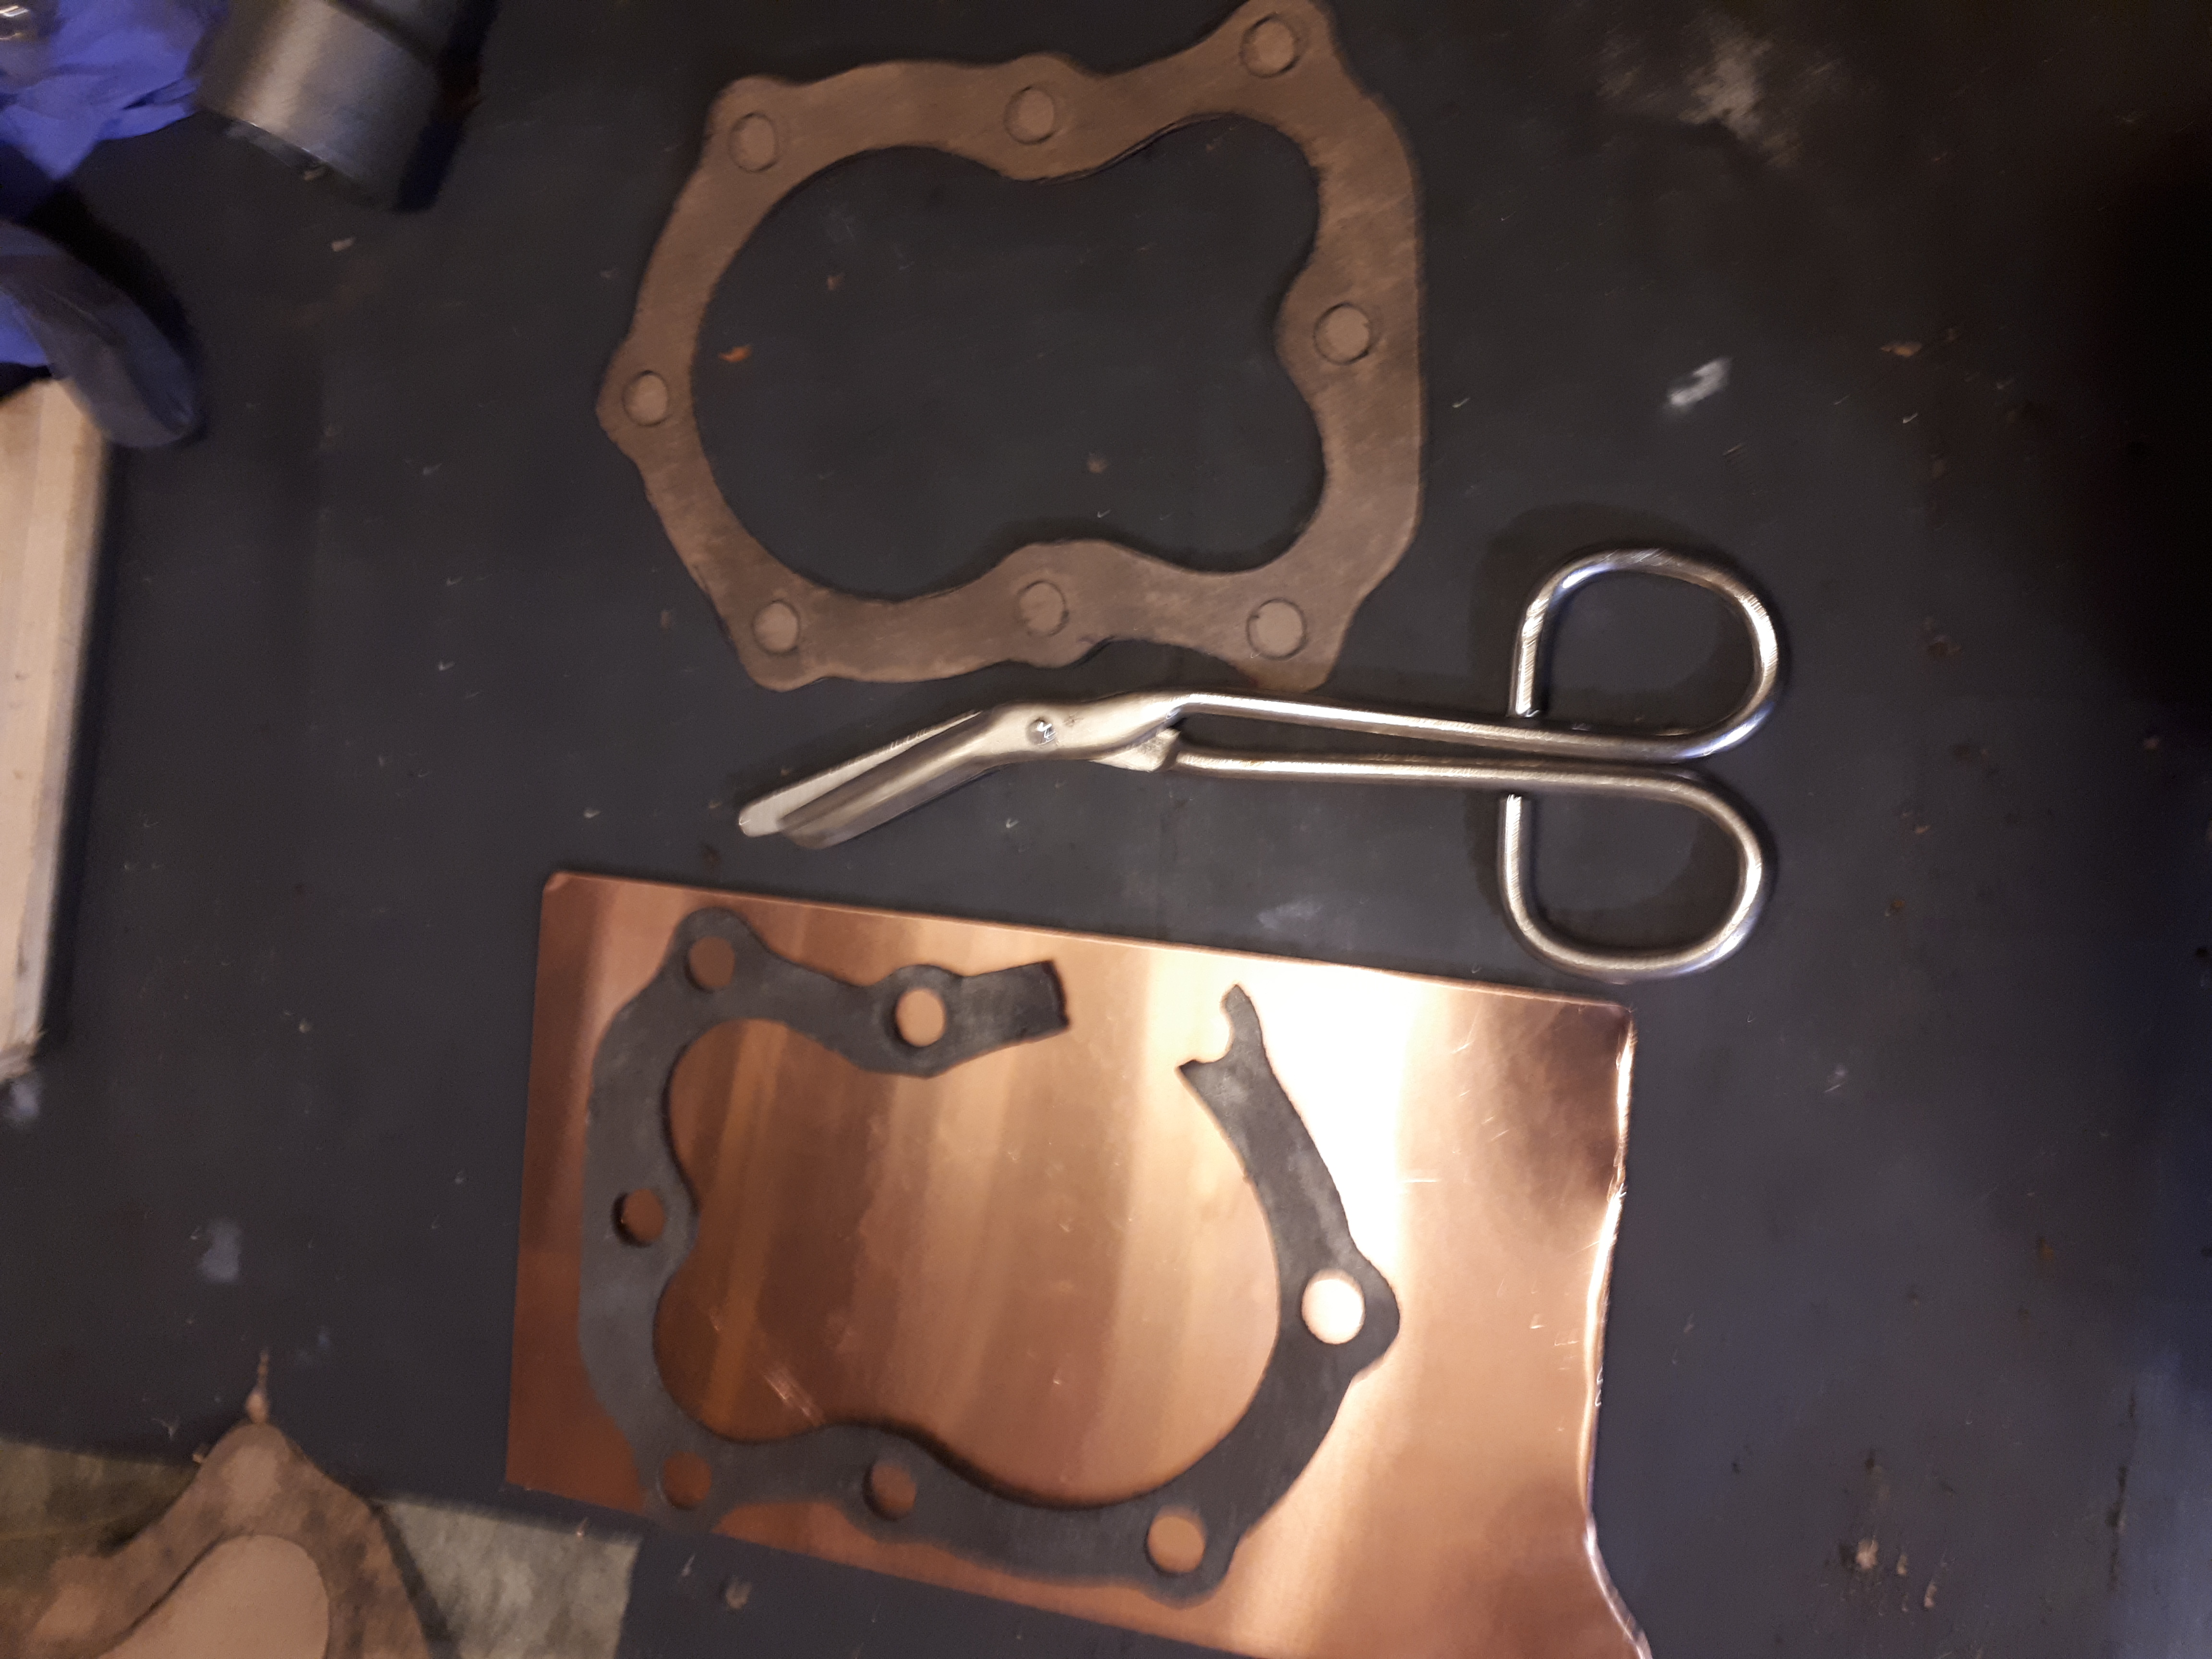
A few photos to illustrate.
Of note that for the copper plate, I mainly used the “special scissors” I had from an old medical kit and a “Dremel” to refine/adjust the cuts/holes.Attachments:
January 17, 2021 at 3:22 pm #36436vhgmcbuddyMemberNow the other gaskets.
Attachments:
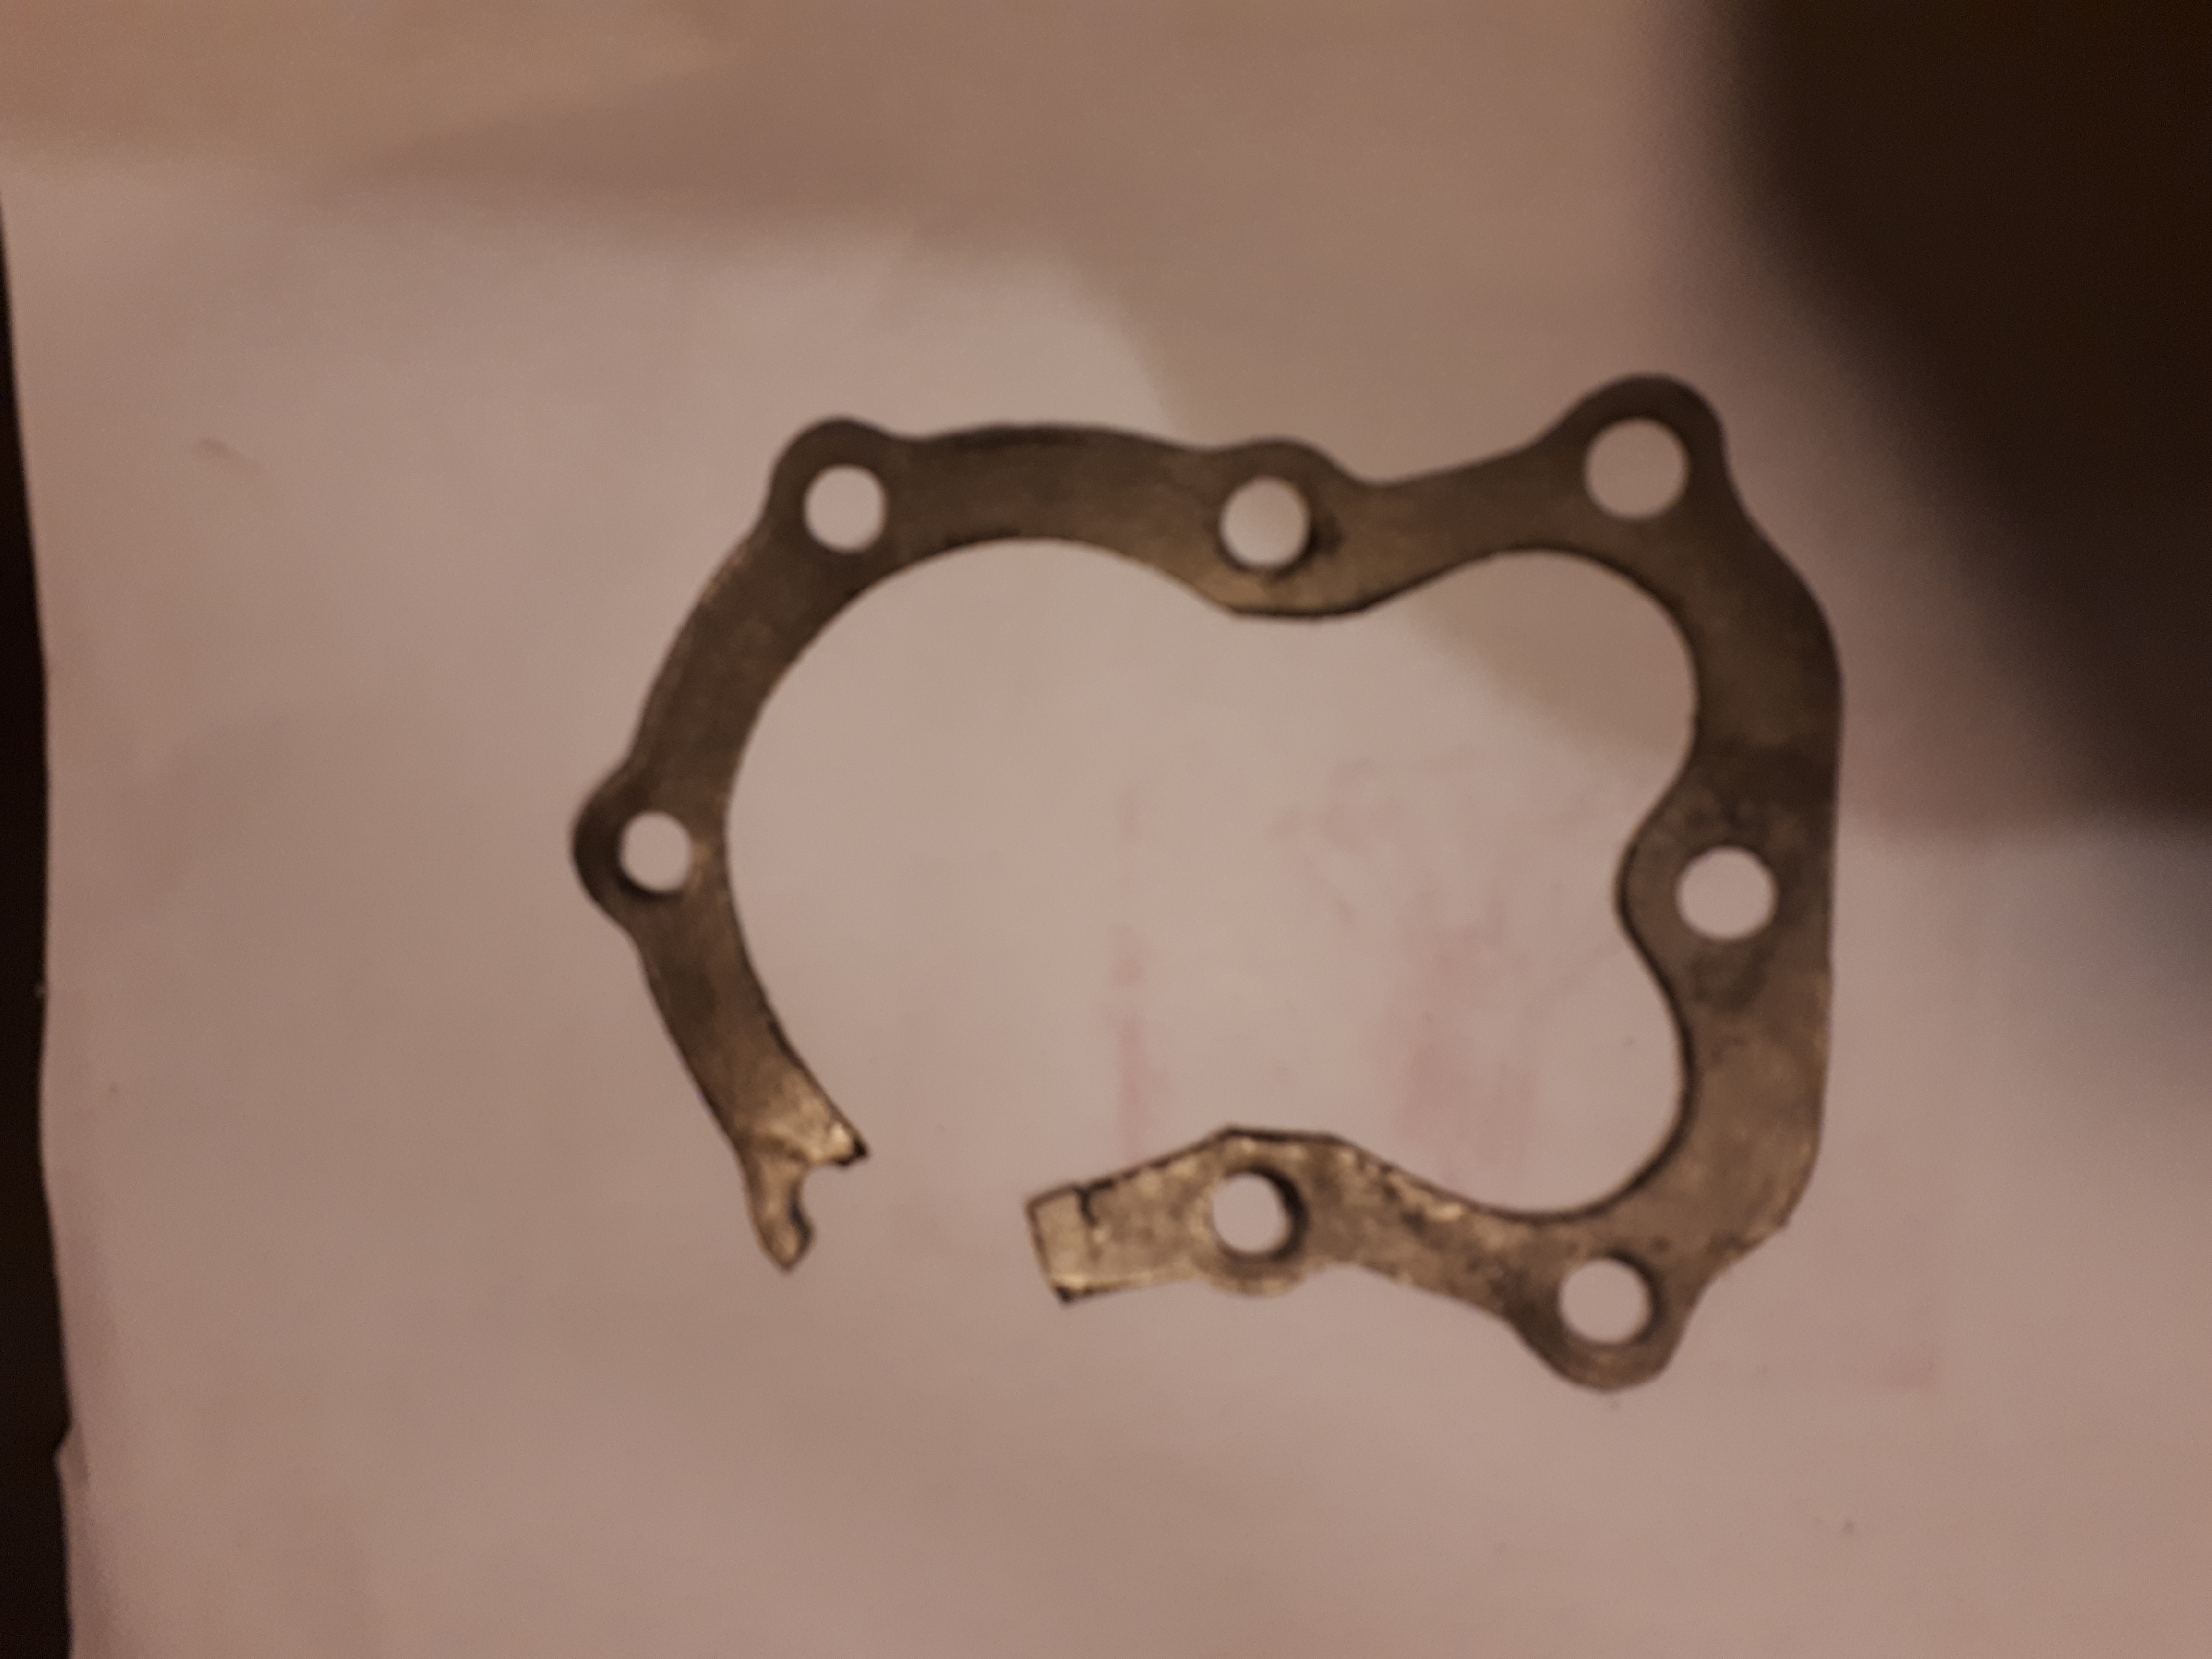
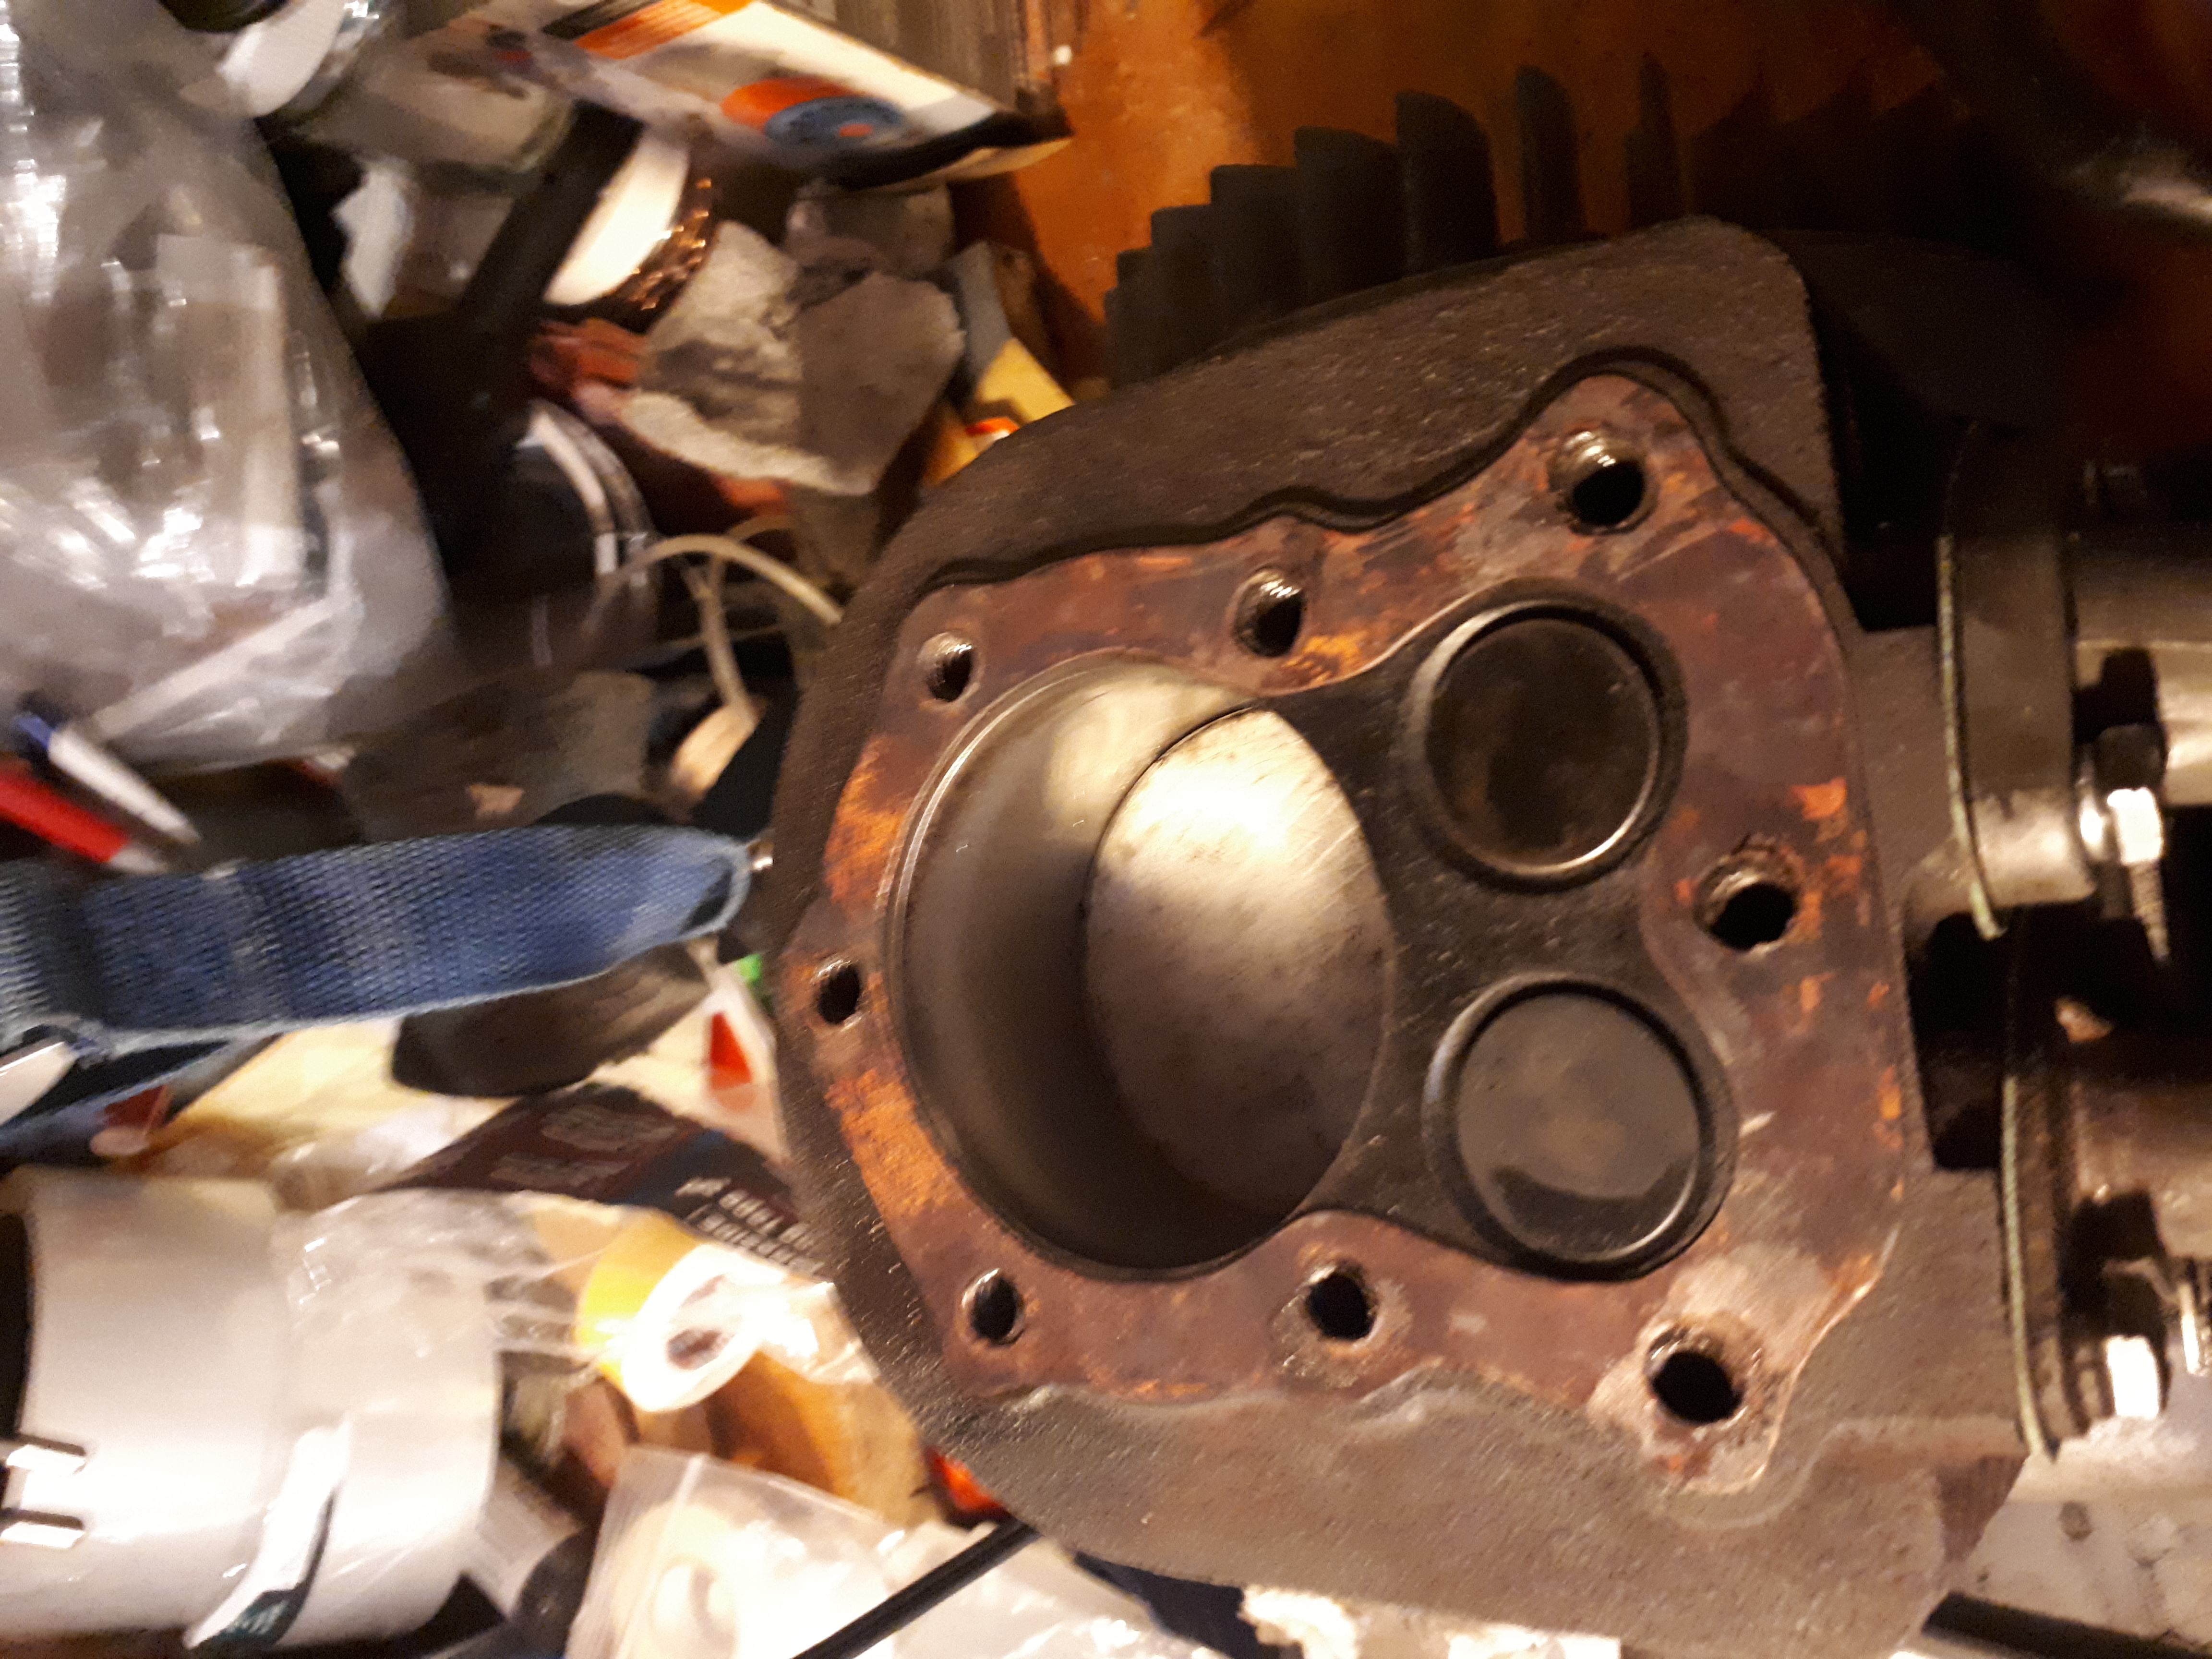
January 17, 2021 at 3:23 pm #36438vhgmcbuddyMemberThe head gasket prior to fitting the head back and torque the bolts.
Attachments:
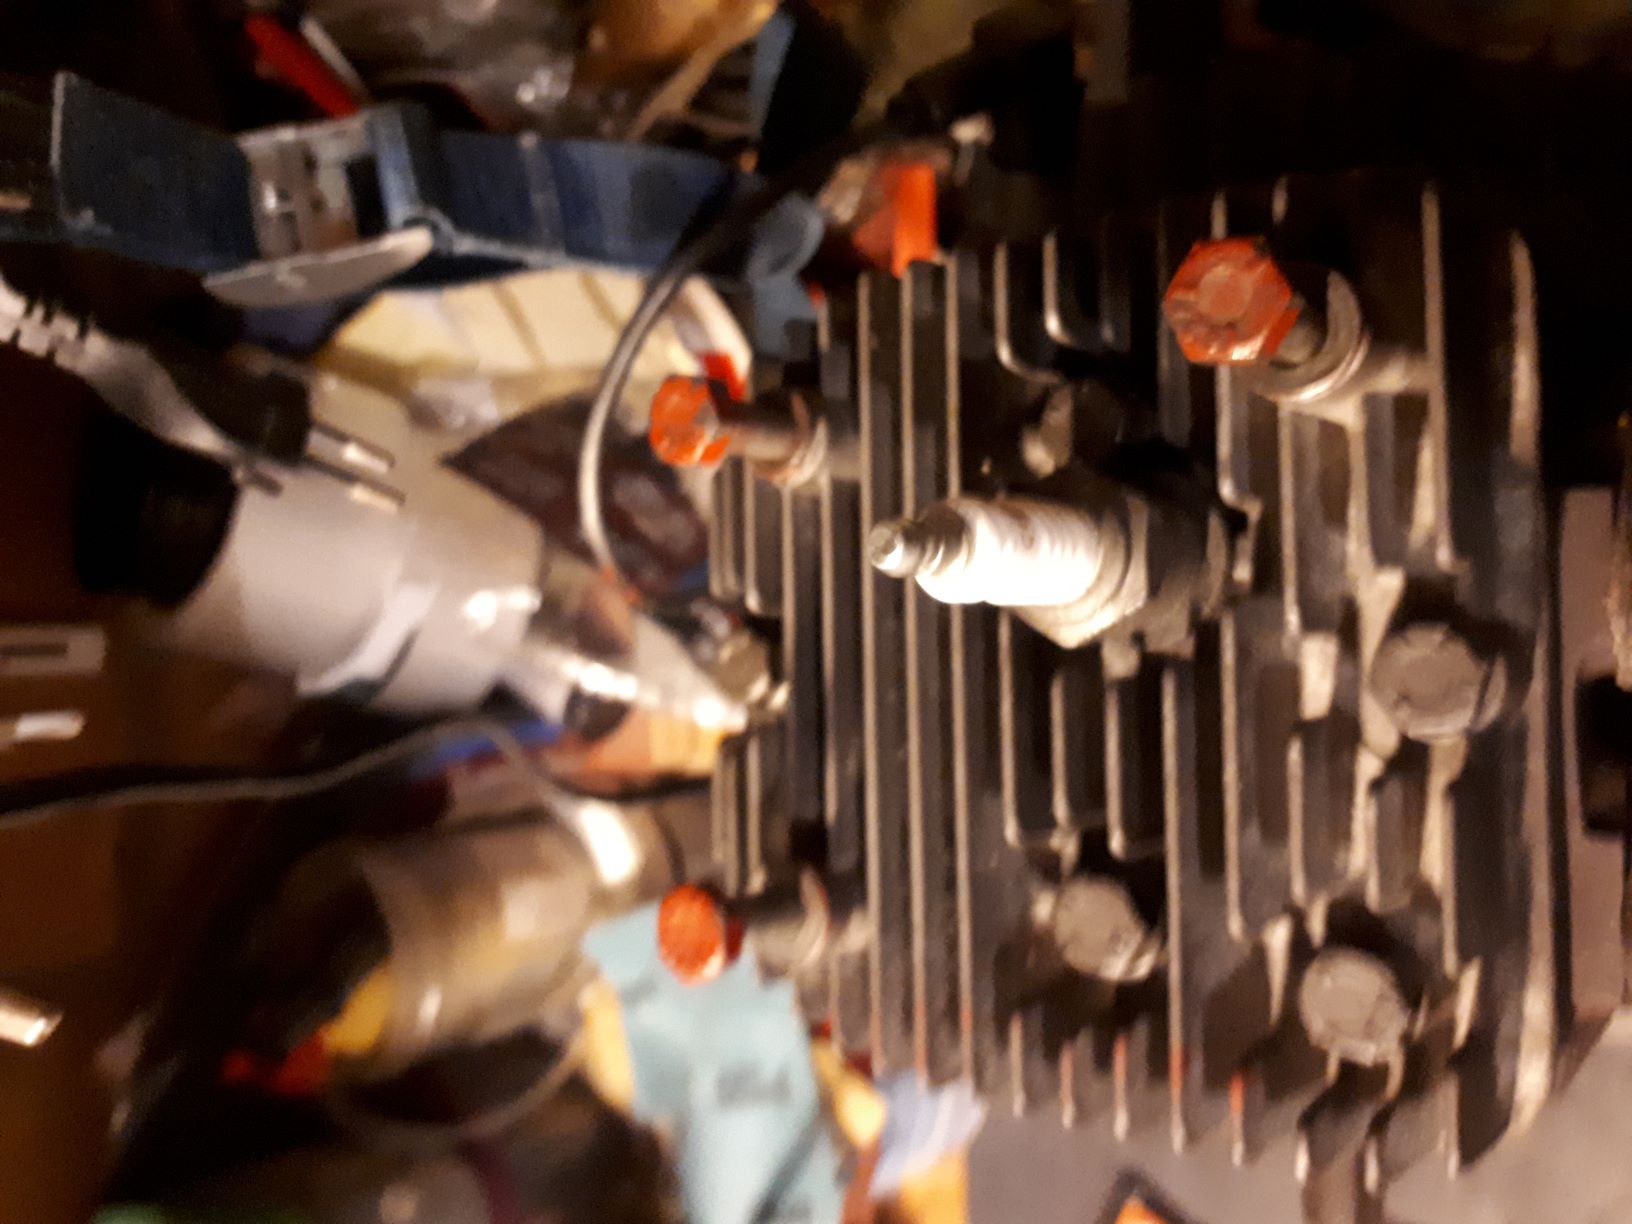
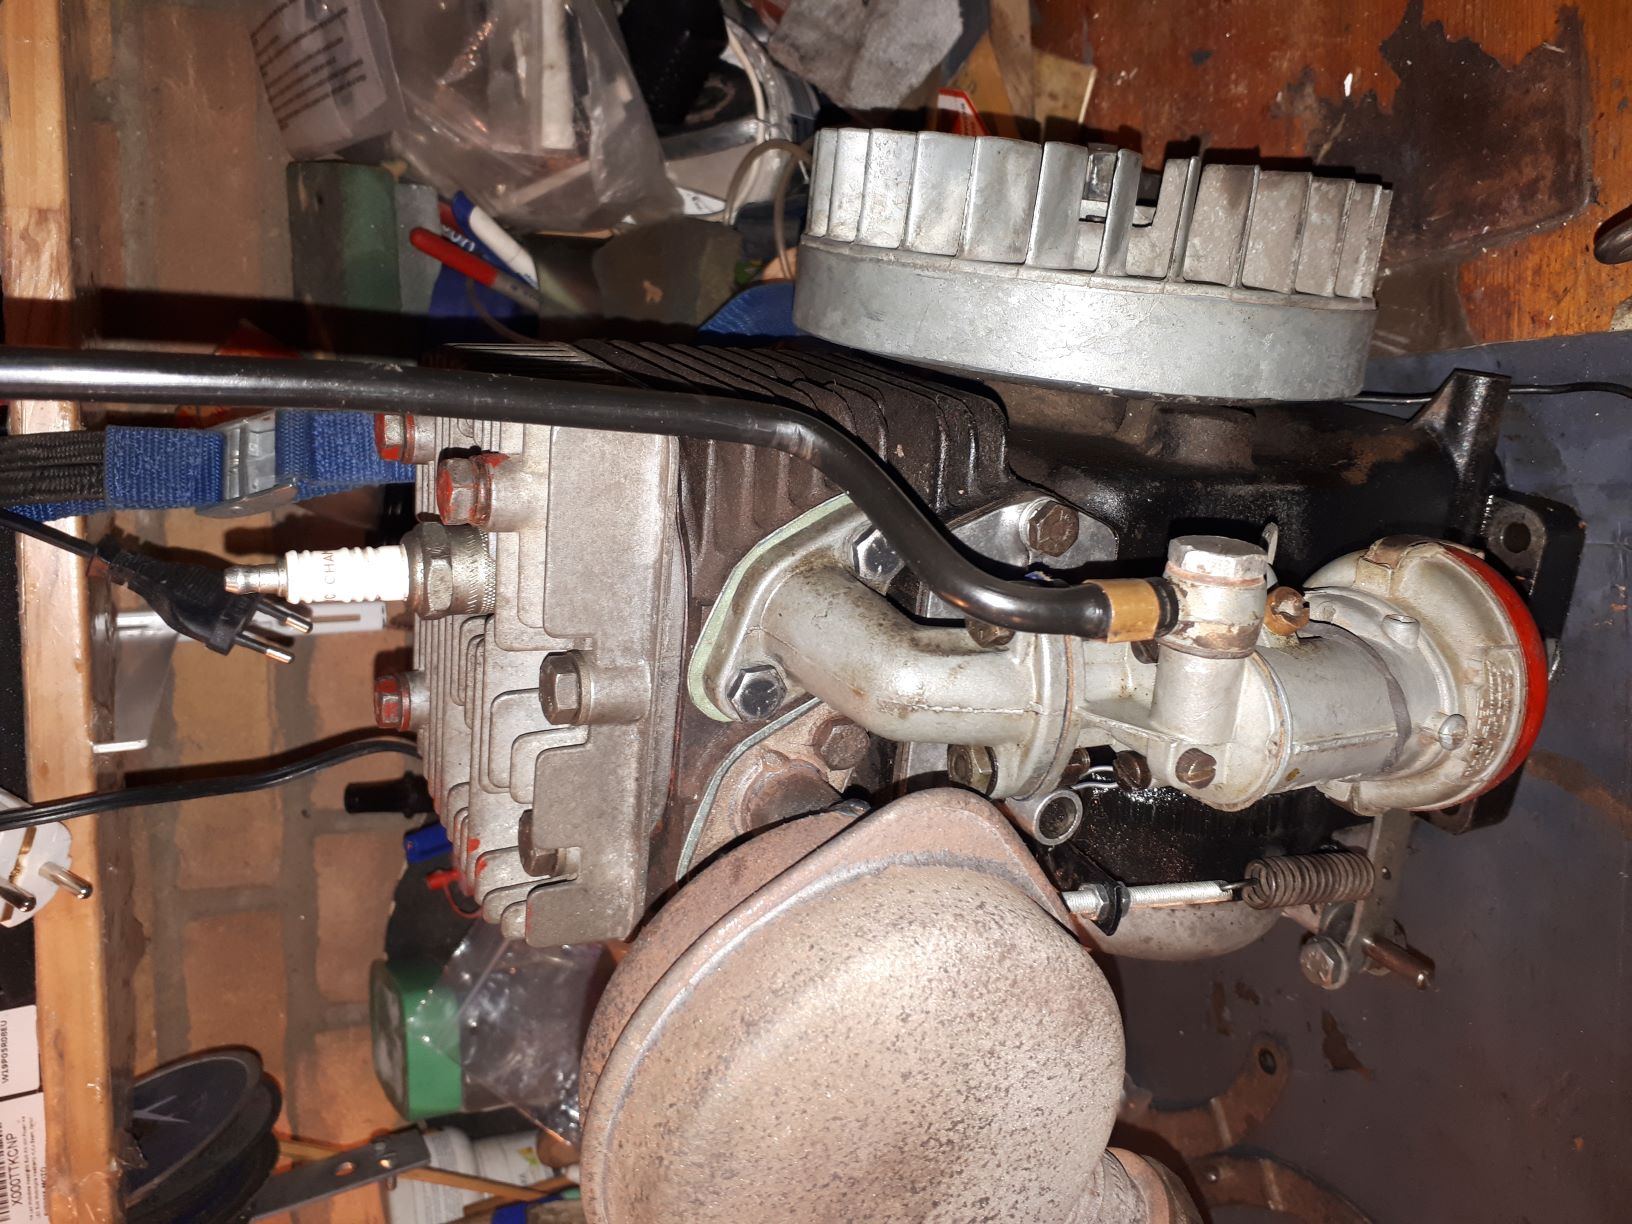
January 17, 2021 at 3:27 pm #36440vhgmcbuddyMemberFinally the engine re-assembled with all the new gaskets. Was a good exercise and a first for me.
Attachments:
January 18, 2021 at 8:27 am #36444charlieKeymasterGood news. I have made various gaskets but never attempted a head gasket.
-
AuthorPosts
- You must be logged in to reply to this topic.