Home › Forums › The Main Forum Area › Projects › Norton Trusty
- This topic has 41 replies, 5 voices, and was last updated 3 years ago by
halfa.
-
AuthorPosts
-
September 23, 2020 at 12:37 pm #35419
 trusty220Keymaster
Before you put it back check the carrier arms for cracking at their base. If the pivot bolts for the shoes are overtightened it stresses the cast iron and they can break off at the base of the arm. The bolts should have locking nuts on so that you can just nip them up without having to tighten too much- I’ve had both Nylocs and Binx nuts on mine in the past, but you could also get away with two half-nuts locked together.
It’ll be interesting to see if it goes again now you’ve cleaned it! (Only joking, of course!)
September 26, 2020 at 6:56 am #35421halfa
ParticipantDoes anyone know where I could get suitable replacement caps for the fuel and oil tanks? The original ones on the Norton are missing and have just been bodged with a rubber bung and a bent piece of tin. Cheers.
September 27, 2020 at 12:11 pm #35427trusty220KeymasterThey were standard items “off the shelf” at the time so you should be able to find some at an autojumble. I’m not sure if Newbury sort-out is on this year but that would be the kind of place to go to where you are most likely to find something.
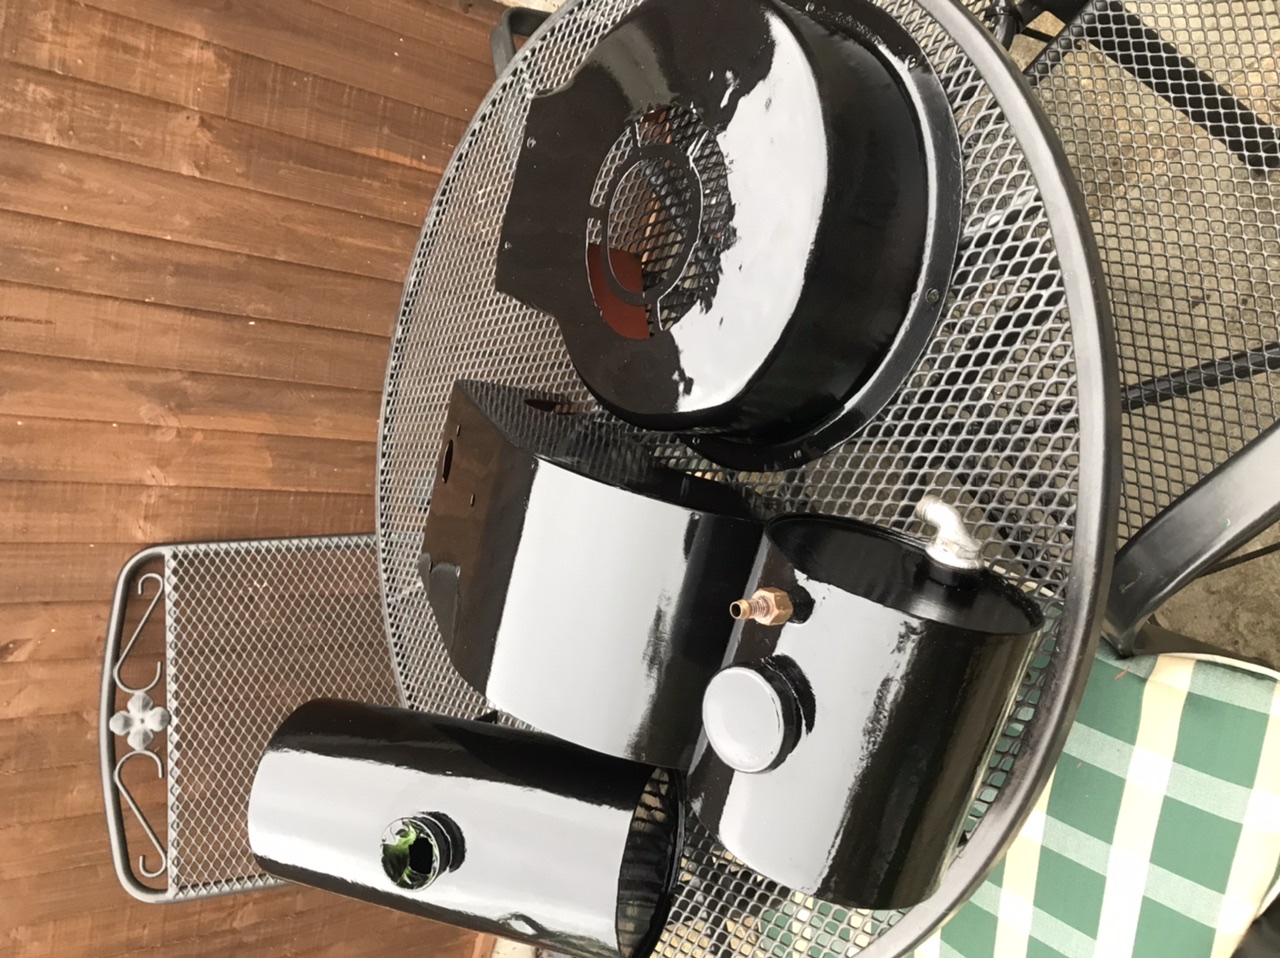
October 25, 2020 at 8:07 am #35660ParticipantEngine tin work prepped and re painted with gloss engine lacquer, hopefully it will stand up to the odd splash of petrol.
Attachments:
October 30, 2020 at 9:13 am #35694trusty220KeymasterLooking good so far. As you say, attention to detail pays dividends at the end and will turn a good restoration into a winner.
If you need any help you know where we are.
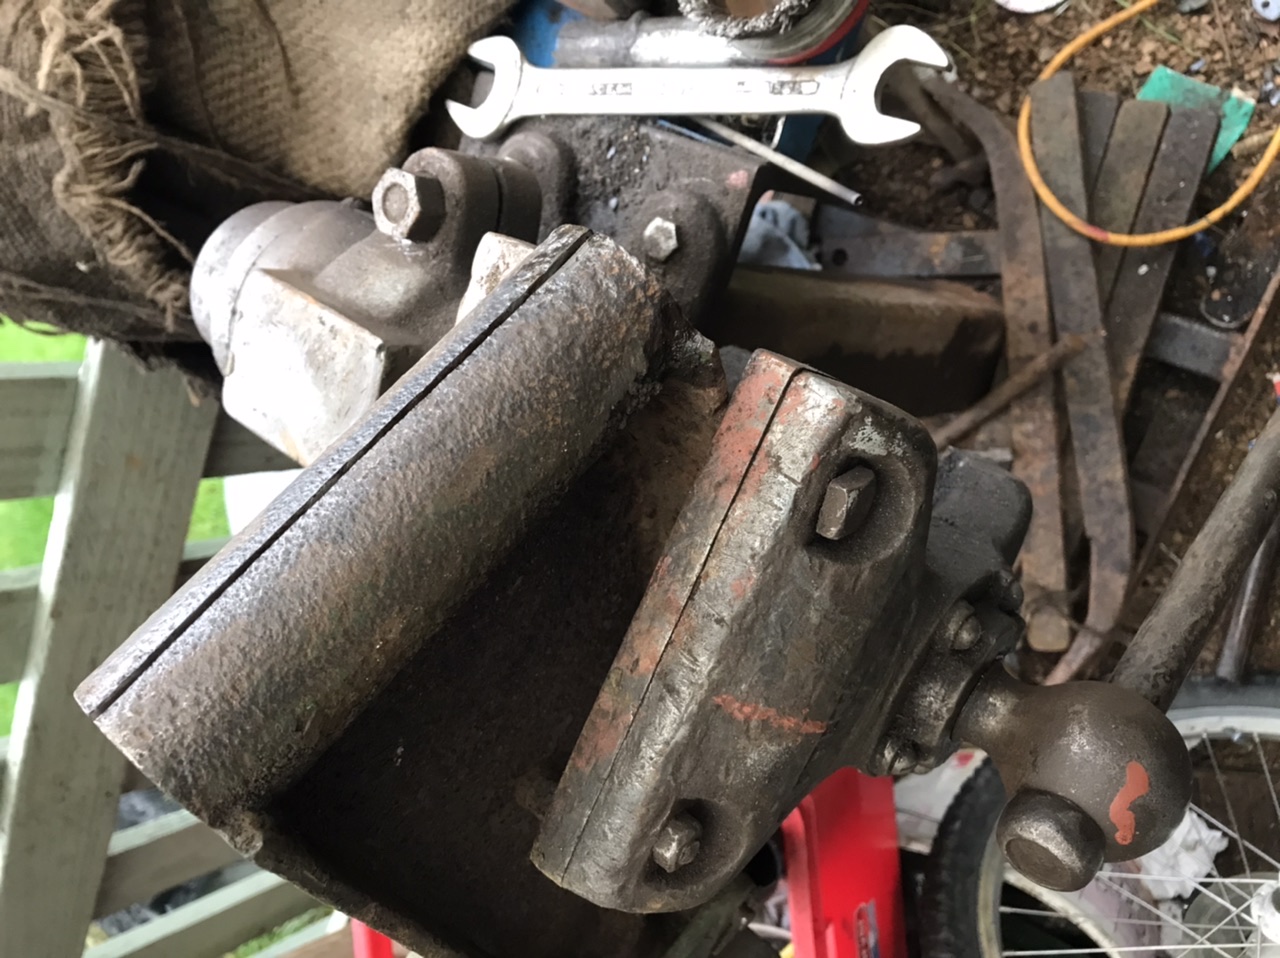
November 2, 2020 at 9:07 pm #35715ParticipantAny tips on the best method of removing a very stuck drawbar pin ? It’s free in the casting but seized solid in the central steel part.
November 4, 2020 at 4:12 pm #35716trusty220KeymasterThat is how they normally come when they haven’t been greased. You could try heating the drawbar on the outside then twisting the pin with a pair of Stilsons, or unscrew the grease nipples, clean them out and re-fit them so that you could force grease into the join.
In the worst cases I have had to cut the pin at the top and underneath of the drawbar so that I could separate the drawbar from the support casting. I then built up a fire and put that end of the drawbar in it so that it all reached a cherry red colour, left it to cool and pushed it out with a press. A little drastic and you then have to make another pin, but at least it teaches you to grease the pin on a regular basis!
It’s probably the worst job you can get to do on a Trusty; once you’ve done it everything else will seem easy!
November 15, 2020 at 8:49 am #35818ParticipantThe pin had unfortunately become one with the drawbar. So the oxyacetylene was employed along with the press. I cut the pin top and bottom of the drawbar and removed it from the casting then strapped it to the press. But it wasn’t to be as any hotter would have turned it into a liquid ! And the press was making creeking noises never heard before. So I had to slice down the back of the drawbar with a slitting disc, gently re heat whilst in the vice then knock out with a big hammer and drift which worked fine. The cut was then grooved out with the grinder and stick welded up very carefully just an inch at a time over lots of tacks in order to keep it true. Which it did and a new greased pin slid in nicely.
Attachments:
November 15, 2020 at 7:27 pm #35835trusty220KeymasterThat’s stuck harder than any I’ve come across; they normally come out with heat and cooling, then under the press. Well done for finding another way to do it!
November 16, 2020 at 8:01 pm #35847ParticipantAh that’s where I went wrong, I put some pressure on it then started heating it up. I’ll leave it to cool off next time. Cheers for that tip.
November 17, 2020 at 9:02 am #35848trusty220KeymasterSome people use a differential expansion method to break the rust seal- once it’s all cherry red pour cold water on the outside but stand well back because it spits steam everywhere. I tend to build up a big fire in an oil drum over at the farm, put the item in it to heat up thoroughly for 30 minutes then take it out quickly and immerse it in the stream. The different expansion and contraction between the two items tends to break the rust up. It hasn’t failed me yet!
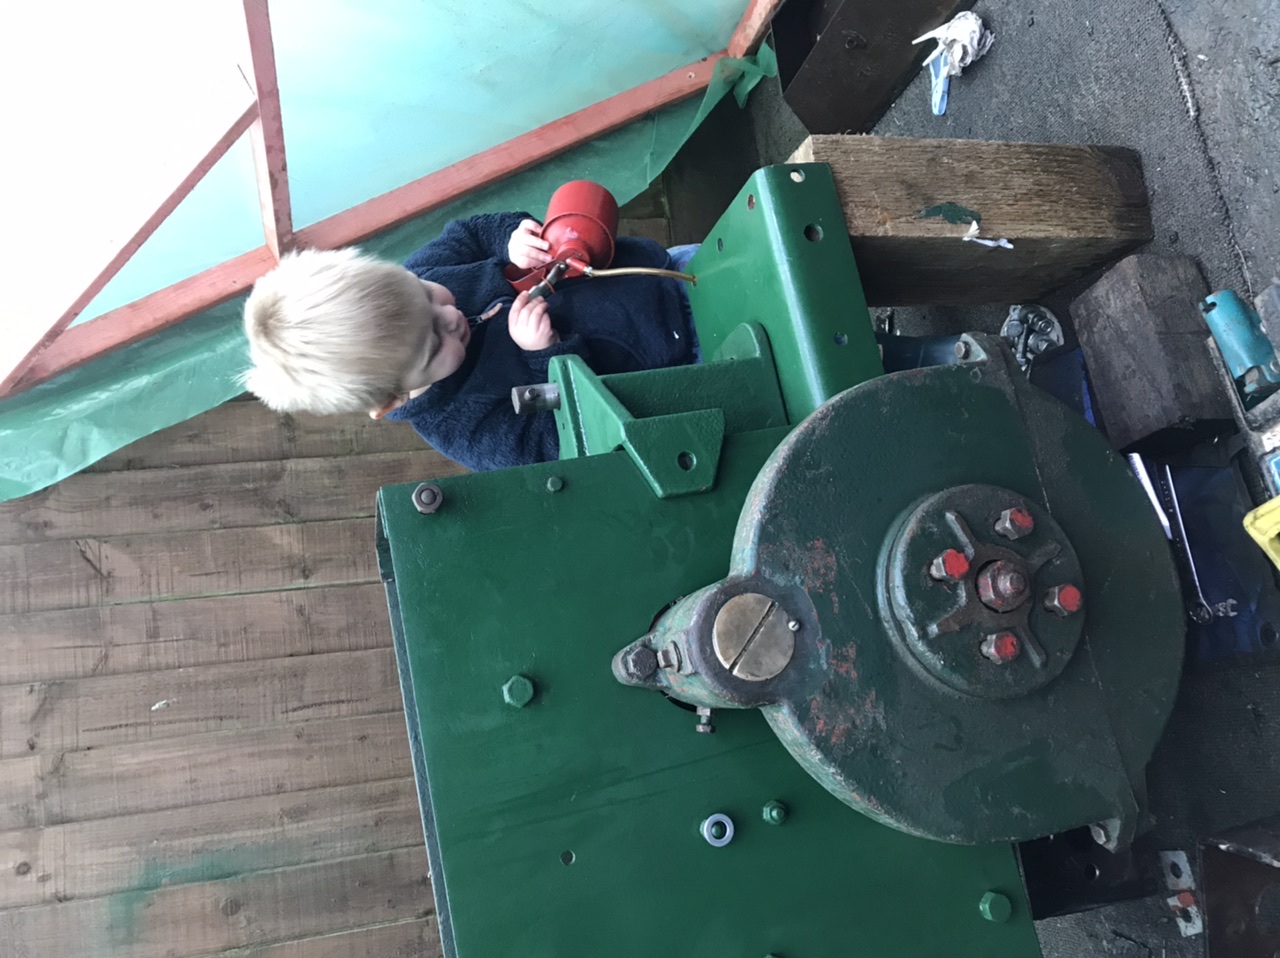
December 13, 2020 at 5:01 pm #36162ParticipantHad some help today with putting some bits back together.
Attachments:
December 14, 2020 at 8:17 am #36164 charlieKeymaster
Brilliant, start em young.
December 14, 2020 at 9:20 am #36165 will-haggleParticipant
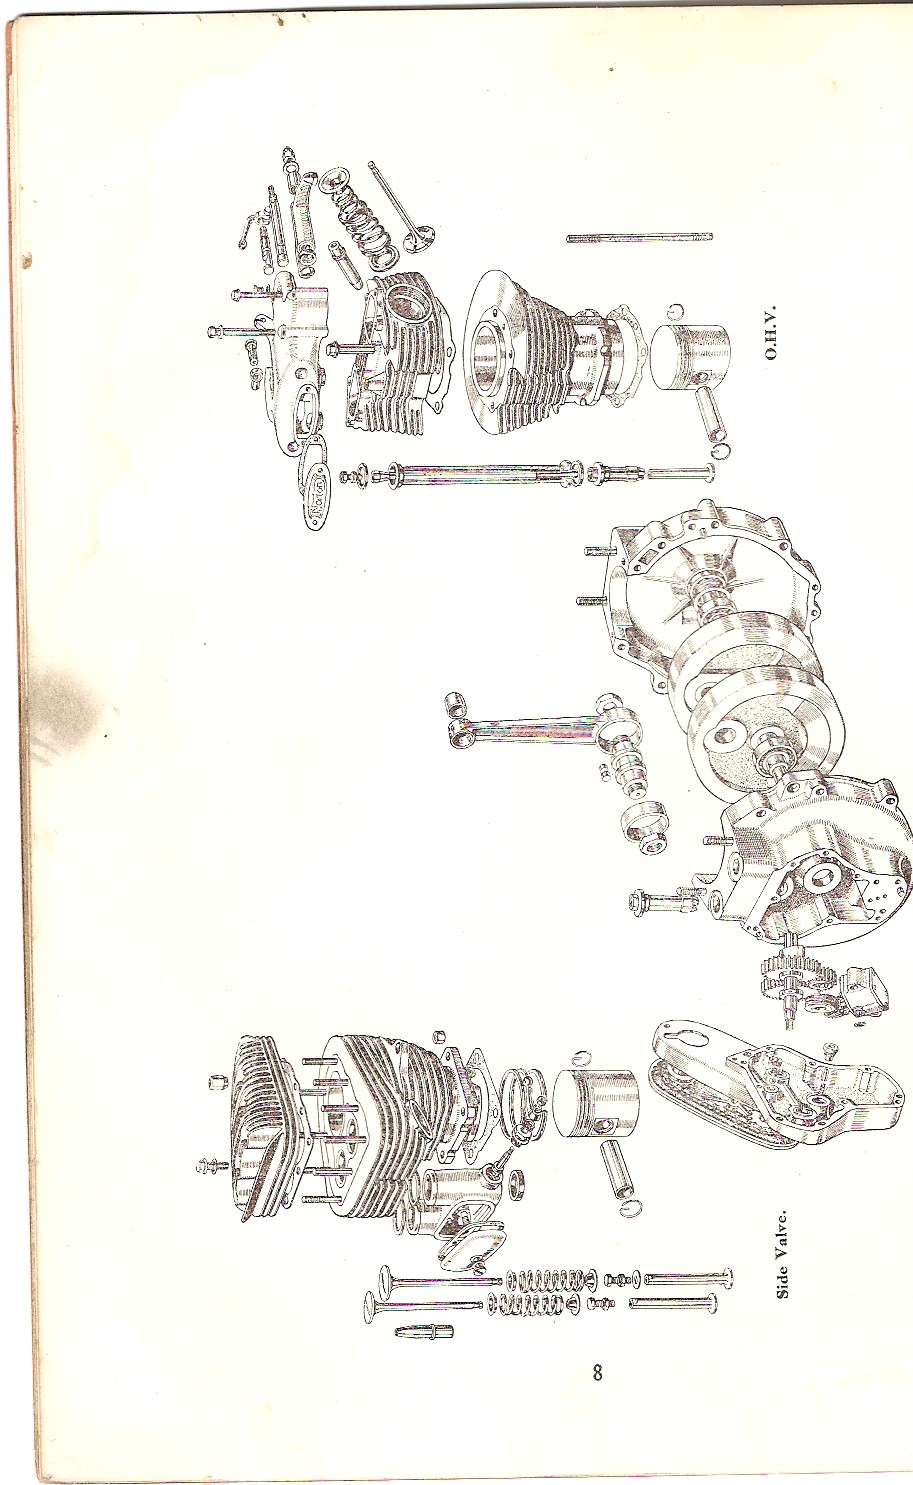
I have a Big 4 manual, I’ll put a link to it. The main difference to the bike engine is the drive side main shaft, it’s tapered for the engine sprocket on the bike but it’s plain on the trusty to attach the Trusty centrifugal clutch.
Attachments:
December 14, 2020 at 9:32 am #36169trusty220KeymasterIf you use the bike manual be very careful. There are two types of Big 4 engine- the bike engine was fitted to the Mk2 Steed with tapered shaft, BTH magneto and cooling fins on the head going from front to back, and also having an oval valve cover.
On the two wheeled tractor the crankshaft is parallel, valve chest is rectangular, the head has the fins running from side to side and it has a Wico A magneto with opposite rotation to the bike engine.
Most of the dimensions and clearances are the same on both except the bike engine is (I’m working from memory now) 639cc and the 2-wheeled tractor engine is 599cc. Don’t get caught out by the opposite rotation mag and set the points gap to 15 thou.
-
AuthorPosts
- You must be logged in to reply to this topic.