Home › Forums › The Main Forum Area › Projects › Coleby Junior Restoration
Tagged: Coleby
- This topic has 29 replies, 6 voices, and was last updated 3 years, 9 months ago by
 ssorthiek.
-
AuthorPosts
-
October 8, 2018 at 6:29 pm #29392
 ssorthiekParticipant
I am new to VHGMC but now have an increasing interest in Coleby Cultivators. I am currently restoring one and have recently purchased another from a gentleman in Kent which I need to pick up.
I have recently added to a post to a topic that started about 4 years ago, but it has been suggested that I start a new topic covering the restoration.
The reason for the interest is my Grandfather purchased Coleby Cultivators Ltd when Fredrick Coleby sold the business. Having worked for Fredrick Coleby my Grandfather clearly saw a business opportunity.
Very little is known about the company or the machines within our family but several people have been good enough to share some snippets of information.
During the restoration project, some of the tools that were originally used to manufacture the Coleby will be used. I have my Grandfathers original tool box. We also have the share certificates for Coleby and various other bits and pieces.
The Coleby Junior I am trying to restore hasn’t got any of the attachments and I would be delighted to hear from anyone with any attachments for the Coleby Junior or any information about the company, Fredrick Coleby or indeed my Grandfather Sidney Ross.
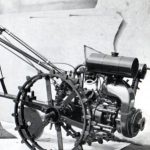
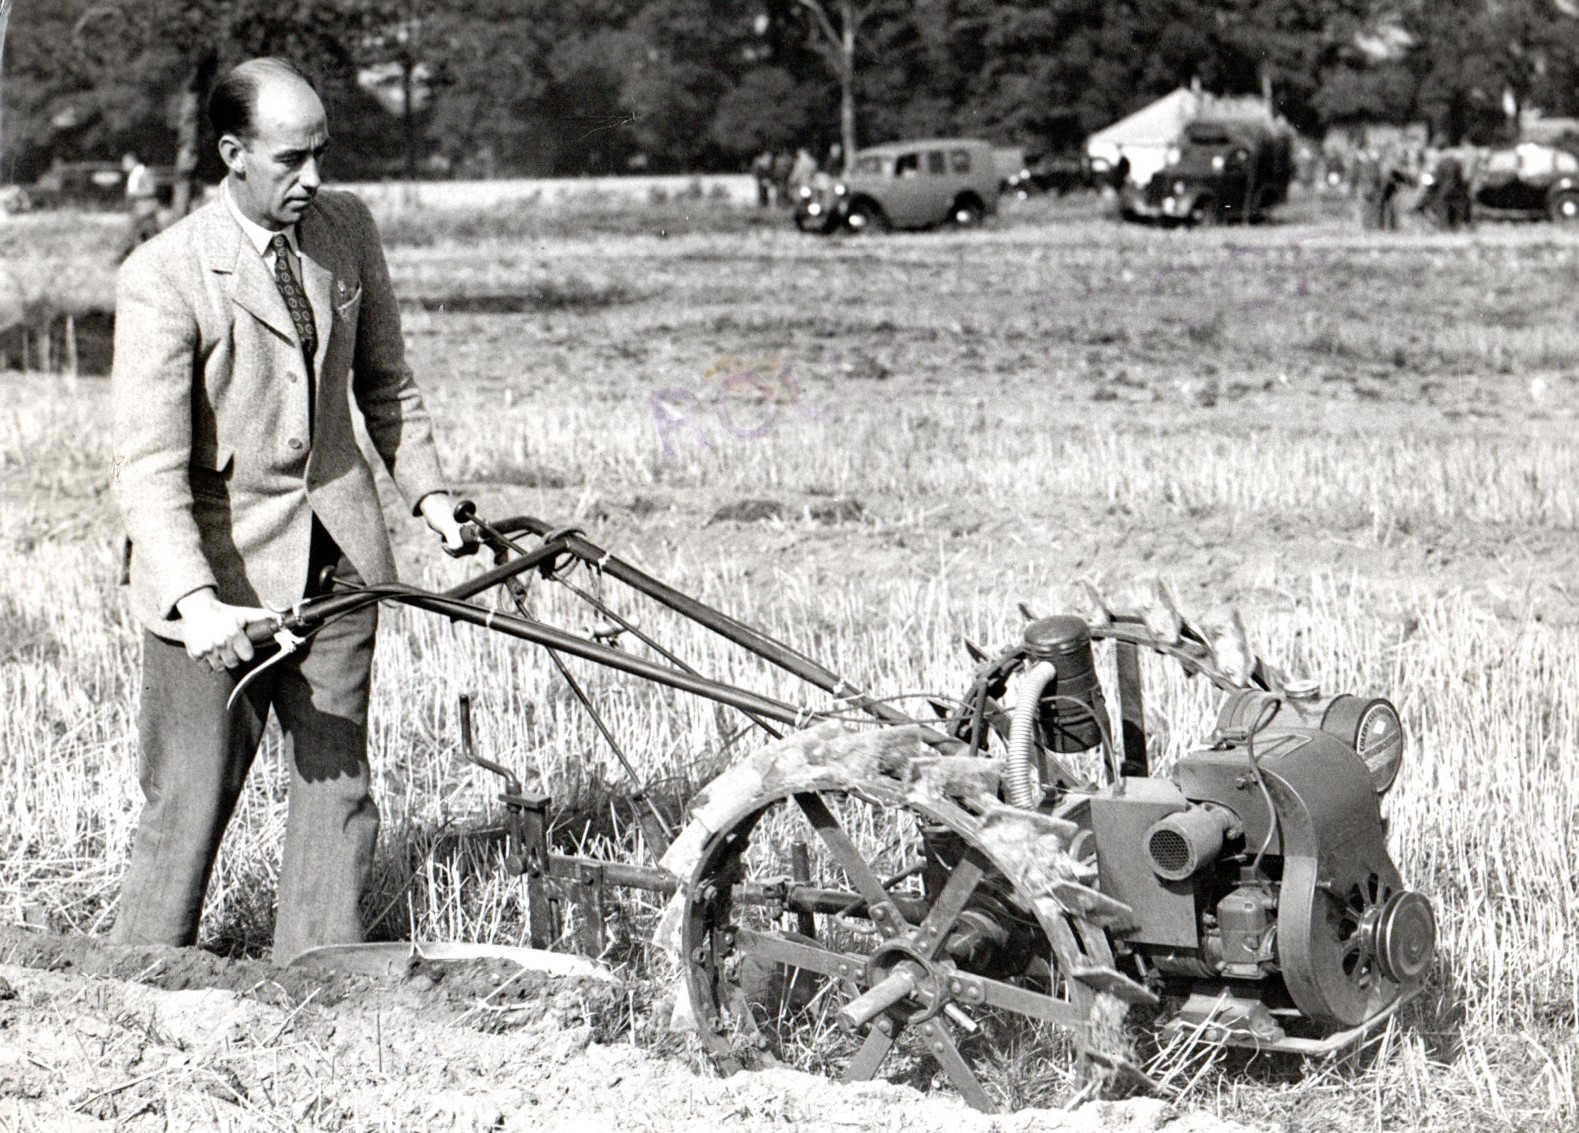
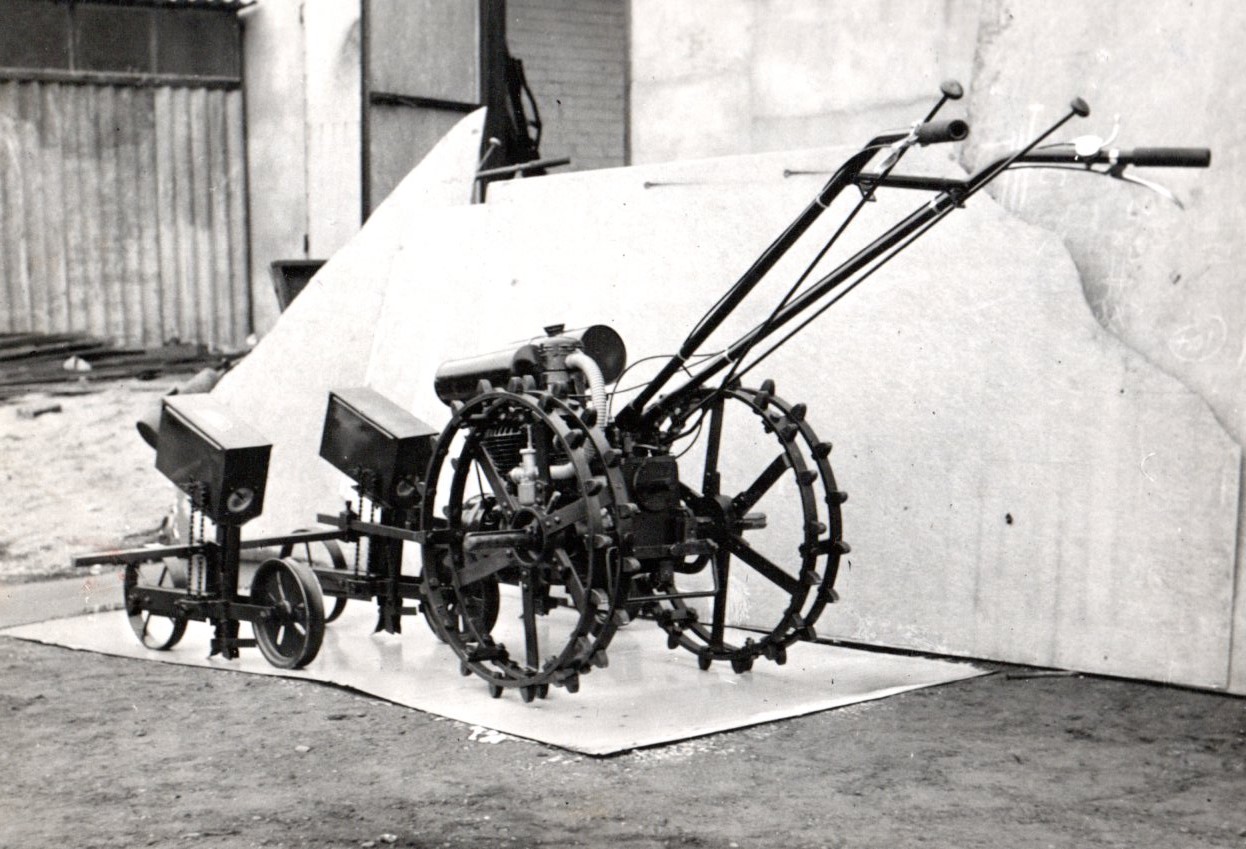
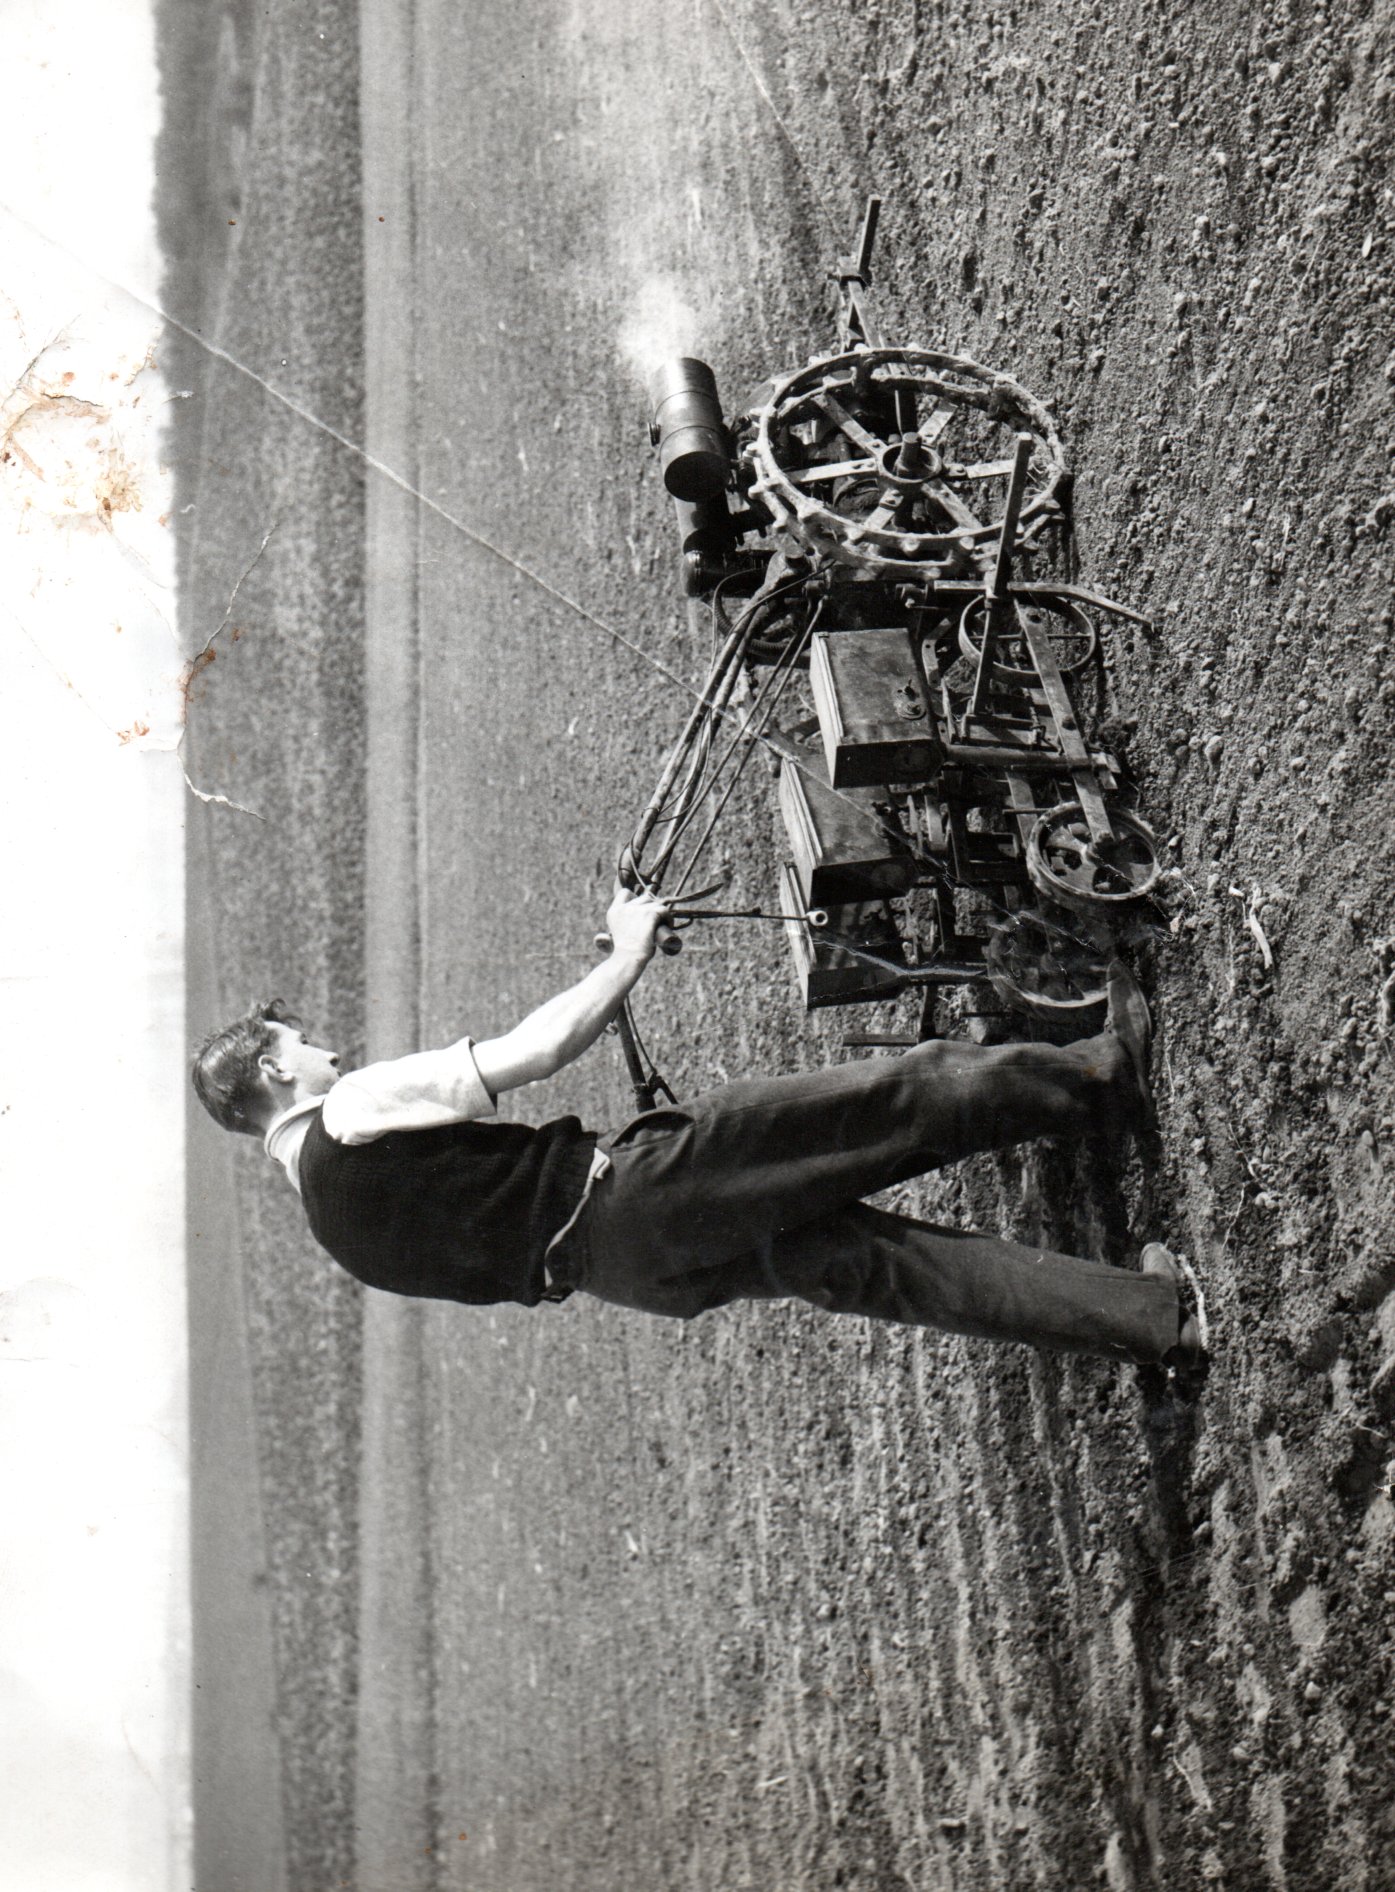
There are a number of photos from 1948 which may be of interest which I have added. If anyone can identify the gentlemen in the photos, it would be very much appreciated (I know one of them).
I hope this will be of interest and look forward to any correspondence.
Attachments:
October 8, 2018 at 6:36 pm #29396andyfrost
ParticipantVery best for your restoration , what engine are your machines fitted with…JAP4/3 , or Villiers 25A.
Andy.
October 8, 2018 at 6:43 pm #29397ssorthiekParticipantBoth are fitted with the JAP 4/3 engine but both have the newer magneto. I’m not sure whether the one I have purchased in Kent has the correct Magneto for its age, but expect the one I’m using for the restoration project will be fine to get the engine going.
I do have the Wico 2A magneto but can’t get the screws off the coil cover at the moment. Totally rested and seized even with copious amounts of a well know penetrating oil.
Over the next week I hope to have quite a few photos of the gearbox in bits, the clutch and a few odds and ends.
October 8, 2018 at 6:56 pm #29398ParticipantI was just curious as I have quite a few internal spares for the 25A , I’m fairly certain your age of JAP4/3 should have a wico series A magneto , and not the much later CJ series , which I assume is the “later” one you refer to.
Andy.
October 8, 2018 at 7:19 pm #29399ssorthiekParticipantThanks Andy, yes you are correct, the CJ series sounds about right. It’s worth me remembering you have the 25A spares since I would love to find an early Coleby and restore that at some point. However I need to walk before I can run.
Keith
October 9, 2018 at 8:35 am #29400 charlieKeymaster
Keith, I use Plus Gas penetrating oil, original WD40 is not that good as a penetrating oil, although they do now make a specific penetrating oil. A bit of gentle heat might help.
October 9, 2018 at 5:28 pm #29401 wristpinParticipant
When it comes to dismantling I’m a great believer in Plus Gas but diesel and heating oil (kerosene) are both good, particularly if item can be left in a tank to soak for a few days. A few contributors to American sites recommend home brewed potions involving automatic transmission fluid (ATF) and acetone.
I’m no lover of the original WD40 other that for what it was originally marketed for -Water Dispersal. As a friend says “the best thing about WD40 is their marketing and publicity, never mind the product”!October 9, 2018 at 5:39 pm #29402ssorthiekParticipantGents
Many thanks for your replies regarding well known (or well marketed) so called penetrating oil. I think it is worth me getting some Plus Gas first of all, especially for the magneto but certainly take on board the diesel idea.
I’m a little busy tonight but have started a “what I have done so far” write up. I need to take a few photos, hopefully someone will find this interesting.
Keith
October 9, 2018 at 9:42 pm #29403ssorthiekParticipantThe Coleby Junior is now dismantled. The engine and clutch housing has been separated, the clutch housing and the gearbox has been separated and the gearbox has now been stripped down. The next couple of posts will detail what I have done so far with a few pictures to help the descriptions.
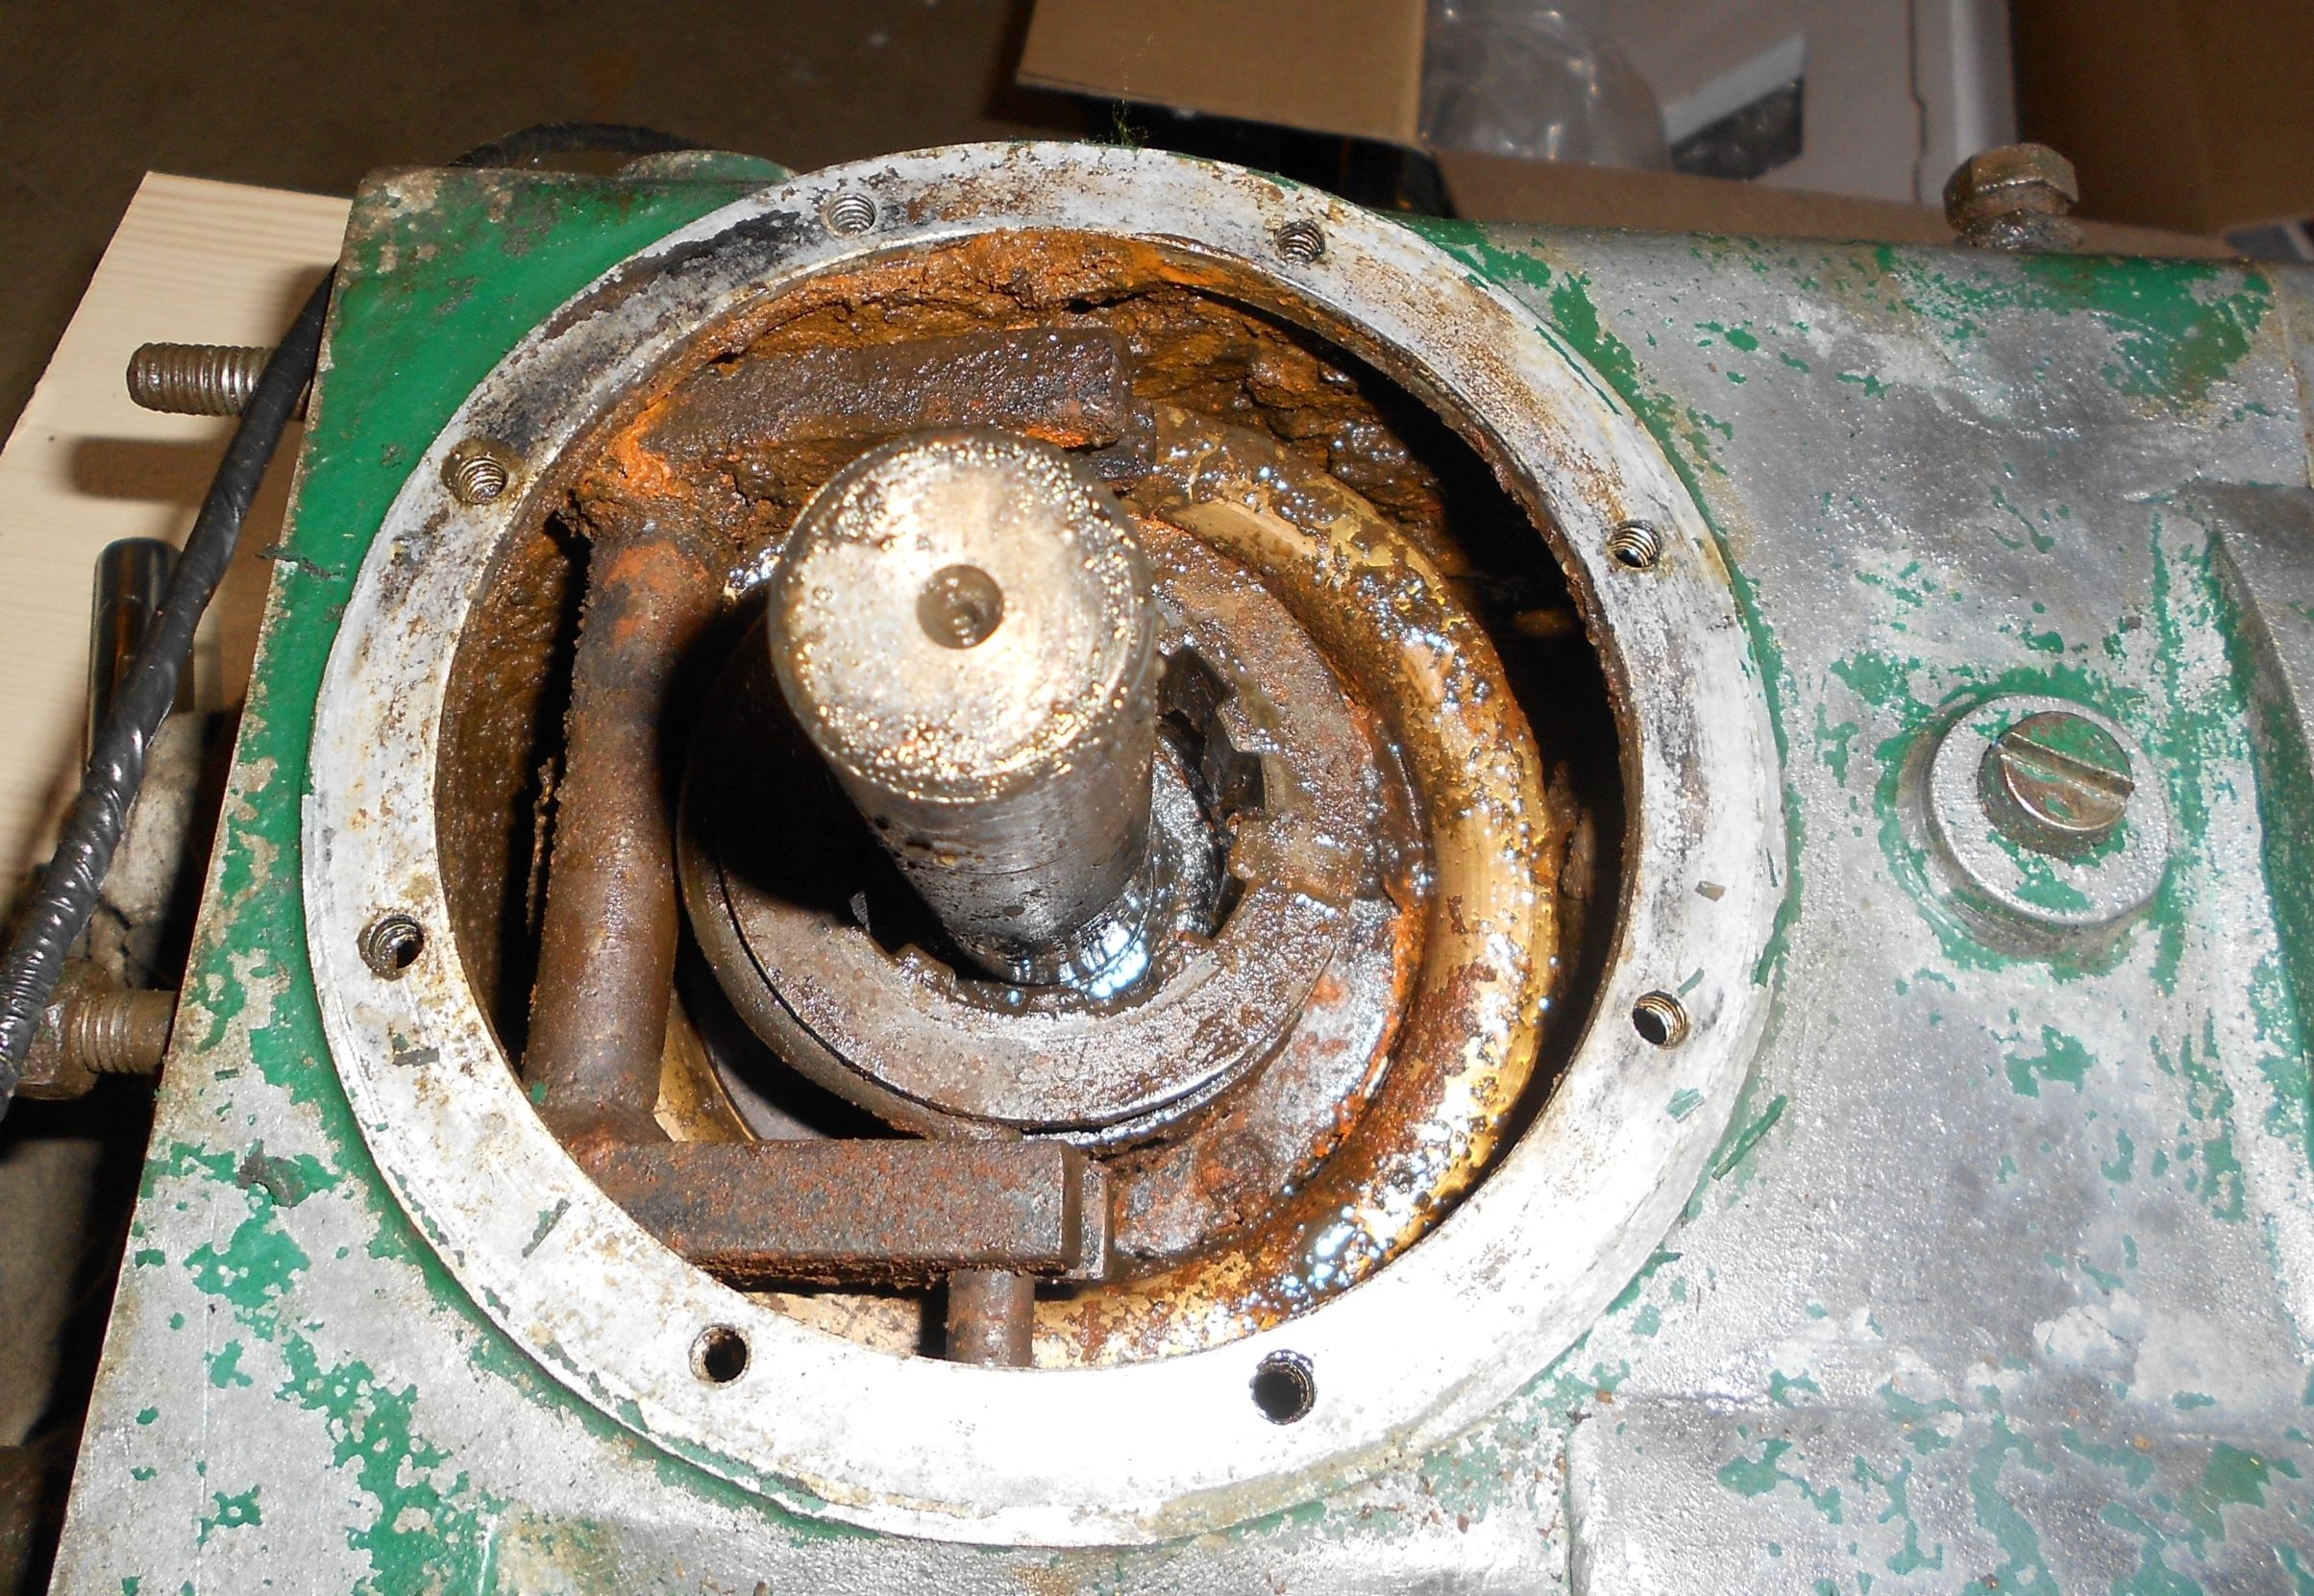
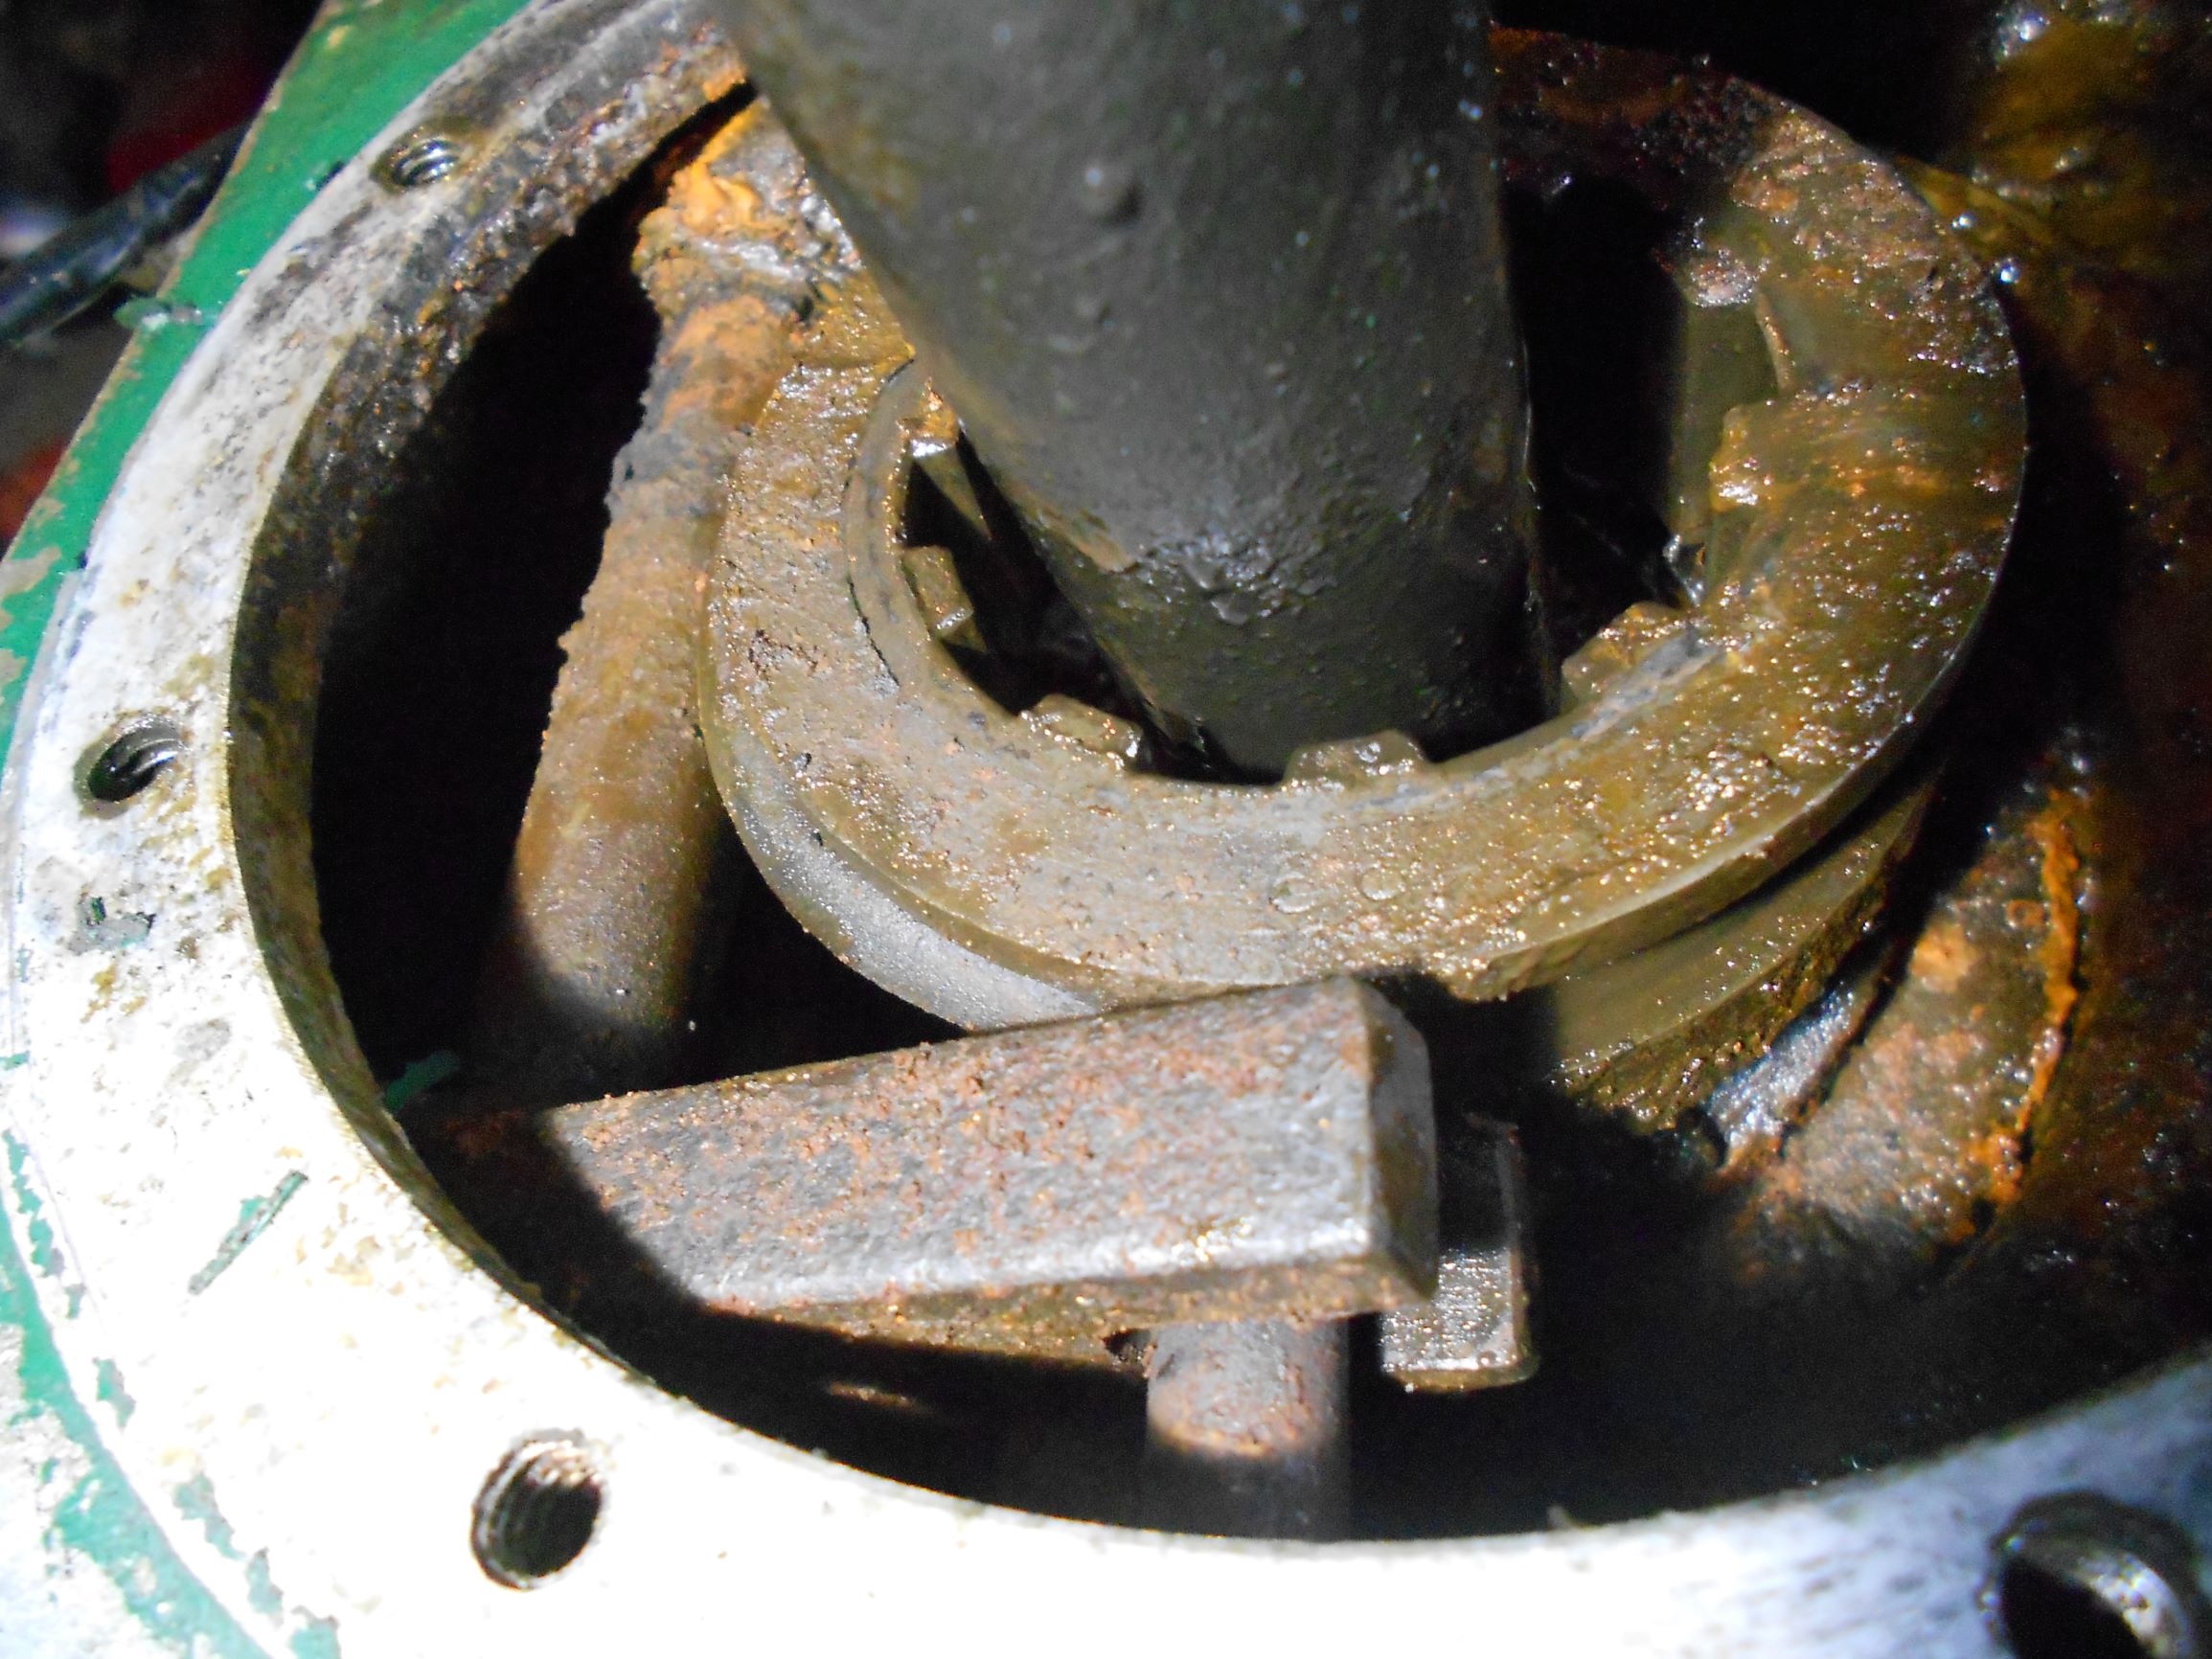
October 9, 2018 at 10:04 pm #29404ssorthiekParticipantGEARBOX
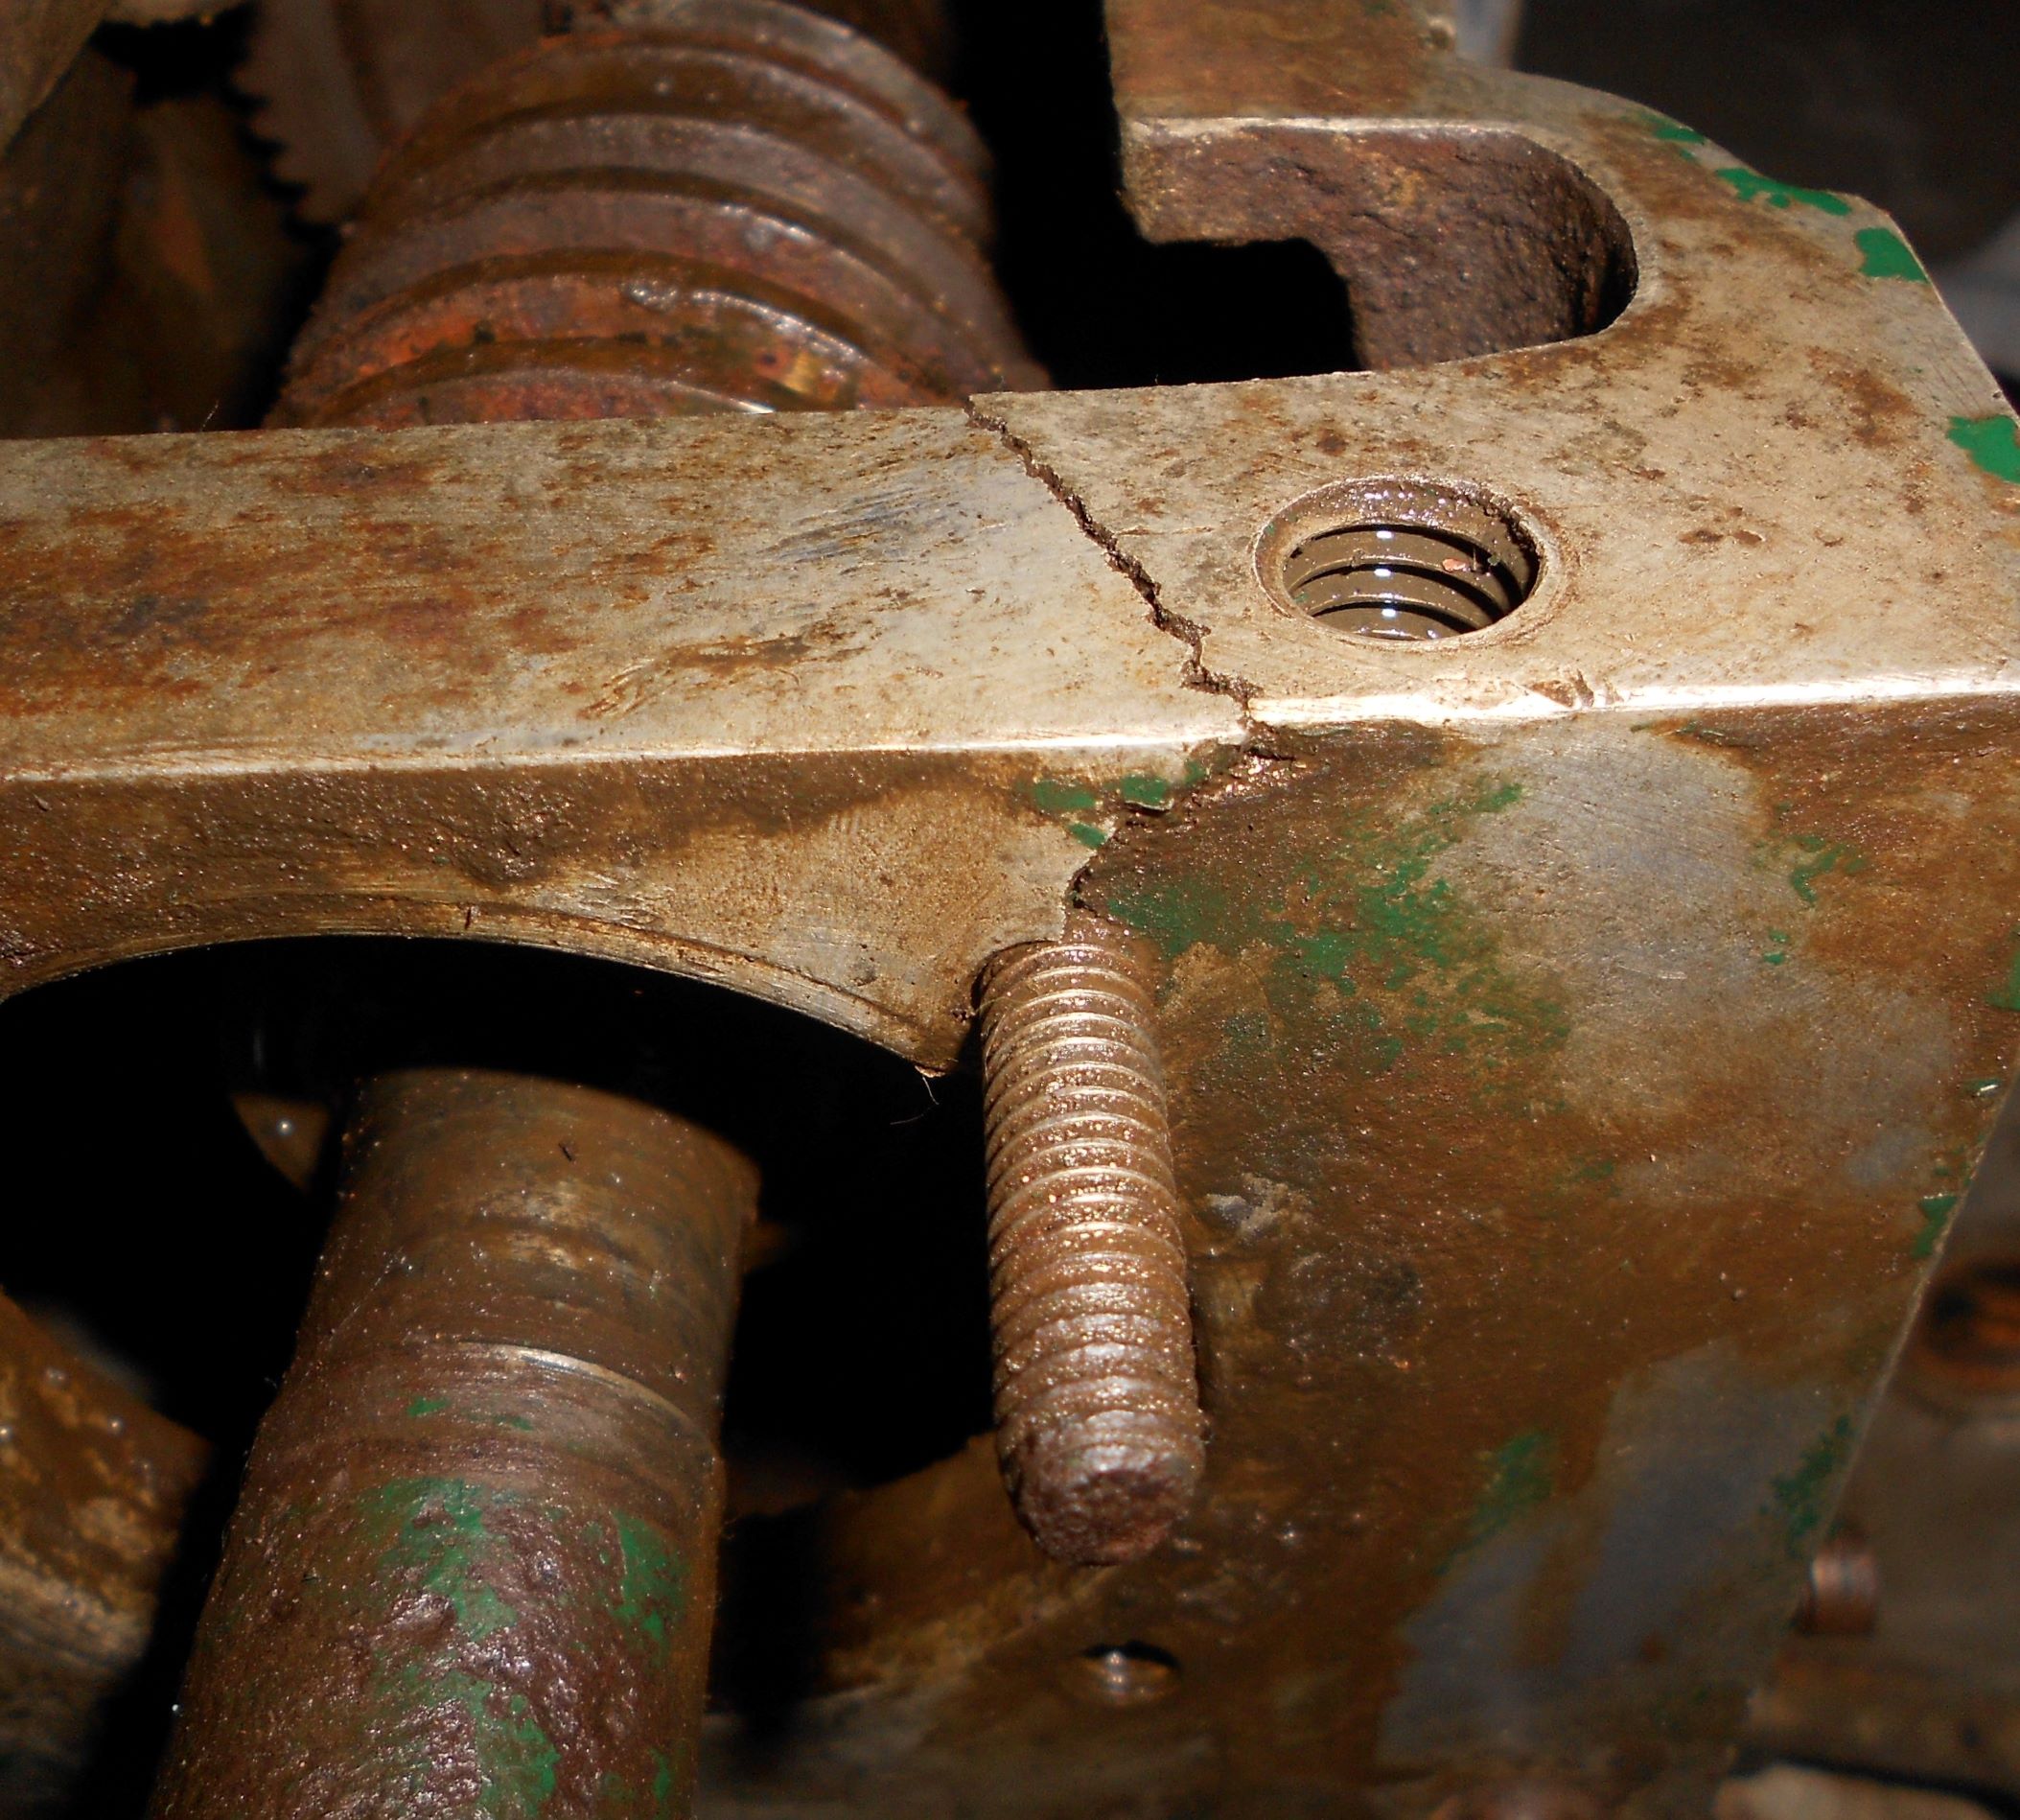
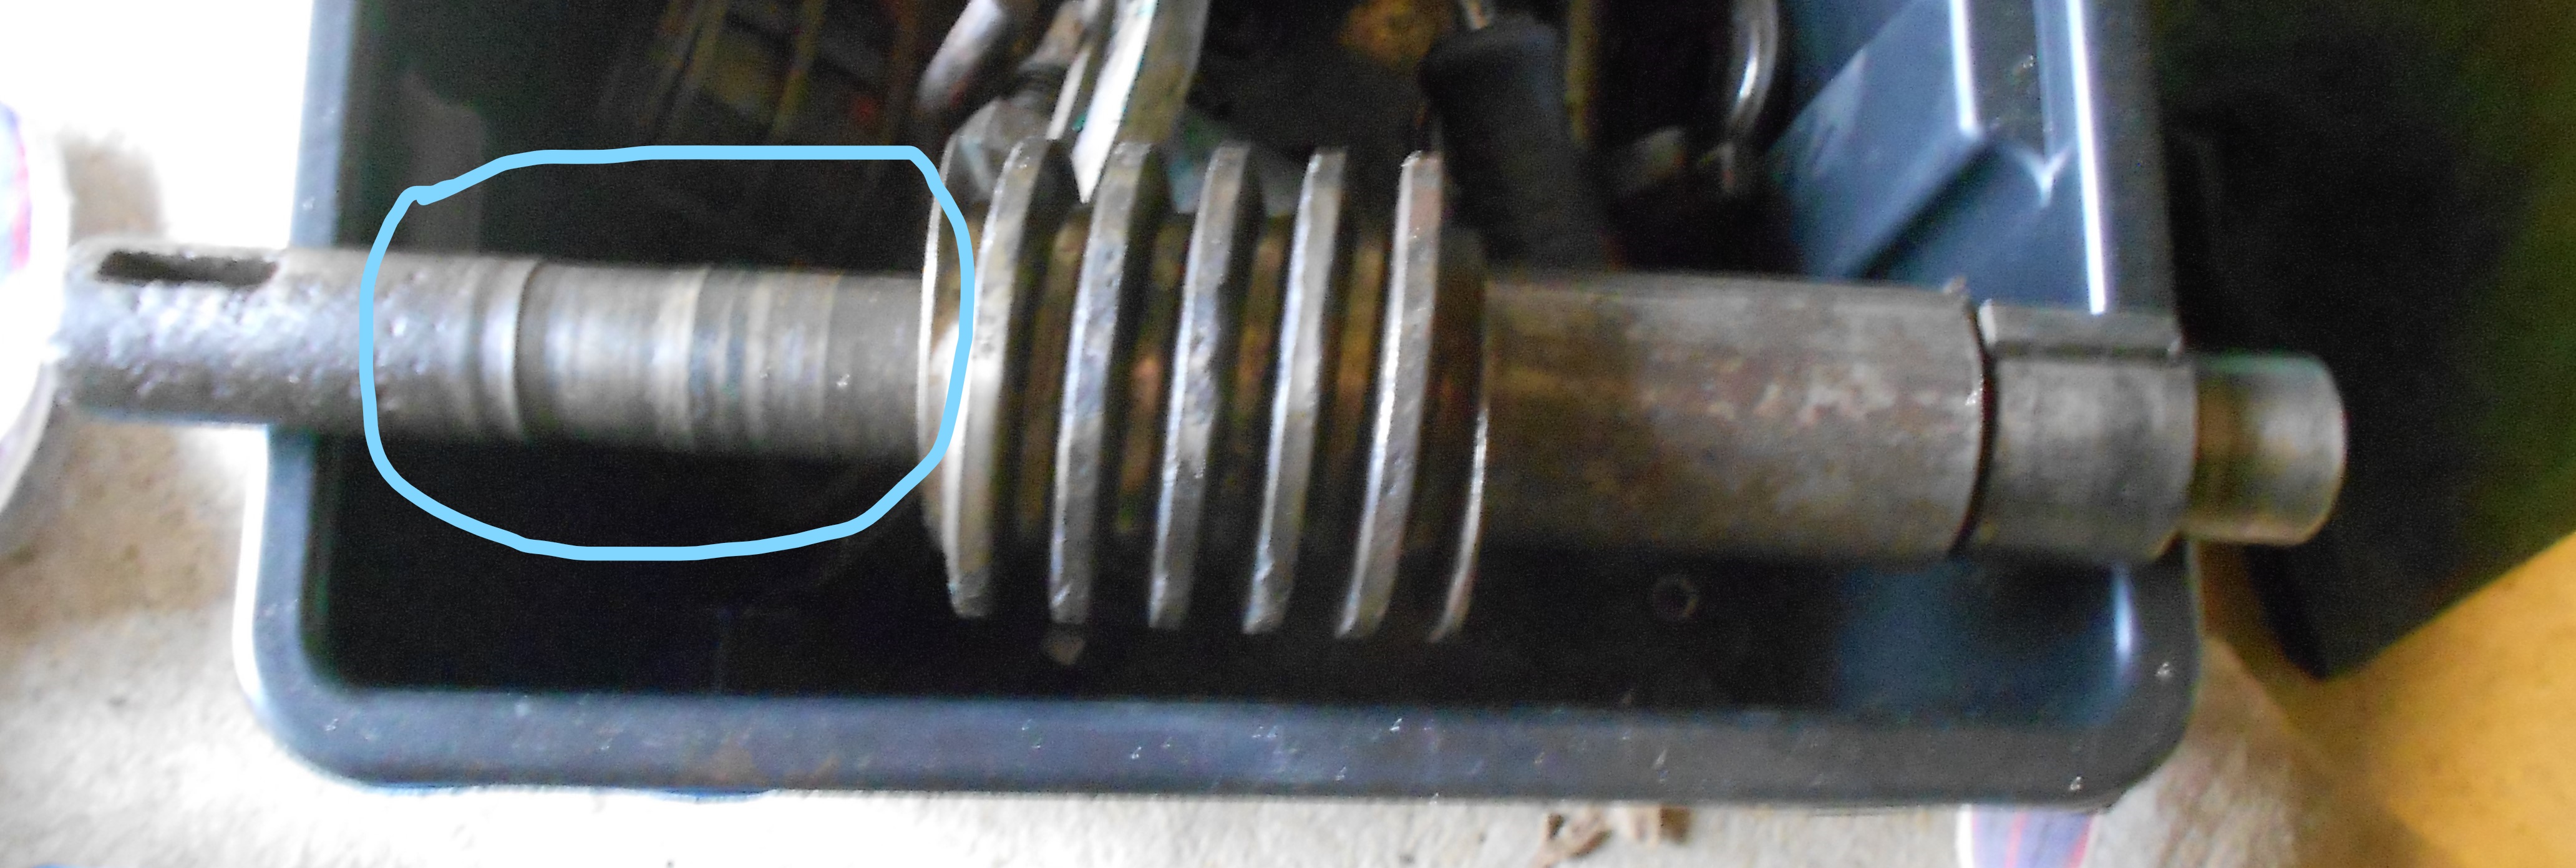
The gearbox is presenting some challenges. There is a large crack in the casing, but I believe I can get this welded. The shaft that the worm is on has worn to an unacceptable level. It would appear that the shaft was originally 25.4mm or good old 1” and has worn to 24.2mm or 0.950”. Can we stick to good old English measurements now the country has voted to come out of the EU? Incidentally, I have no leaning one way or another as to whether we should remain or leave the EU.
My idea at the moment is to turn the shaft down to 7/8” and then get someone to machine a collar 7/8” I/D and 1” O/D. There is a small issue with this approach since the shaft appears also to be a PTO and has a slot for a key but I suspect that I won’t be able to get any attachments for this machine that uses the PTO so this doesn’t matter too much if this is the case.
The worm is quite badly pitted through rust but hope that this won’t affect the operation.
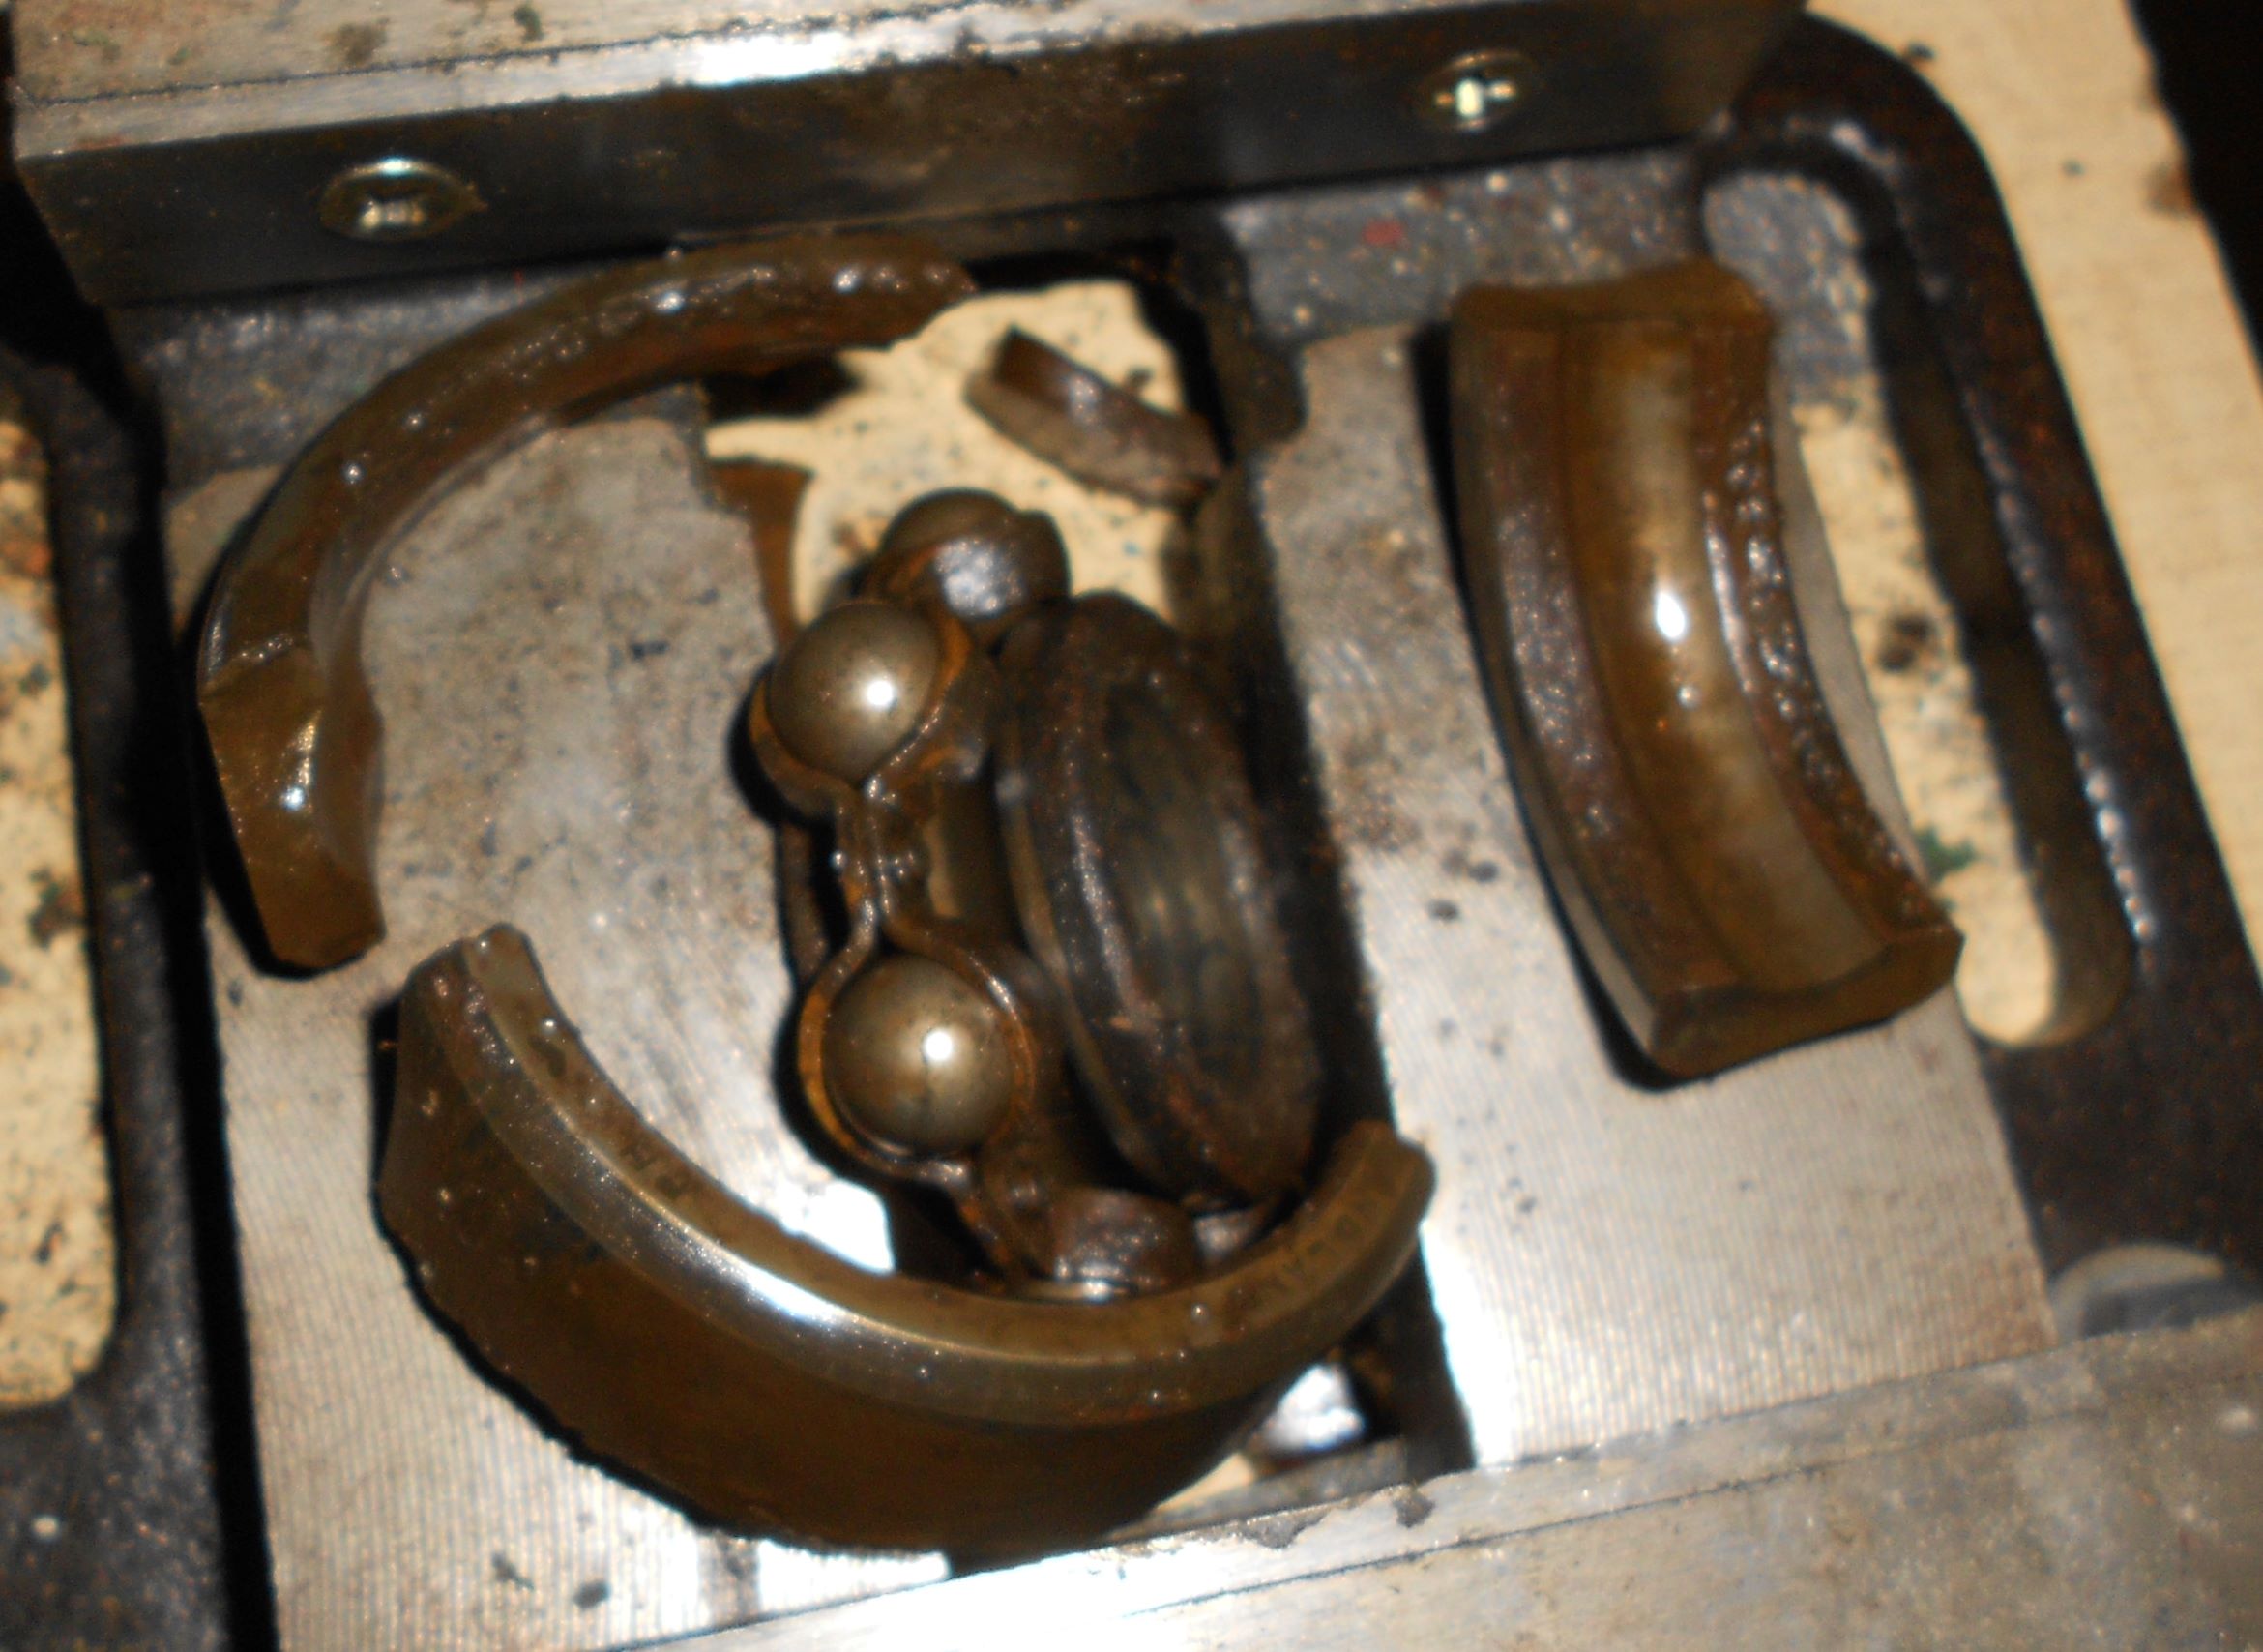
The next issue is getting two bearings out of the casing which sound like a bag of nails. To do the restoration justice, I need to remove both and if that is successful and easy enough there is a third that I would like to remove and replace which should then hopefully last another 70 years with very light use.
I also have and engagement mechanism for the wheels which is very worn, maybe just rusted away. Any advice on whether this can be repaired or remanufactured would be again much appreciated.
The gearbox oil was in a shocking state. It had emulsified and all that was left was a very thick sludge. I think I have managed to clean this up now and it is starting to look promising.
I think I have got all the bits that are supposed to be moving, moving.
I’ve also included a photo before I really started to attack the gearbox
Attachments:
October 10, 2018 at 5:38 pm #29410ssorthiekParticipantA few more photos of the gearbox before stripping down totally.
Attachments:
October 10, 2018 at 7:23 pm #29414 stuartParticipant
You could get get that worn shaft built up with weld and then turned back to std size in a lathe.Be cheaper than getting a complete new shaft made i think !
October 12, 2018 at 8:44 pm #29417ssorthiekParticipantThanks Stuart. I still like the idea of turning the shaft down and fitting a collar over top of it. Welding may well distort the shaft.
A bit of superglue (Loctite 480) should hold the shaft in place if I have a small clearance fit of a couple of thou.
If this is the route I finally take, I shall let you know how I get on and any problems I’ve had.
October 13, 2018 at 9:21 am #29418charlieKeymasterAn alternative to using loctite would be to have the collar a tight fit, then heat it before fitting and let it shrink onto shaft a bit like fitting metal tyres on wooden wagon wheels.
October 20, 2018 at 7:32 pm #29450ssorthiekParticipantThanks Charlie. I’ve thought about shrinking the collar onto the shaft and that still is possible. Initially I thought that heating the shaft would distort it but having thought about it for a while I only need to heat up the collar.
So yes, good call.
Keith
-
AuthorPosts


- You must be logged in to reply to this topic.