Home › Forums › The Main Forum Area › Projects › Trusty Steed Plough Rebuild
- This topic has 5 replies, 2 voices, and was last updated 6 years, 11 months ago by
 trusty220.
-
AuthorPosts
-
December 31, 2016 at 2:24 pm #23762
 trusty220Keymaster
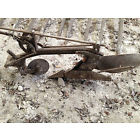
Earlier on this year I bought a Steed plough off the auction site. I didn’t pay much for it (luckily!) but thought it needed rescuing because of the rarity of it. I’m always being asked if I know of the whereabouts of one and I always reply that I don’t because once someone has bought one for their Steed they don’t tend to part with it.
When I picked this one up I thought that it would be a quick turnaround- that is, until I saw it. Apart from lying in a mixture of cow muck and concrete, someone had driven over it with a tractor and flattened it! No quick return here, then. Still, it came into the workshop a few weeks back and has taken me an age to strip down because it was so bad. I couldn’t remember how some of it came apart from when I did mine twenty years ago, so it was a re-learning experience for the most part.
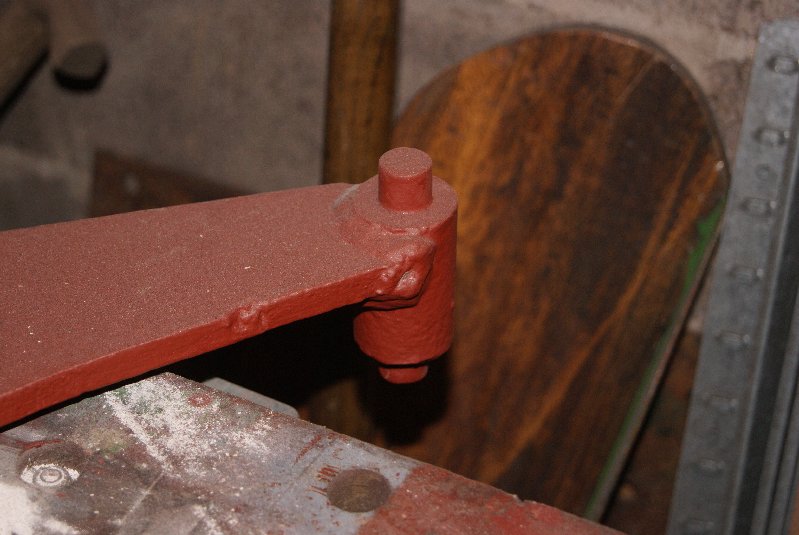
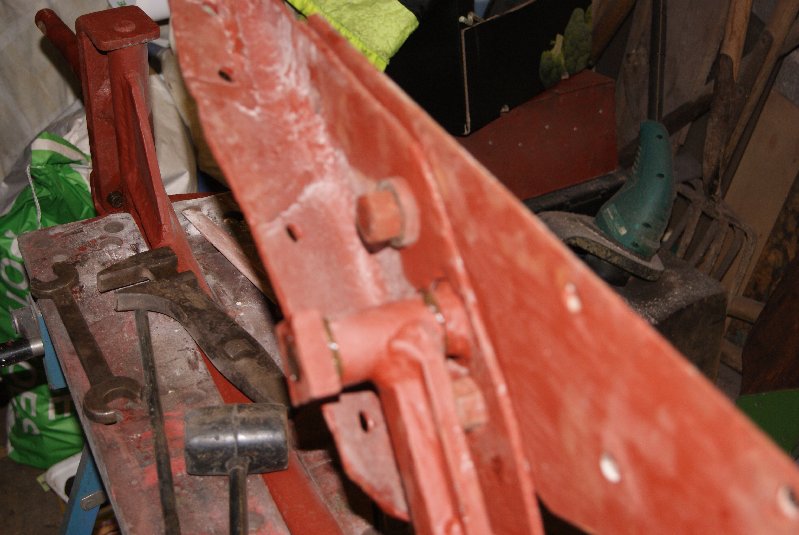
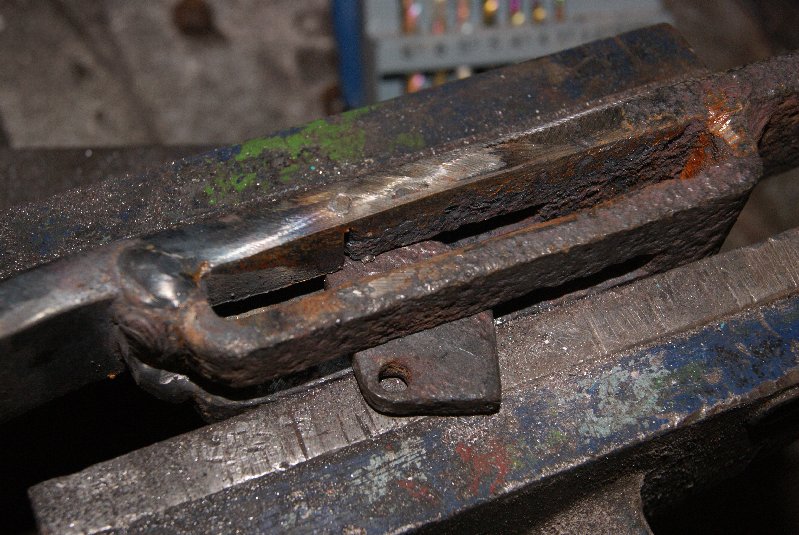
The one bit that flumoxed me for a while was the bottom of the leg where the shoe/breast assembly pivots. I was convinced that it was a separate dowel that went through the two pieces but it wouldn’t shift no matter how hot I got it, so I ended up grinding the sides off a couple of large nuts to dismantle the breast and found that the pivot is in one piece and welded to the bottom of the foot. You can see this in one of the pictures.
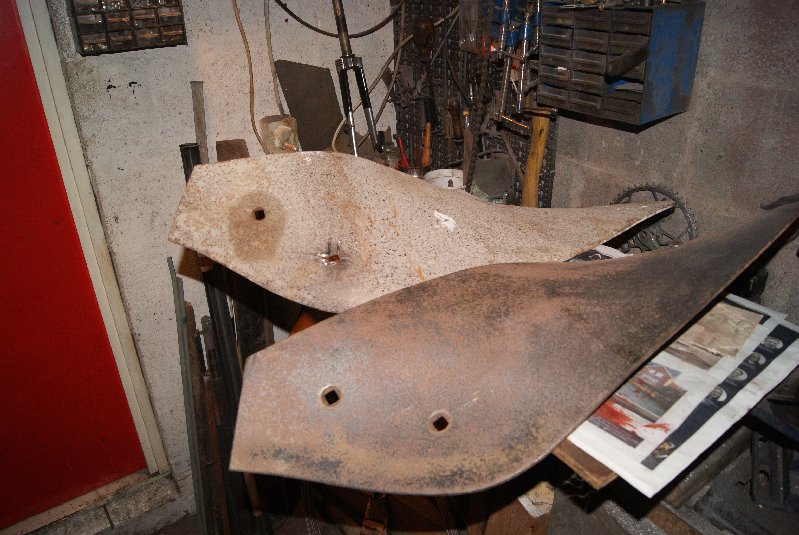
Included in the pictures is one that appeared on the auction site so it is a little blurred, but you can see what I mean by flattened when you compare the mouldboards in another picture.
Attachments:
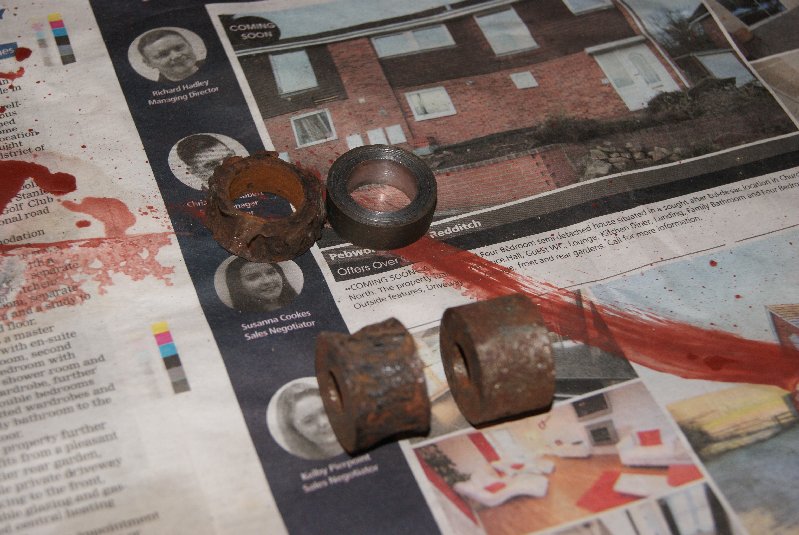
January 2, 2017 at 12:41 pm #23808trusty220KeymasterOnce dismantled I used the pickling process to kill the rust on all the small parts. If you have never done this before it is very worthwhile but takes a couple of weeks to do properly. Firstly I soak the parts in Brick & Patio Cleaner for a week (it is a dilute Sulphuric Acid, so you must do it where you have good ventilation and neighbours that don’t mind the smell of rotten eggs!) then put the parts into a bath of Bicarbonate of Soda for a week to neutralise the acid. It seems to be the second process that fetches the rust off, and if there is any left after the week it is easily removed with a wire wheel on the angle grinder. Generally the steel comes up shiny like new but needs a good clean to be ready for paint. One of the surprises that this brought up was that all of the round spacers seemed to have been almost eaten away with rust so I found myself turning up some new ones before I could re-start the restoration.
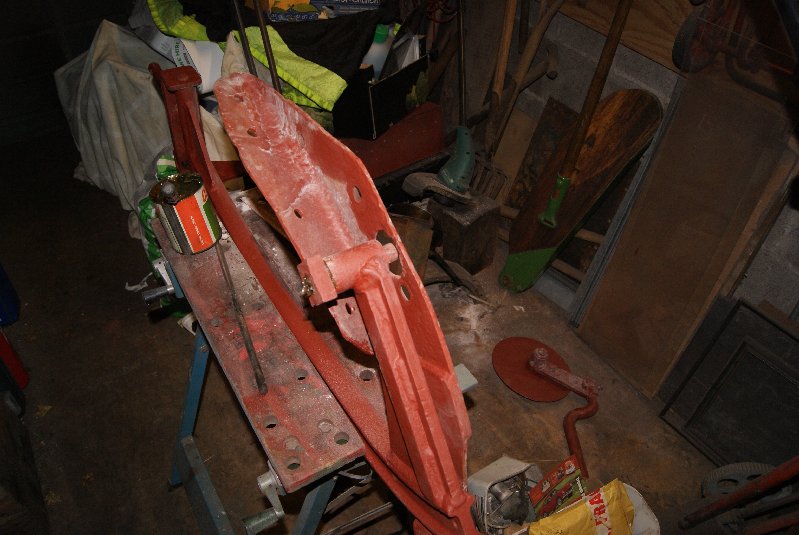
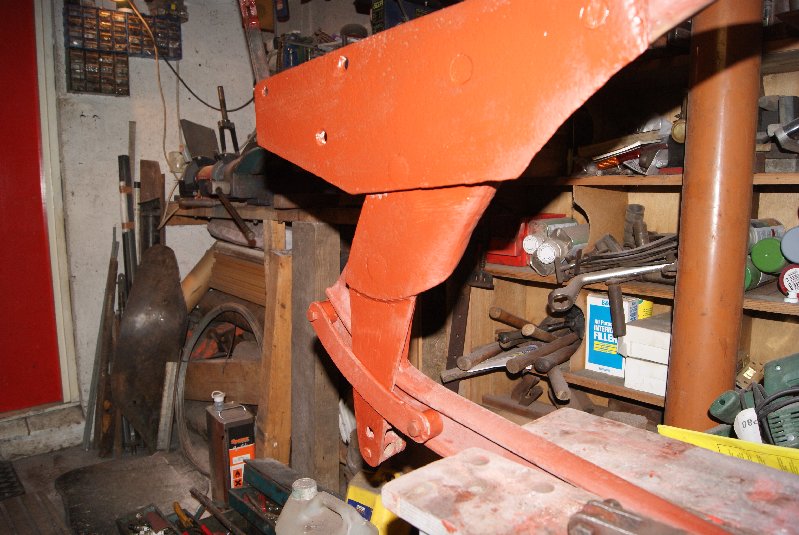
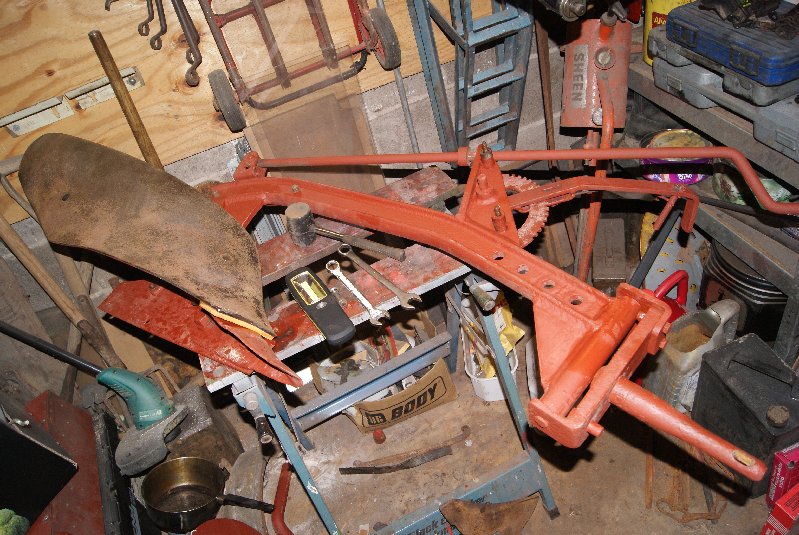
The most logical approach to building the plough up again was to fit the breast to the leg, then bolt the landslide to the breast so that the bottom pivot that I had all of the trouble with could be looked at. Once this was done there is a plate on the side of the beam that limits the plough’s travel that needed to be re-fitted with the first of the new spacers. That completed the back end of the beam for a while whilst I fettle the replacement mouldboard and source a new plough point.
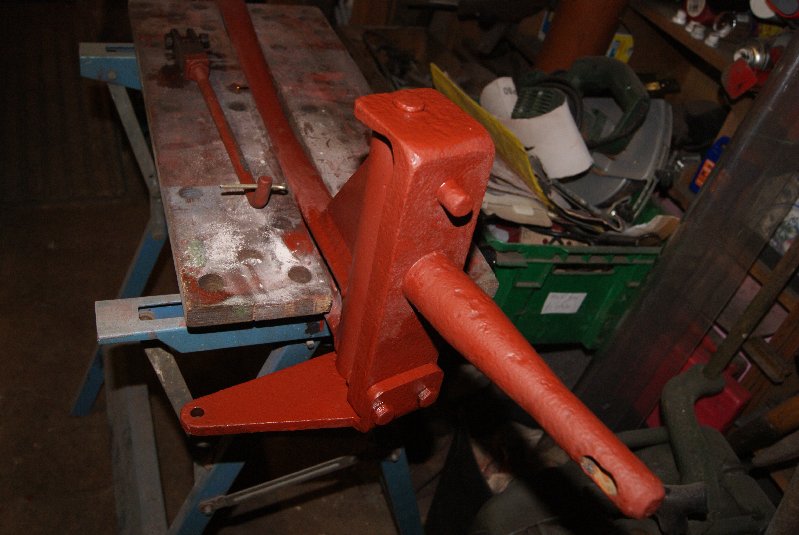
The front of the beam has a similar arrangement to the plough pivot but it works in a vertical plane. The purpose of it is to adjust the furrow width when it is fitted to the tractor, and it also carries the special Trusty Steed fitting to attach it to the drawbar. While the paint was wet at the back I thought it best to re-assemble this as well so that when I turn it right way up again I can re-mount the adjusting levers and connect them.
That’s as far as I got today, so I’ll leave it to dry until I can find time to have another bash.
Attachments:
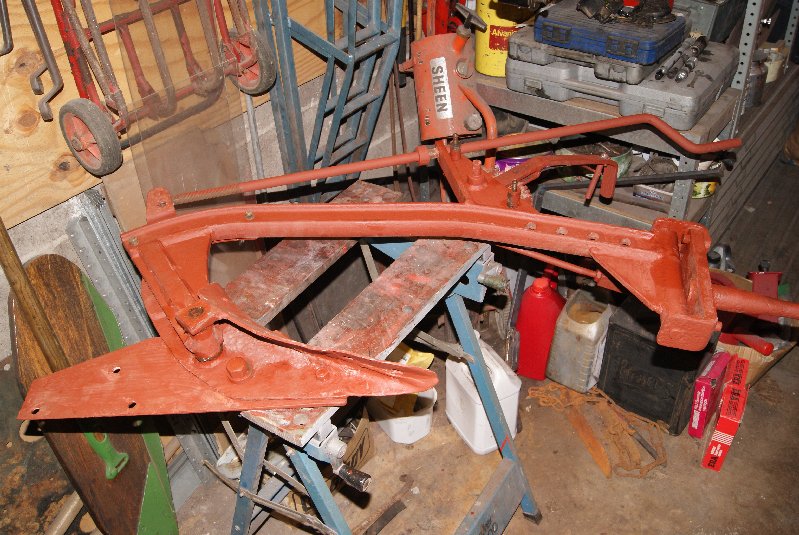
February 5, 2017 at 3:07 pm #24302trusty220KeymasterIt’s been a little chilly in the workshop of late so I didn’t relish doing anything on the plough until it warmed up a little. Enthusiasm got the better of me though, so I carried on with the furrow width lever and crescent, replacing the spacers with new ones that I turned up.
On the other side of the beam there is (or rather, should be) a longer lever that serves as a quick adjustment to the plough depth. It’s basically the same as the furrow width lever but longer, and the crescent that it works on only has one notch instead of the dozen or so that the other has. It’s sole purpose is to help lift the plough out of the ground at the end of the furrow so that the driver is not having to lift the weight of soil on the mouldboard as well as the plough. Approximately two feet from the end of the furrow the driver would pull the lever towards him so that it latches in the forward position; this gives the plough a nose up attitude so that if it is pulled forwards it will break surface. The driver then lifts the plough off the ground, turns the tractor to line up with the next furrow, unlatches the lever to return the plough to it’s normal attitude and then drops the plough on the ground to begin the next furrow. Simple, only somebody had broken the lever off and the whole top half was missing.
Off to Metal Supermarket with my shopping list, then weld up the new bar to form the top section. It only took a few moments with the oxy-acetelene to put two bends into it, drill a hole and make a lever to work the latch. That’s the beauty of a lot of “our” machinery- when you look at it you can generally tell how it’s made and you can reproduce it using a few tools that you can find in the garage.
The actuating bar was attached at the bottom of the new lever and adjusted for length, the latches adjusted on the levers and a well-earned bottle of beer to celebrate.
I had a spare mouldboard in the workshop so I put this on as well. This is where I started to struggle, because the bolts are special. Some have a reverse cone with one key and the others that fit the point and the board have a reverse cone with a square at the base.
I modified some coachbolts to give me a countersunk square head, and found some Kverneland plough bolts for the conical head with one key (they come with two keys, but I filed one off). If anyone knows of a source of these highly specialised bolts I would be grateful to know.
Attachments:
February 5, 2017 at 6:27 pm #24309 charlieKeymaster
Have you tried Westlake Plough parts, they are usually at Tractor World.
February 5, 2017 at 9:43 pm #24324trusty220KeymasterAn excellent idea, Pike. I wondered who was going to be the first to suggest that!
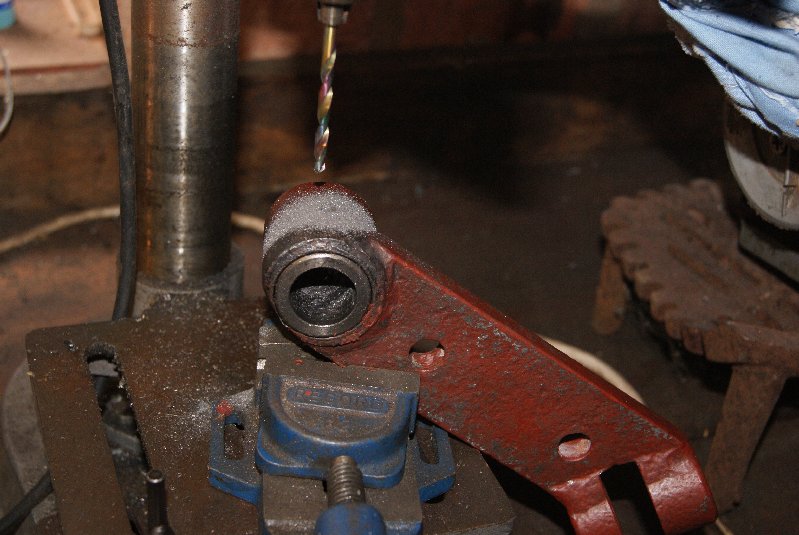
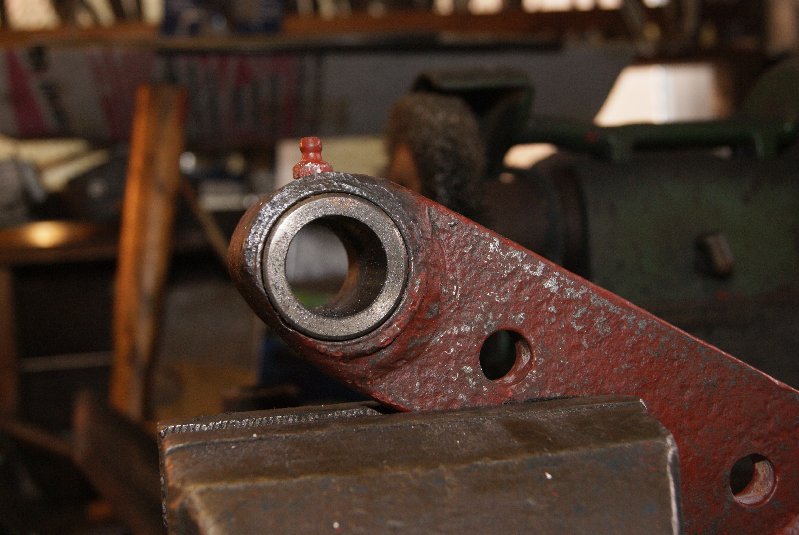
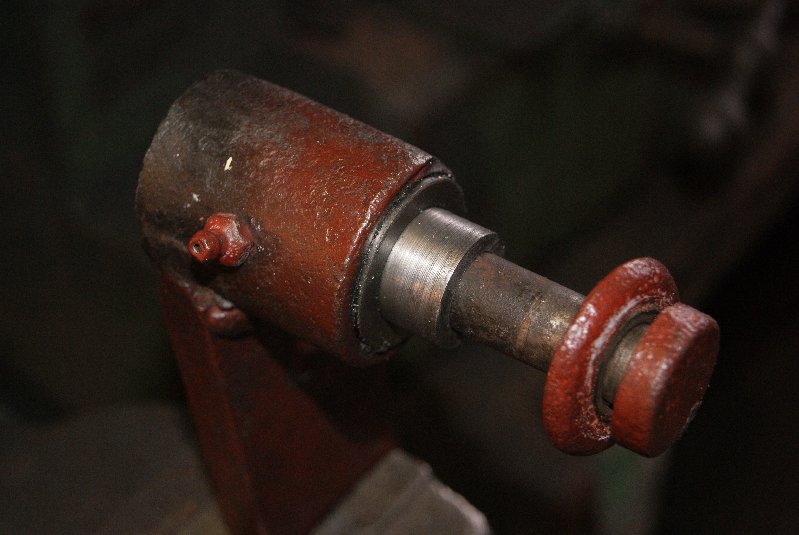
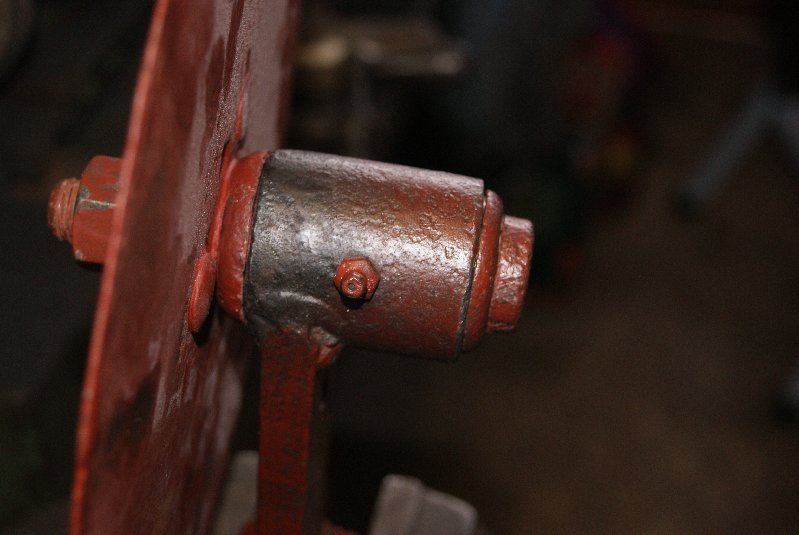
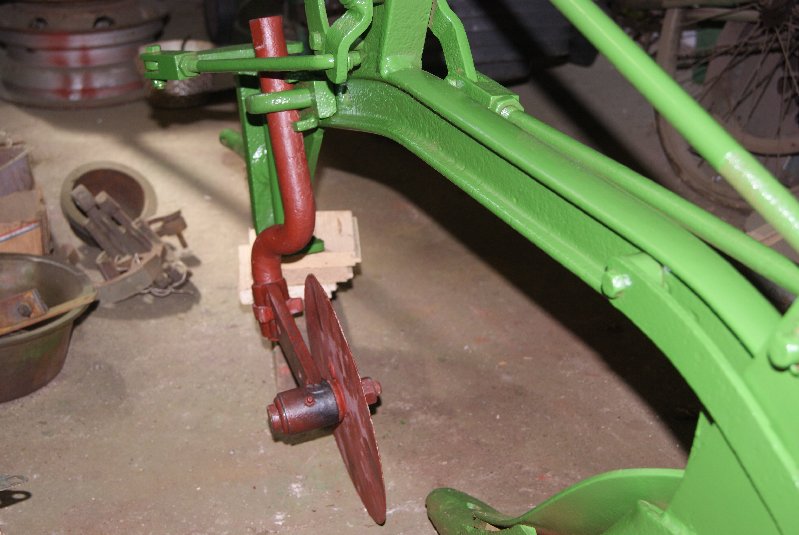
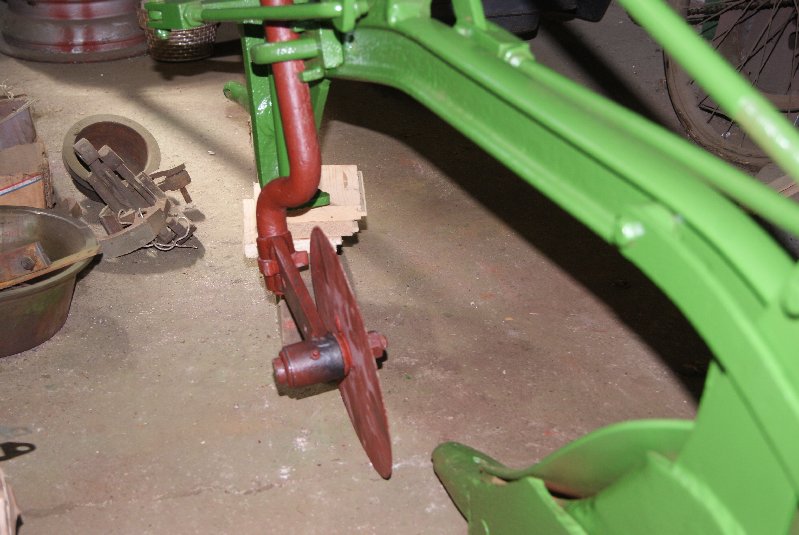
May 14, 2017 at 6:33 pm #25220trusty220KeymasterHaving restored most of the plough the one part that I was having trouble with was the disc coulter. The bearing that it runs in is very crude, with a cast iron sleeve forming the outer part and a mild steel spacer forming the inner.
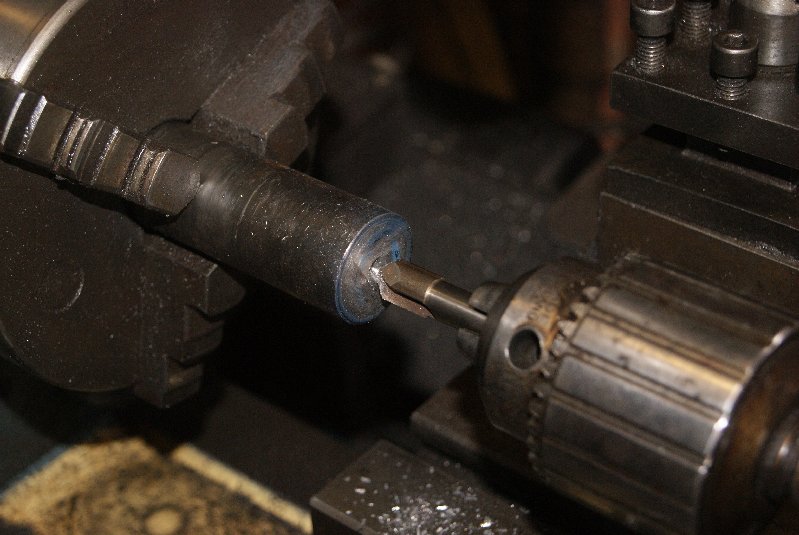
My first thought was to enlarge the hole in the cast iron sleeve to take out the wear, then make up another mild steel spacer to fit the new hole. This did not prove successful and even a 1″ reamer did not take out all of the wear, so it was back to the drawing board.
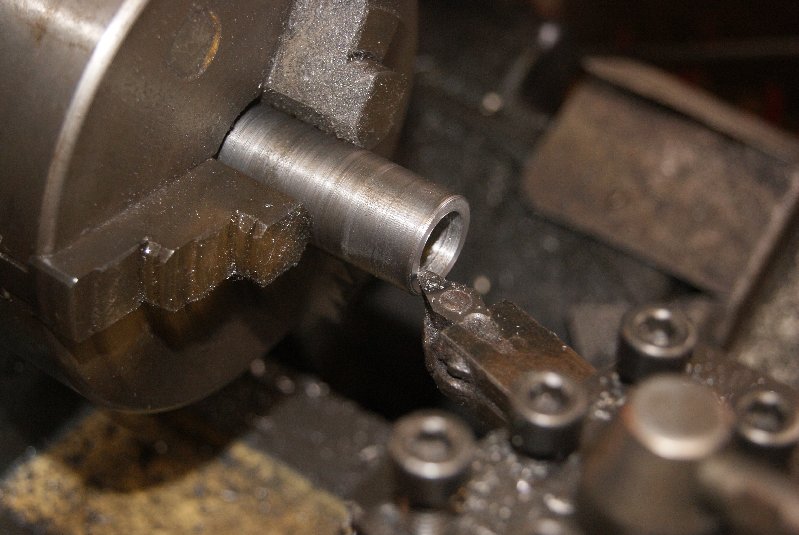
I pressed out the worn cast iron sleeve from it’s carrier and made another using a weight from a sash window which was cast iron. This was then pressed into the original carrier and a new spacer tube made up to form the inner part of the bearing. A hole was drilled through the cast iron sleeve under the grease nipple hole so that it could be greased, then the whole lot was assembled and fitted to the plough.
Sounds simple enough, but it took me two days to make the cast iron sleeve because it was a difficult material to work with and I had to keep changing speeds on the lathe so that I didn’t burn out drills.
Anyway, the work is now finished and ready for paint. Nearly done!Attachments:
-
AuthorPosts


- You must be logged in to reply to this topic.