Home › Forums › The Main Forum Area › Projects › Trusty Road Roller Restoration
- This topic has 6 replies, 3 voices, and was last updated 6 years, 6 months ago by
 trusty220.
-
AuthorPosts
-
September 27, 2017 at 7:48 pm #26627
 trusty220Keymaster
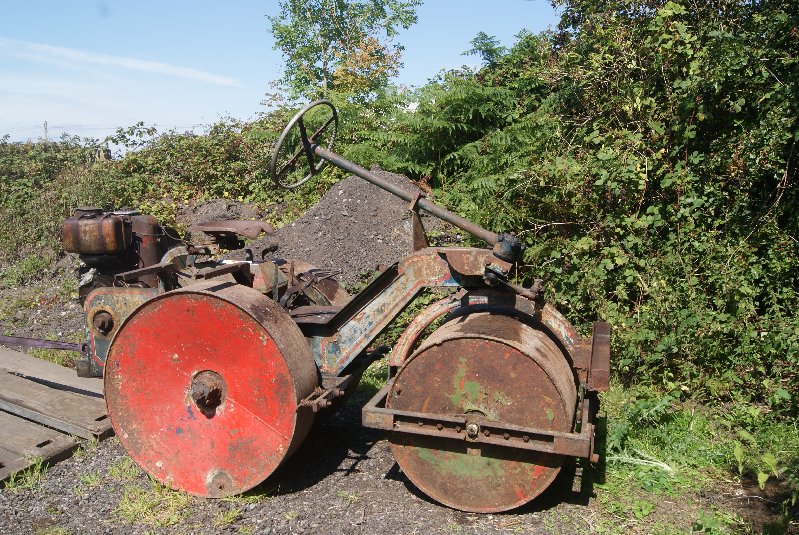
Some of you may have noticed that I had a rather unusual birthday present off Mrs. Geoff this year. It was something that I’ve wanted for a long time, even to the extent that I put a “Wanted” advert in some of the major tractor magazines, but these proved to be a complete waste of time. Imagine my surprise when one turns up that’s been within five miles of where I’m living for the last twenty years at least. I couldn’t get the owner to sell it to me, but Ruth is obviously more persistent than I am and it is now parked up awaiting TLC at the farm.
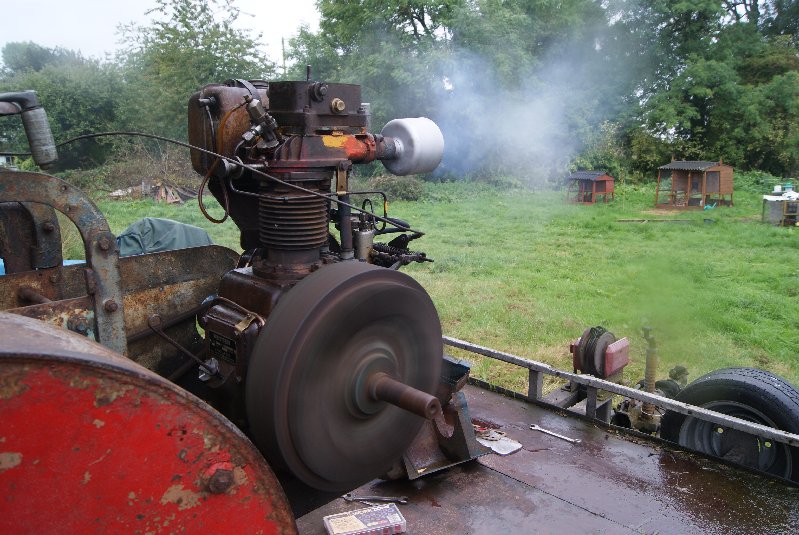
The priority is to get the engine running properly. At present it has a Petter AVA1 air-cooled diesel which will only start on Easy Start and runs very erratically, almost as if it is running on “Excess Fuel” which is a cold-starting aid on some diesels. If you can’t imagine what it sounds like, imagine a petrol engine running on full choke when it’s warm; it sounds strangled and choked up. Now multiply the volume times ten because there is no exhaust on it and it is seriously bad for the environment!
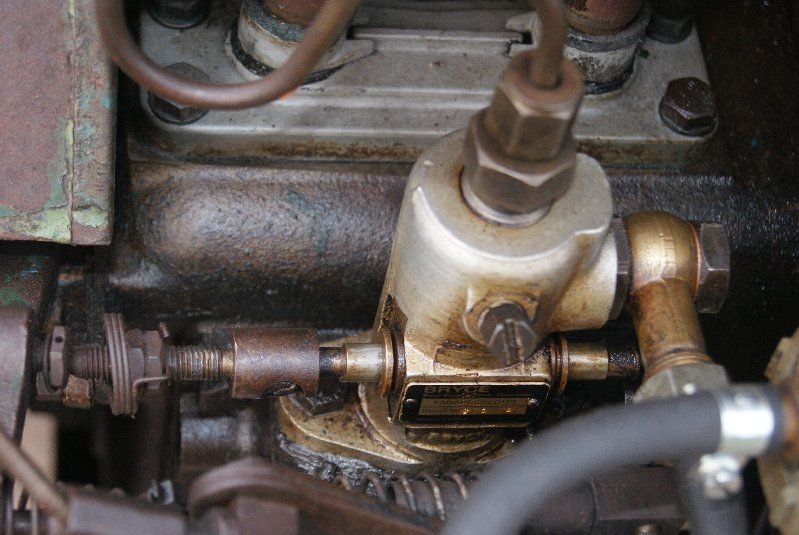
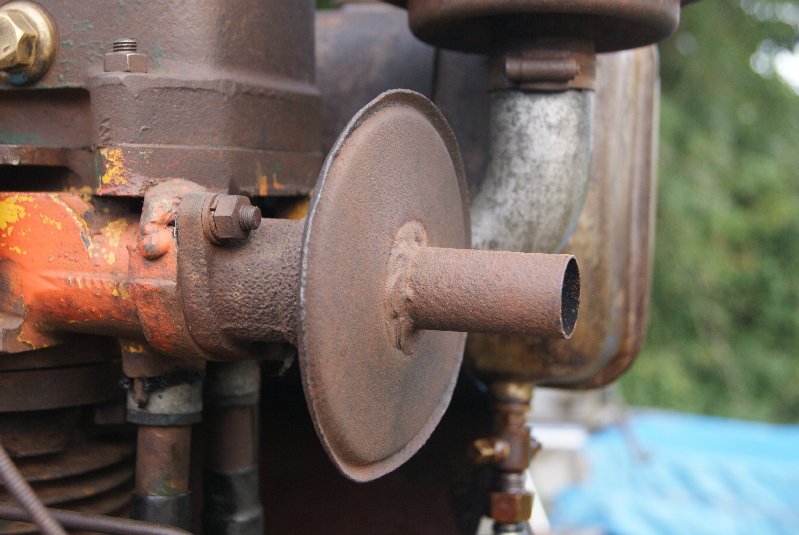
First job was to remove the air cowlings to see what was underneath and to get to the injector. Once removed, the injector was re-attached to the pipe but facing away from the engine (and me!) whilst I turned the engine over with the decompressor lever open. Three solid squirts came out every time it triggered- this isn’t good because the fuel should be atomised in the cylinder so that it burns evenly, and steady streams just don’t show enough fuel surface area to the compressed gas in the cylinder to ignite.
Droitwich Diesels reconditioned the injector for me; for £30 I got a complete service on it and a new nozzle, so now when it fires I’ve got lots of lovely diesel mist coming out instead of solid streams. A little bit of oil down the inlet manifold to help the compression and it started first time on diesel. I still think the pump is playing up, either that or the timing is out, because the running is still erratic and accompanied by clouds of white smoke. Still, I’m getting somewhere with it but now it’s started raining and it looks like the Winter’s coming.
Watch this space to see if I can overcome the running problems, or shall I just buy another engine that runs? It’s tempting, but not yet!
Attachments:
September 27, 2017 at 9:13 pm #26637 charlieKeymaster
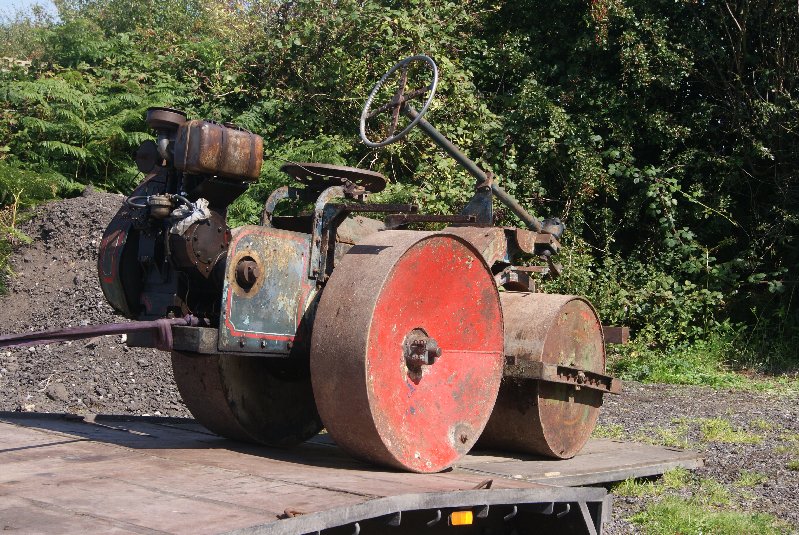
Good to see it running. Is that the original paint work?
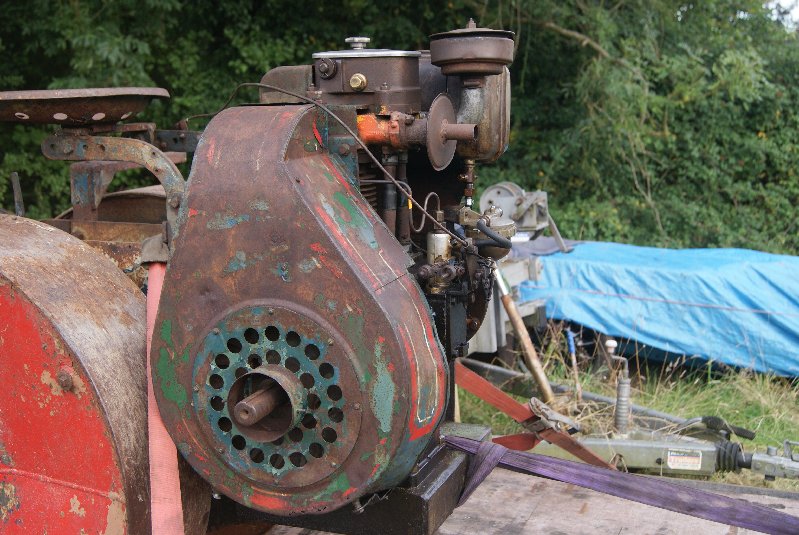
September 27, 2017 at 9:19 pm #26638trusty220KeymasterThe paintwork is definitely not the factory finish, but the more I look at it the more it grows on me. If I can get the engine running properly I will take it around the shows next year and ask spectators what they think- do I strip it off completely and return it to glossy green with red wheels, or do I practice my signwriting skills and try to replicate the last owner’s decoration?
September 27, 2017 at 9:31 pm #26639 vhgmcbuddyMember
Pleased to see you’ve made some progress. I don’t know how it sounds, but would it improve with driving about. Give it a bit of a blow out. Be nice if you can sort this engine. I’m hopping for a dry October. Owen.
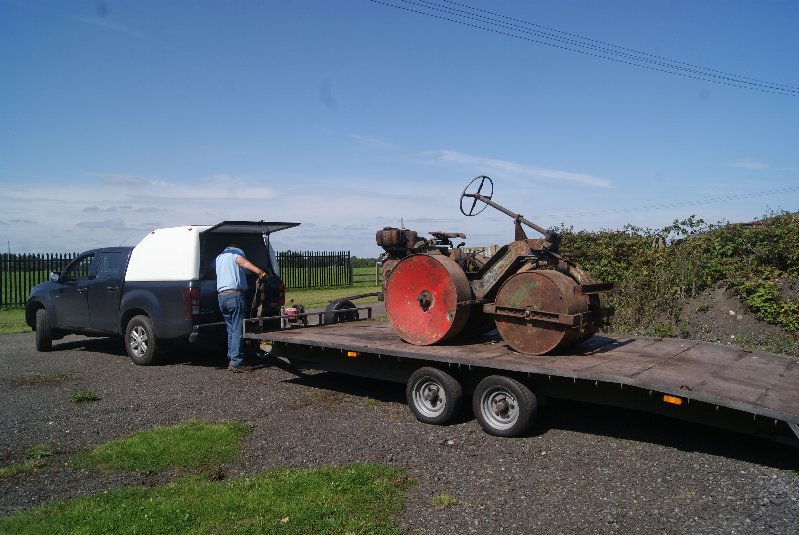
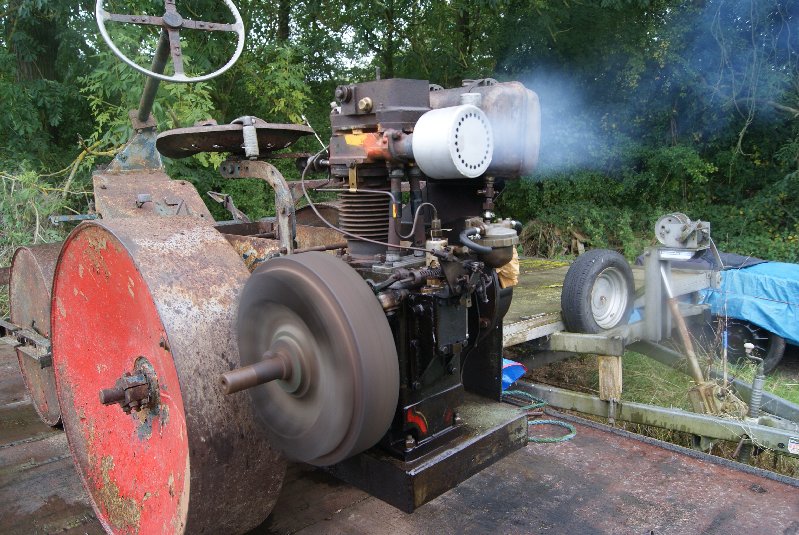
September 28, 2017 at 7:36 am #26640trusty220KeymasterI’m hoping for a dry October as well, but I do have a cunning plan up my sleeve if it turns out wet. Unfortunately the running doesn’t improve when you drive it- what you can’t see (and I didn’t mention) is that I have unloaded the roller from the trailer because it was bowing the boards. I didn’t fancy pushing it so I drove it off the trailer and parked it up in a corner; it does feel as if the roughness wants to clear occasionally, then it comes back so I think the next stage will be to take the pump off and get it looked at. Whilst that’s away I will go through the fuel system from top to toe to eliminate any air leaks and generally clean it out.
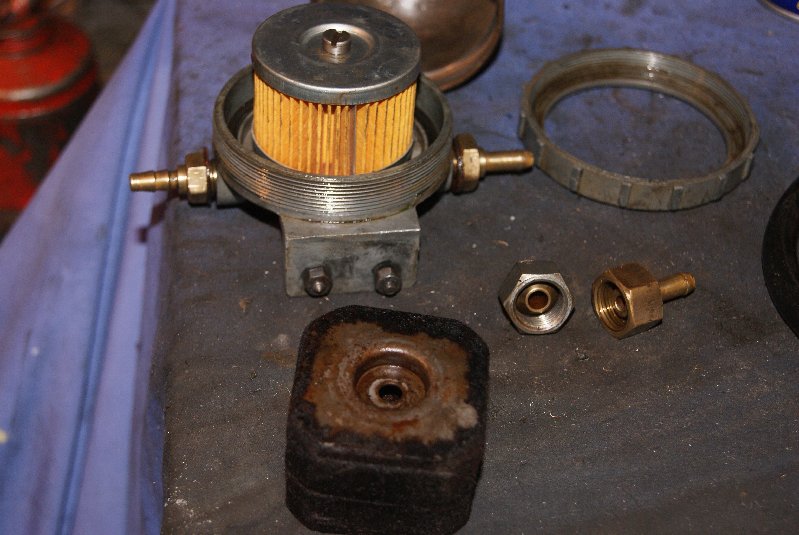
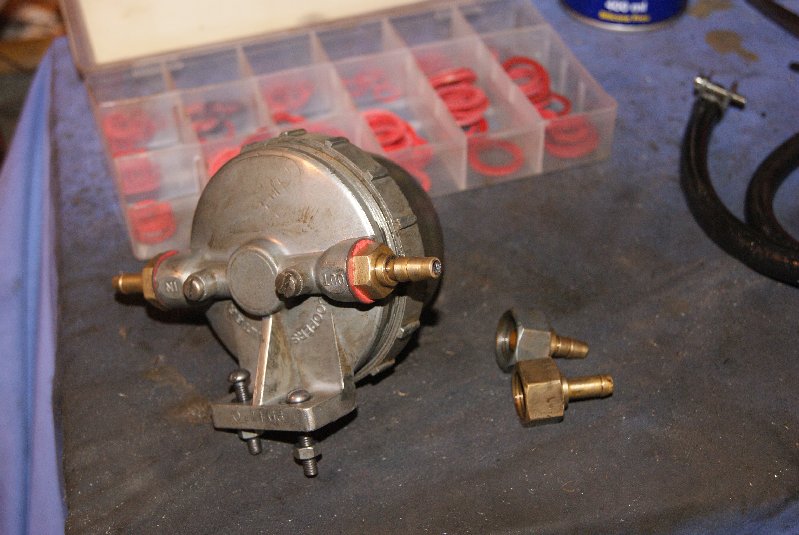
October 1, 2017 at 4:58 pm #26660trusty220KeymasterIn between showers I’ve now dismantled the whole fuel system and I’m slowly going through it stage by stage. I will let the experts at Droitwich do the pump so that I don’t waste any time messing it up then doing it again, but the simple parts like the tank, fuel lines and the filter assembly I’m quite happy to do myself. It looks like it’s had a long career so far as everything seems to be held on with odd bolts (one of my pet hates!), so, if nothing else, I will return it to the proper ones so that I don’t have the same problems dismantling it next time.
One unusual thing that I’ve found so far is the fuel filter which could be the original one, it looks so old! It is made up of felt and is square-shaped; the book that I have lists the filter as being circular and made from corrugated paper, which is the one that I have now put in. As with everything to do with fuel systems, cleanliness is always the uppermost consideration so the fuel filter is very important. How on earth this engine ran I don’t know because there is so much dirt and rust everywhere it’s a miracle it even started.
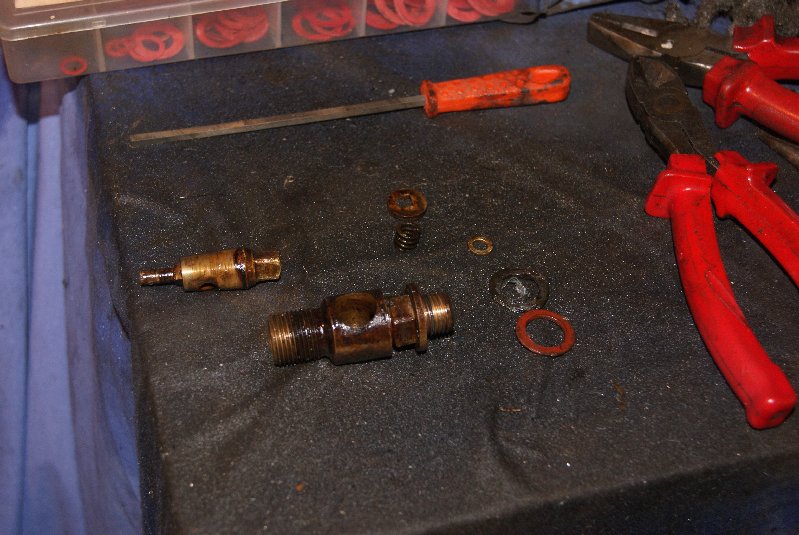
The next item for attention is the fuel tap which seems to have had the knob broken off. It shouldn’t take too long to fashion a new knob and solder it onto the stub, but Ruth’s playing her face about the smell so I’m going to have to stop for tonight!
Hopefully by next weekend I’ll be in a position to start rebuilding the fuel system and testing it, so keep your fingers crossed!
Attachments:
October 9, 2017 at 7:05 pm #26763trusty220KeymasterSorry for the delay but I thought there was a catch in my birthday present- I’ve had to build another arc for the chickens! Female cunning got me bang to rights yet again; will I never learn?
Anyway, I have now reconstructed the fuel tap; it’s a large brass one, much bigger than anything that I’ve come across with the JAP engines, so I had to repair it rather than replace. There’s no reason why I shouldn’t be able to make it serviceable again, so I dismantled it, soldered a new knob onto the moving part and, because it’s a conical tap that relies on being a snug fit in the hole, I lapped the two parts together using fine valve lapping compound. I’ve tried blowing down it when it’s closed and there doesn’t seem to be any leakage, so I think I’ve sorted that out.
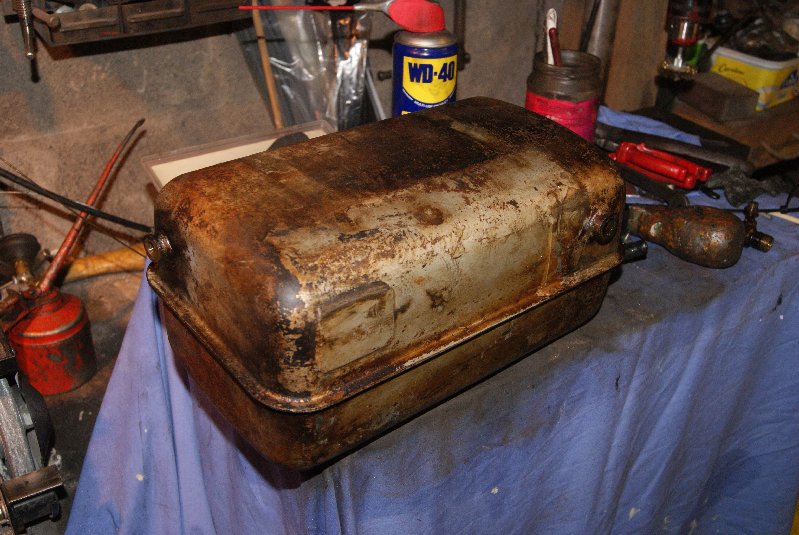
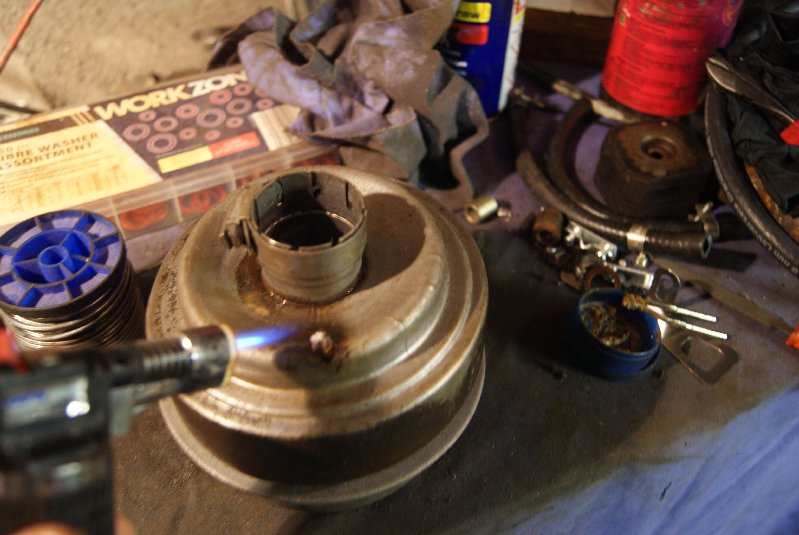
Whilst doing the fiddly bits I put all the larger bits in the acid tank to soak. Have you ever wished that you hadn’t done something? This was just the case and it seems that everything that is supposed to hold liquid has got a hole in it; the diesel tank has some pinholes along the seam underneath and the oil bath air filter has a pin hole as well.
The air filter was stripped with wire wool and the hole cleaned up. I decided that solder was about the easiest and most permanent solution to this hole, so the blowtorch came out and in no time at all the hole was filled. All I have to do now is to straighten the centre tube and paint it, then move on to the tank. That will be tomorrow’s job because I’ll give it a blast with the steam cleaner at work.
Attachments:
-
AuthorPosts


- You must be logged in to reply to this topic.