Home › Forums › The Main Forum Area › Projects › Series 1 Rotary Hoes Gem, The Sequel!
- This topic has 18 replies, 2 voices, and was last updated 10 years, 4 months ago by
 charlie.
-
AuthorPosts
-
November 9, 2013 at 10:55 pm #2718
 darmic1Participant
Well here goes, my first post on the new forum with pictures…….
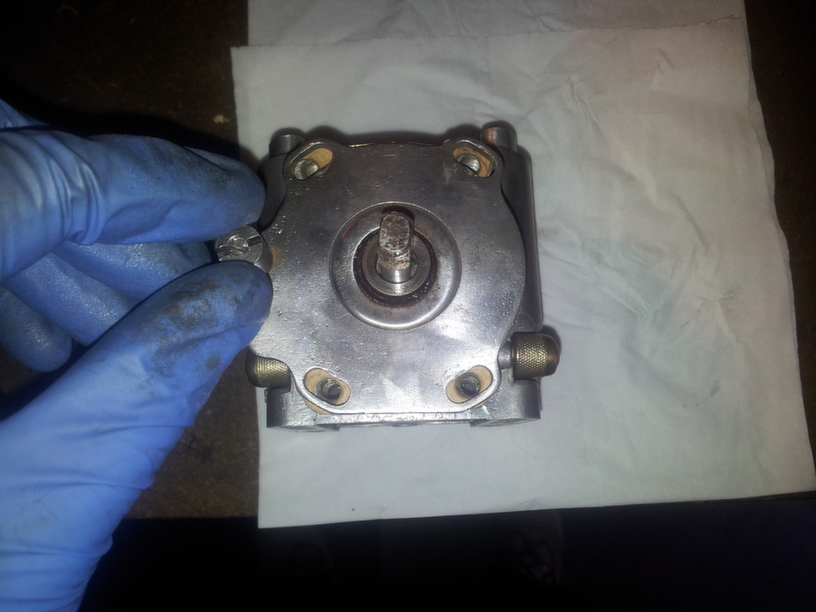
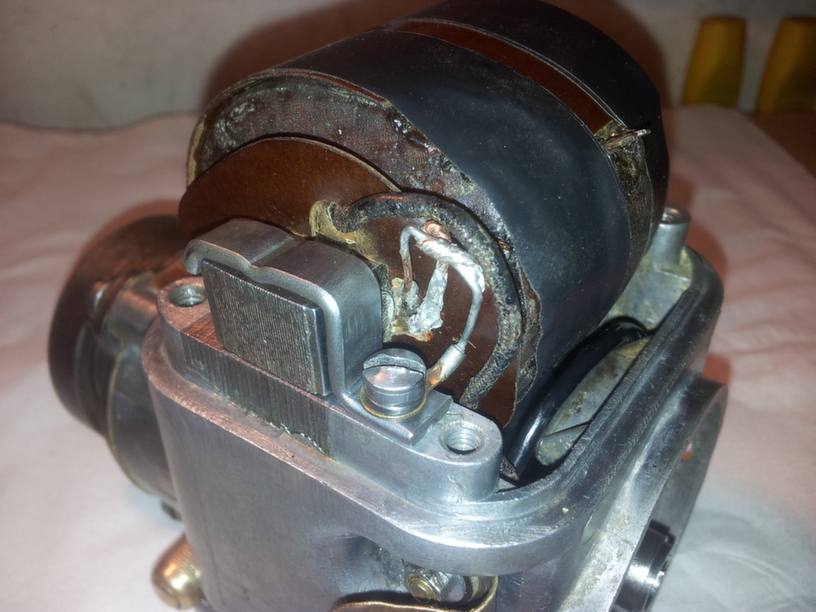
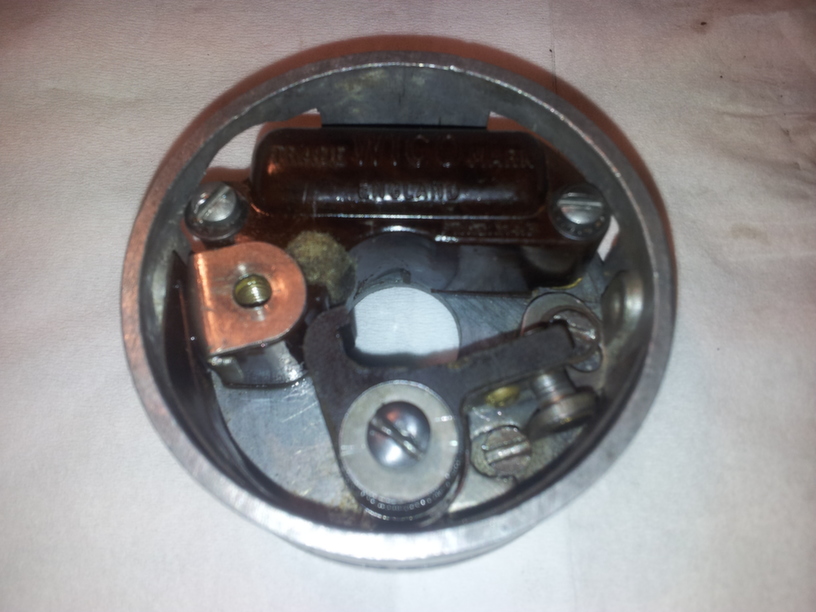
The spare British Junior engine I built was missing a Magneto. I had an old Wico A series mag which came in a box of spares. The mag was a bit rough and seemed to jam a bit when turned. Further investigation revealed some fairly serious damage to the cam area on the centre shaft, the broken piece floating around inside getting caught. Here’s a couple of pictures of the damage and a rather sorry looking coil. Will have to replace both as I’m pretty sure they are toast. The rest of the Mag has cleaned up well and is pretty good condition.Attachments:
November 10, 2013 at 8:28 am #2724 charlieKeymaster
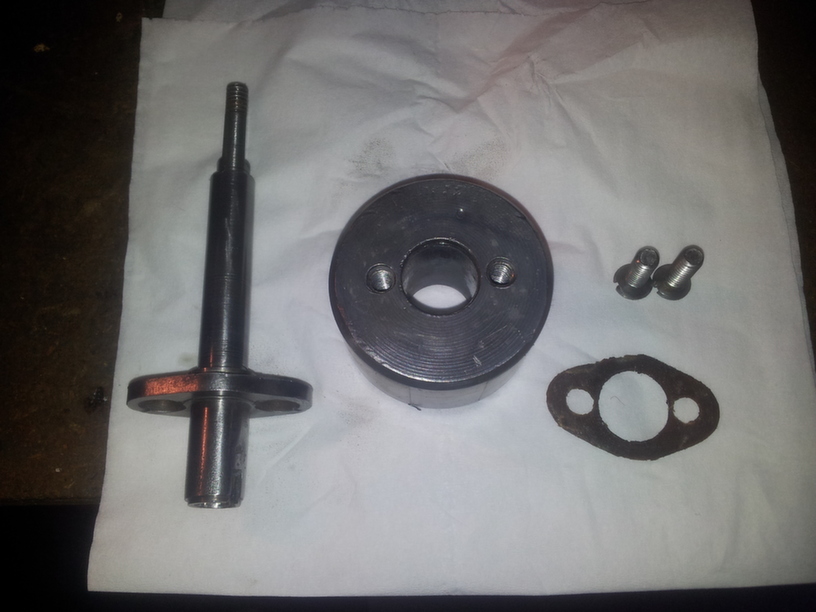
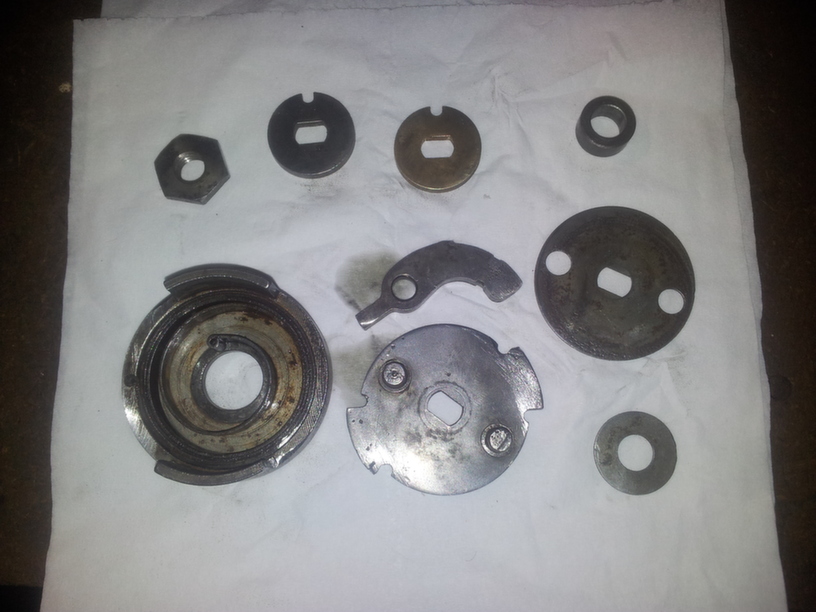
Ouch. I guess with care the cam could be welded and machined. The photo with all the parts laid out is great, certainly shows people what is inside one of these mags.
November 10, 2013 at 10:16 am #2737darmic1ParticipantI guess it could be welded, looking at the break though, it looks like cast? Probably easier to source another. The picture of all the bits has a few parts missing, namely the coil, the clips for the points cover and the central shaft itself. I just hope I can remember where all the bits go! The exploded diagrams of these mags are a bit grainy and not too clear. At least I have a working one to refer to…..
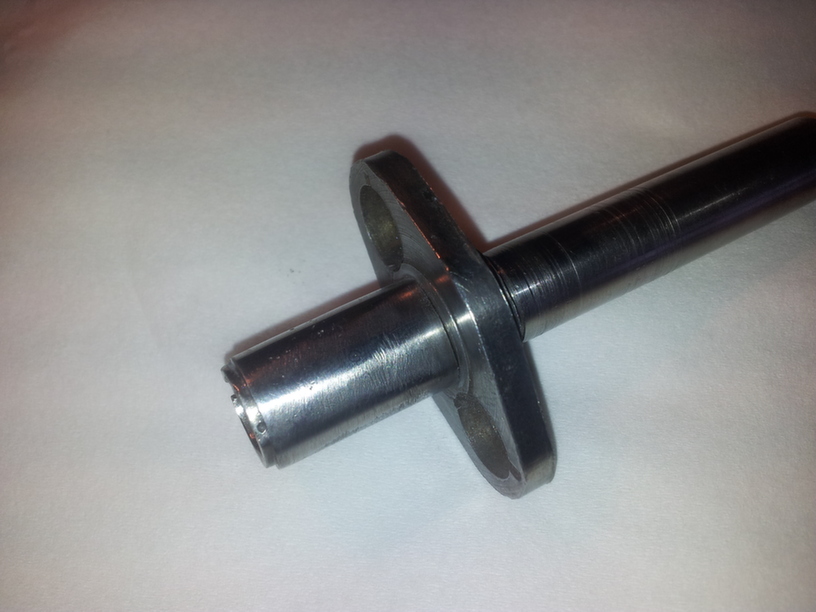
November 10, 2013 at 7:23 pm #2813darmic1ParticipantI decided to try Charlie’s fix for the cam…..
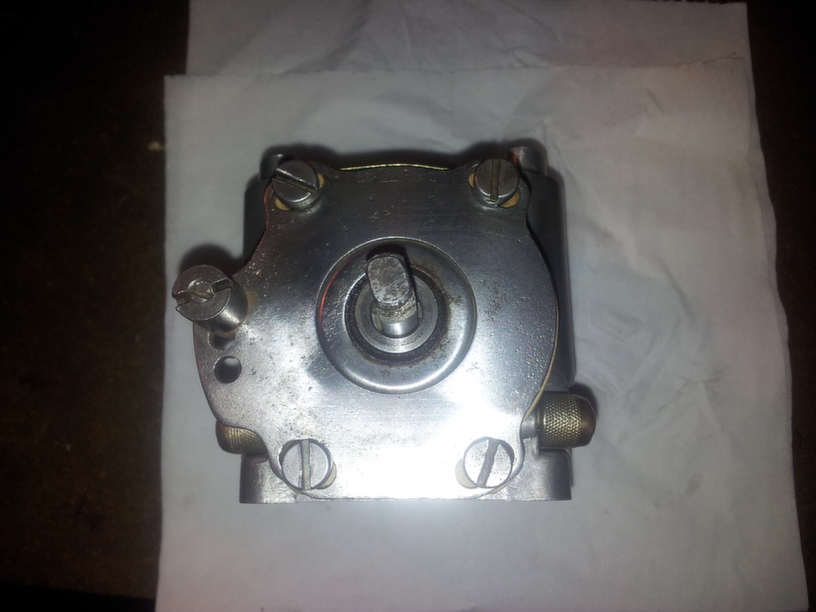
I ‘v’d the broken edges to take the weld, used a strong magnet to hold the 1/4″ broken piece in place, turned the welder down a tad and slowed the wire feed. I then tacked either end of the repair, left it to cool slightly then filled the rest of the repair using small tacks, one after another whilst the weld pool was still glowing. I then removed the majority of the surplus weld on the bench grinder. Finishing off with the small files. Once the cam was repaired I then used finer grades of emery to ‘polish’ the surface. Most of the repair was over the ‘Dwell’ of the cam, so I was able to copy the shape from the undamaged section. The centre just needed a drill running down it a short way to remove a small amount of surplus weld. It looks pretty good but wont know for sure until all is reassembled. Here’s the finished article….
Might have a go at the coil next???Attachments:
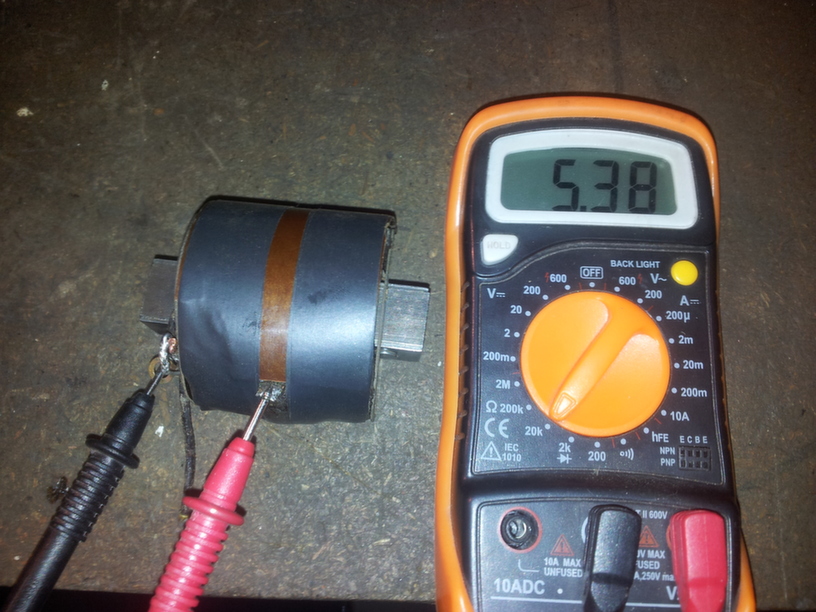
November 10, 2013 at 11:01 pm #2825darmic1ParticipantI’m hoping this evenings efforts are going to save me a few pounds. The coil looked like it had seen better days. It had a wire pulled off, broken outer insulation and generally in a poor condition. So I cleaned it up, removed the remains of the old ‘soldered’ HT lead, re-attached the broken wire and repaired the outer insulation as best I could.
Having done a little reading up, I hope I’ve got this right….. The first picture I am hopefully testing continuity across the primary winding. The test resulted in a beep, which if I am correct, means no broken windings? The second picture I set the meter to 20k ohms and tested the coil at the point where the HT lead would be connected. This resulted in a reading of 5.38. From my research, any result over 5 is good? Somebody please tell me this is right?Attachments:
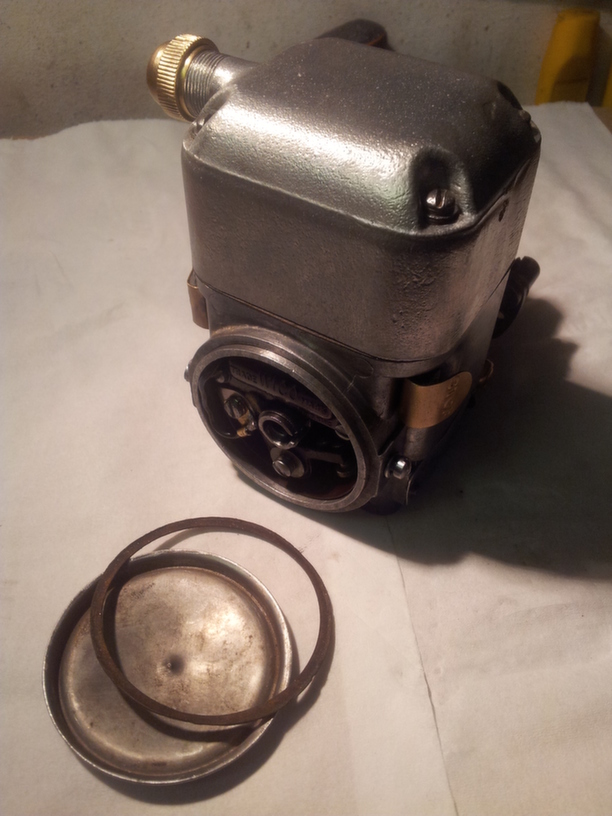
November 11, 2013 at 10:18 pm #2876darmic1ParticipantManaged to re-assemble the Wico today. Like a twit I forgot just how much of a punch these little things pack when your not paying attention. Fingers are still tingling!
Anyway, I photographed the re-build, there’s quite a few photo’s as there is a surprising number of parts to these things…..
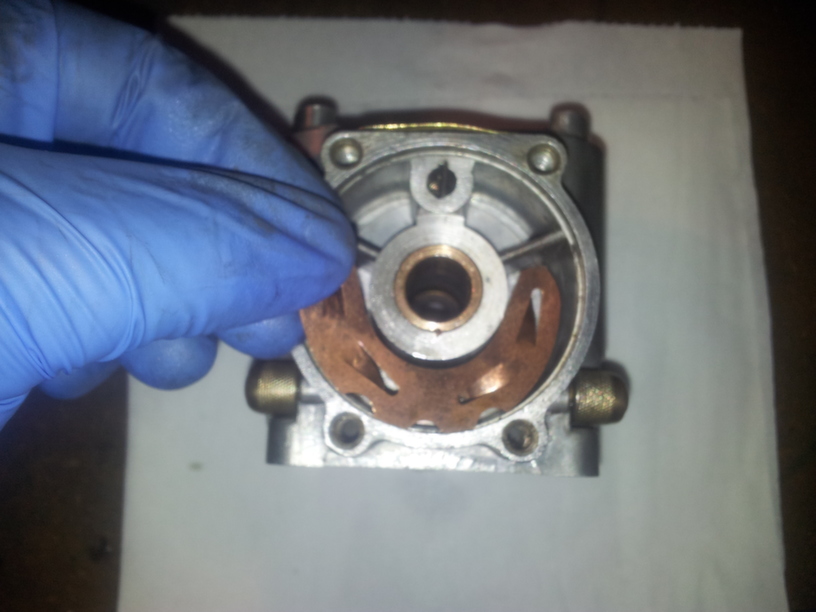
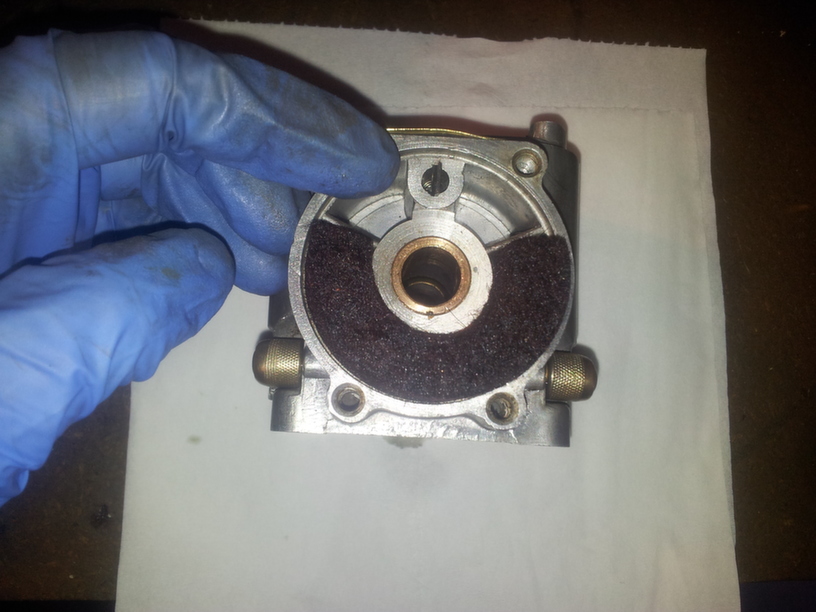
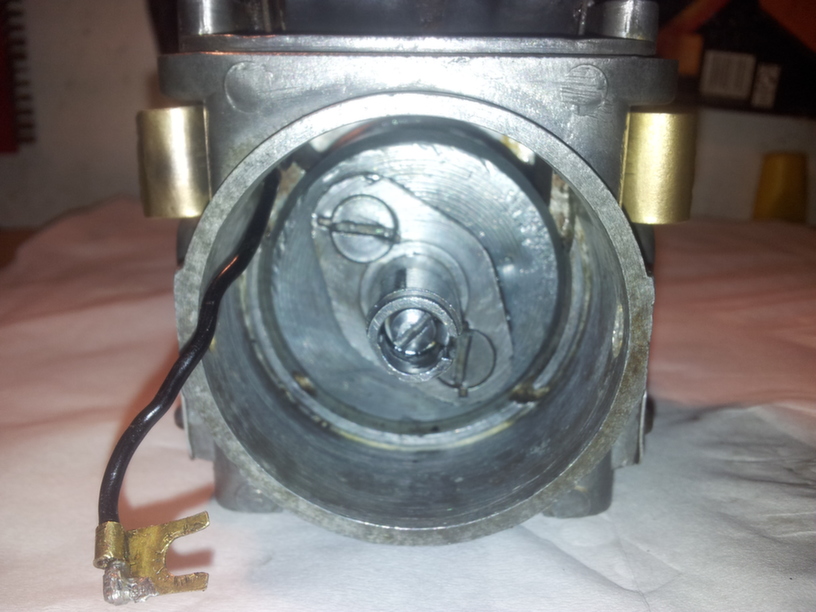
First step is to fit the lubrication system. Oil pad spring, Oil pad and Oiling disc.Attachments:
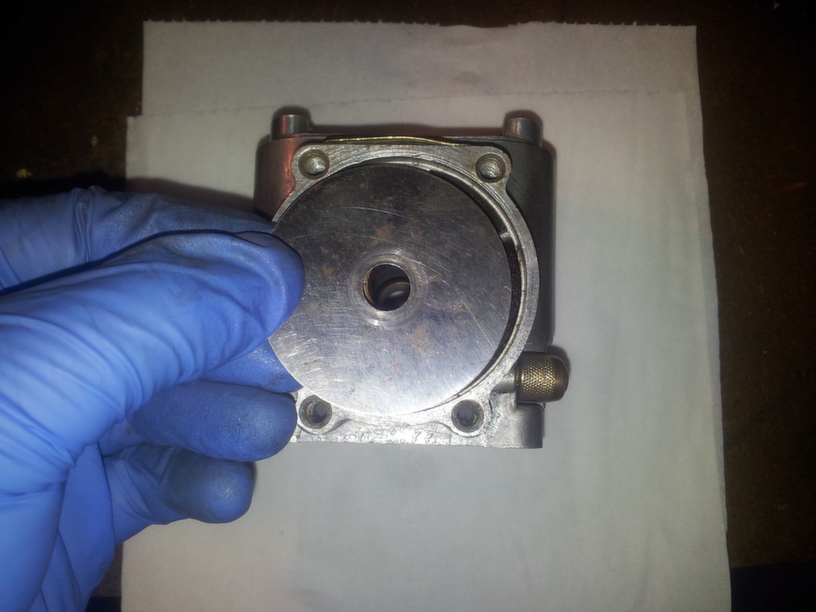
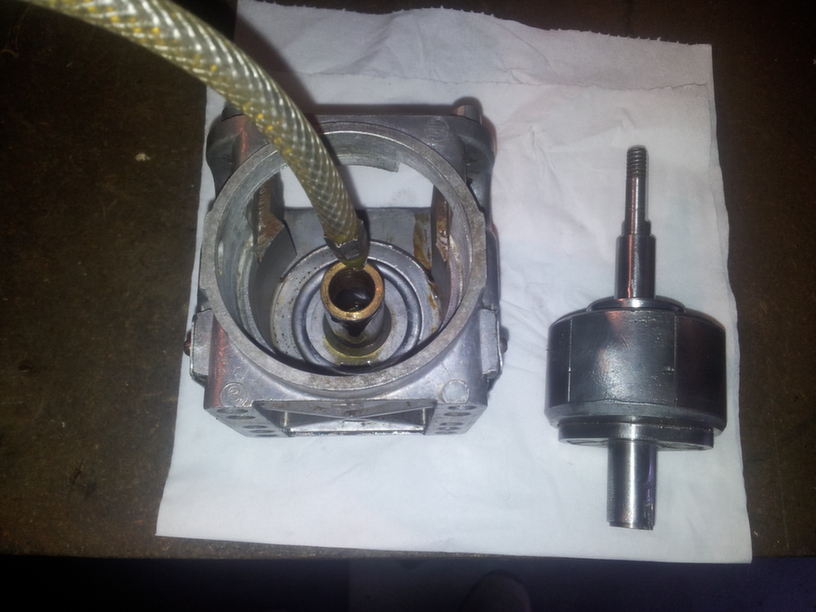
November 11, 2013 at 10:21 pm #2880darmic1ParticipantThen Re-assemble the Rotor assembly and refit into the casing. Don’t forget to lubricate the shaft and housing.
Attachments:
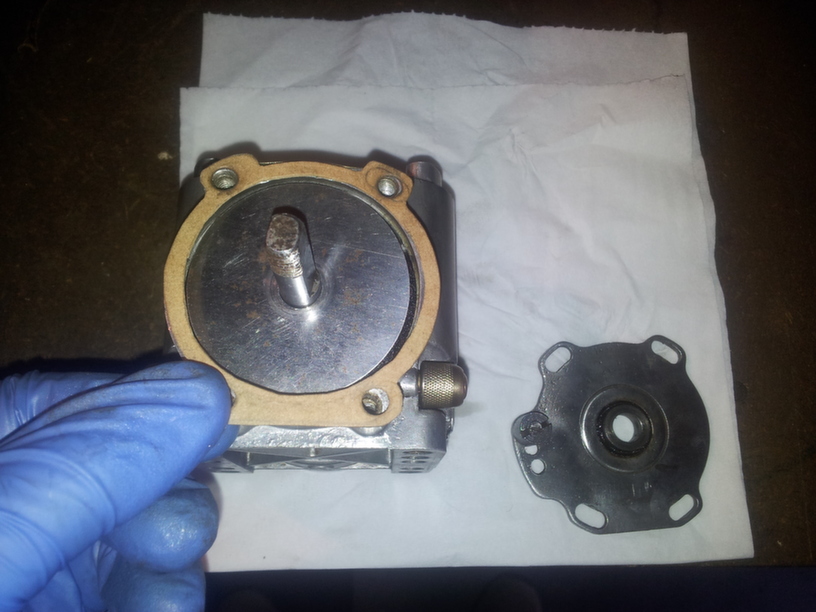
November 11, 2013 at 10:26 pm #2884darmic1ParticipantThen fit the End plate gasket, End plate and the Impulse spacer. Refit the four screws.
Attachments:
November 11, 2013 at 10:29 pm #2889darmic1ParticipantNext, the Impulse assembly. This is quite a tricky part to rebuild, fiddly!
Attachments:
November 11, 2013 at 10:41 pm #2896darmic1ParticipantNext comes the internal wiring, Ground stud group and Stop buttons. pay particular attention to the correct sequence of insulating washers. Each stop button has 5 insulating washers, a flat steel washer and a small nut!
Attachments:
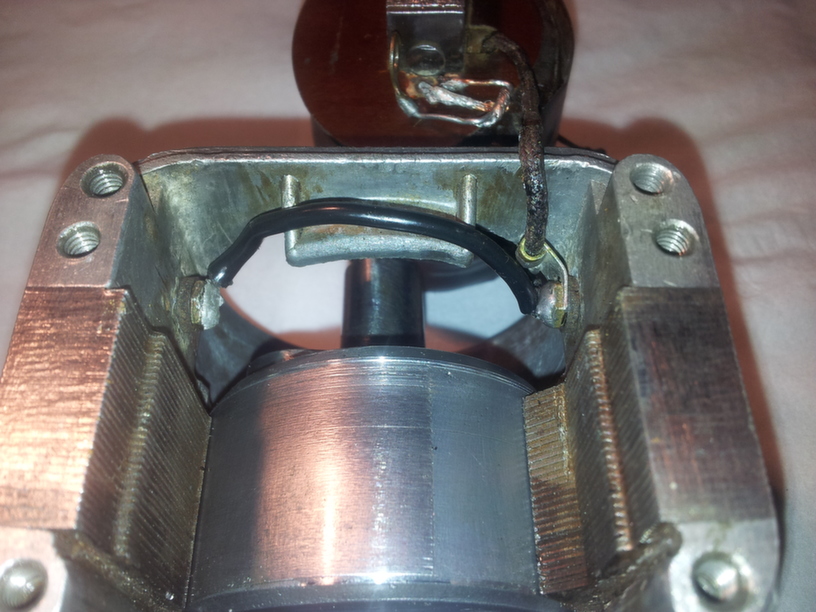
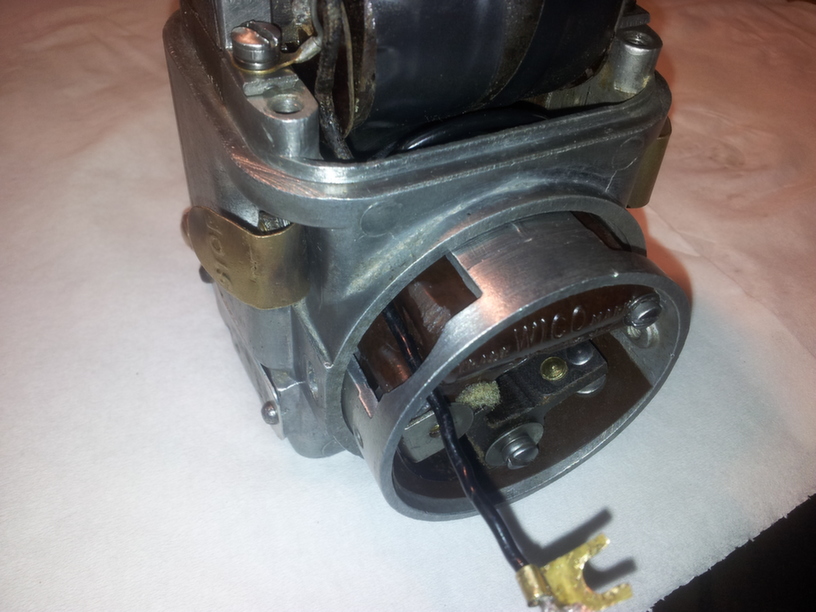
November 11, 2013 at 10:53 pm #2904darmic1ParticipantAt this point the coil can be refitted, the coil has a wire which goes to one of the stop buttons. Make sure this wire doesn’t touch the outer casing or the coil will earth.
Attachments:
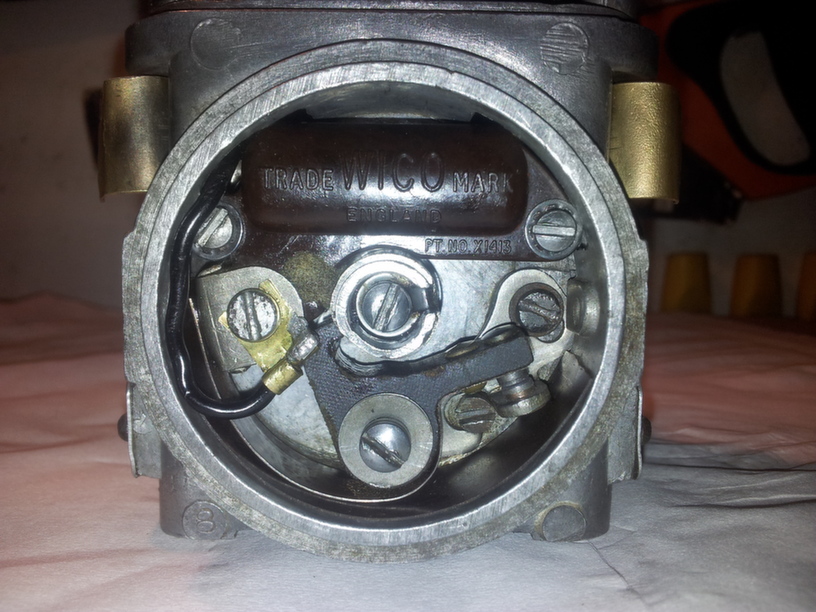
November 11, 2013 at 11:03 pm #2910darmic1ParticipantNow comes the Breaker assembly housing. Its easier to fit the points and condenser into the housing before putting the housing into the magneto body.
Attachments:
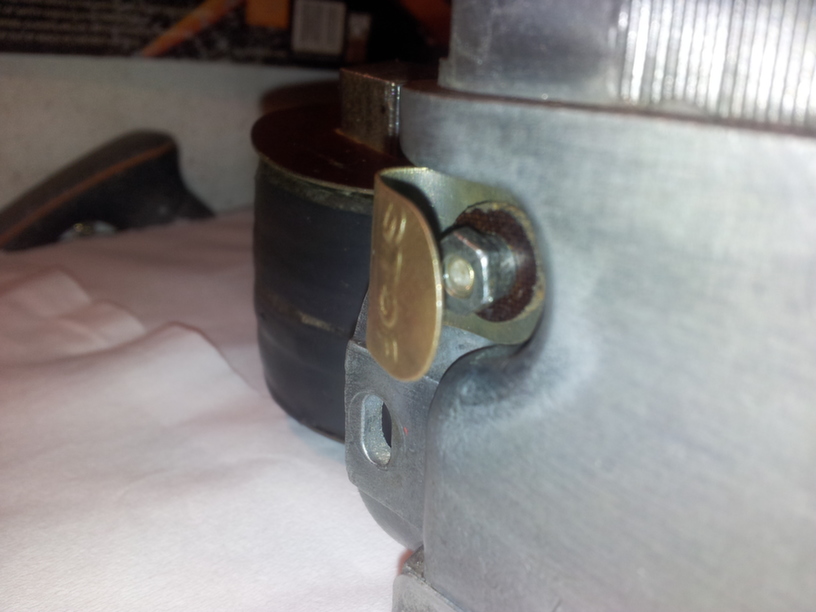
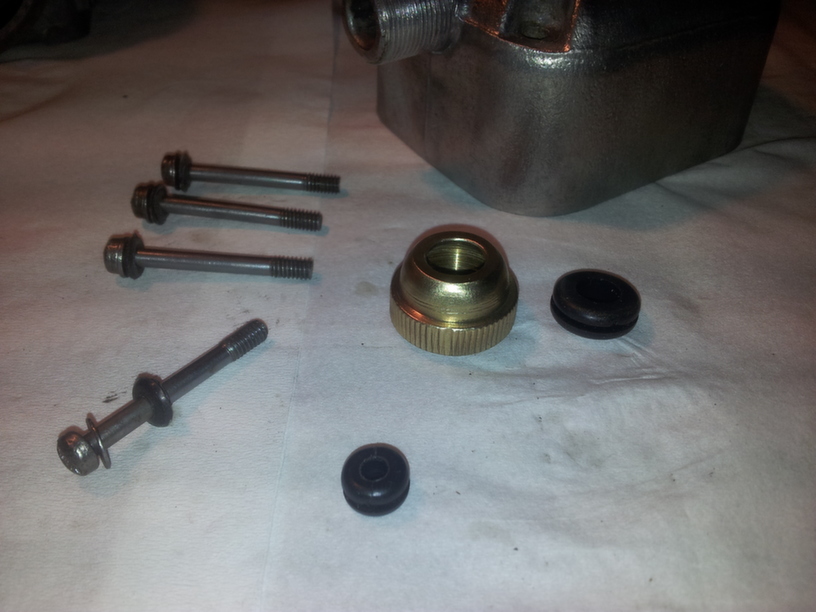
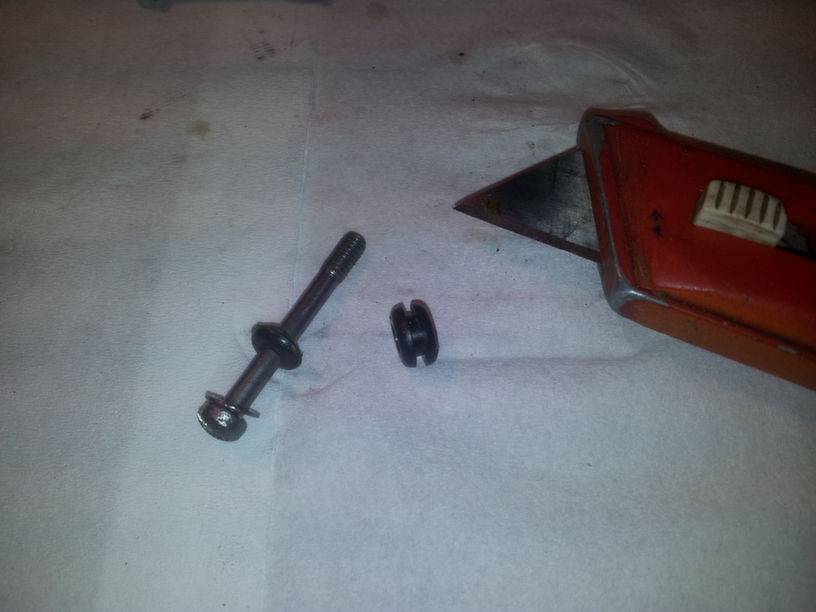
November 11, 2013 at 11:20 pm #2915darmic1ParticipantThe Aluminium cover screws originally had a rubber washer to prevent any water ingress down the screw shaft. These had completely perished. New ones were made by cutting small rubber grommets in half and placing on the screw shaft.
Attachments:
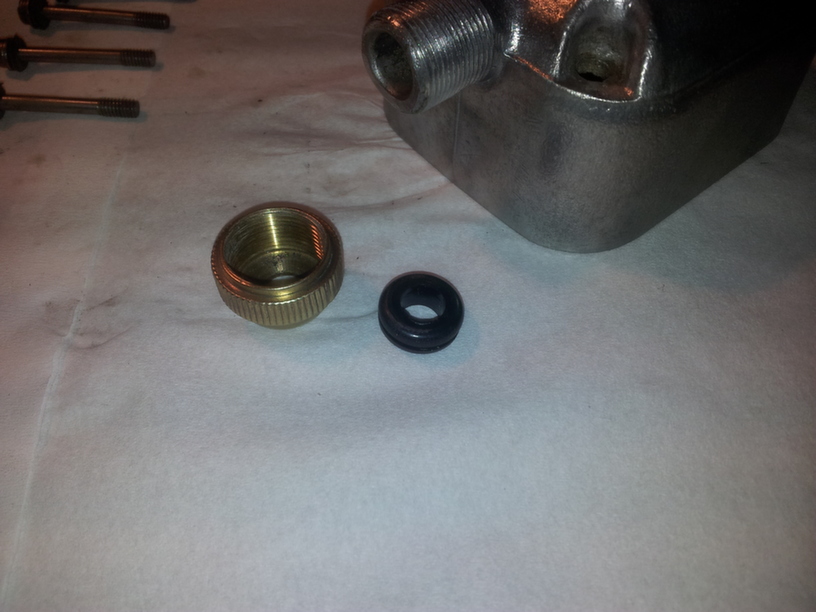
November 11, 2013 at 11:24 pm #2918darmic1ParticipantThe Cap also has a Brass Terminal nut, through which passes the HT lead. This nut also should have a waterproof gland preventing moisture from travelling down the HT lead. This I replaced again using a larger rubber grommet.
Attachments:
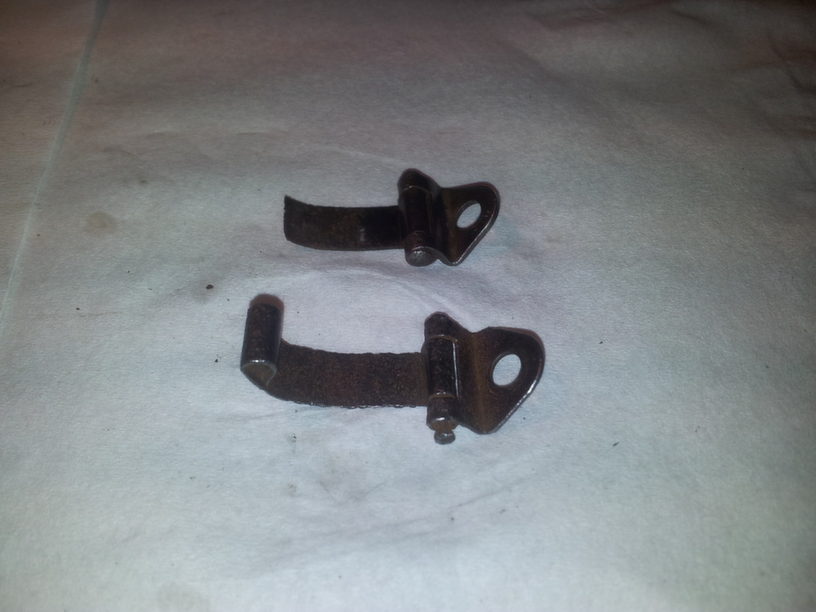
November 11, 2013 at 11:35 pm #2920darmic1ParticipantThe only parts of this Magneto which I will have to purchase will be some new Points cover clips, a new copper core HT lead and a spark plug cap. I will also purchase a pair of new stop buttons as one of these has a crack in the brass.
As I said earlier, Tingly fingers! Note to self, When testing Impulse mechanism, don’t let the exposed output tab of the coil come into contact with palm of hand, Shocking, quite literally!!!Attachments:
-
AuthorPosts

- You must be logged in to reply to this topic.